
Leaderboard


Popular Content
Showing content with the highest reputation on 11/05/2014 in all areas
-
6 pointsI own 12 tractors. If you were to ask my wife, she would tell you she doesn't know how many tractors I have and doesn't care. I recently finished restoring one and all she said was that's nice. We have been maried for 49 years and we have learned to give each other some space from time to time. She will come out to the shop sometimes and sit while I work on something but mostly she just makes sure I am OK and brings me coffee, ice water and lunch. I have to get my own beer.
-
6 pointsWow Vin I could comb my hair in the shine on that hood , only I ain't got any hair
-
5 pointsHeh! I'm real close to Nicks relationship - my wife will say 'thats nice' also and go on about her interests, but yet will give me all the encouragement I could want to keep on doing what I love. At 55 years we have a pretty darn good thing going :) I have 4 running and a roller and if I were to find something tomorrow 100 miles away she'd just say "call your buddy (groundhog) and y'all go get it"
-
4 pointsPenn St., Iowa, Wisconsin, Whichigaahahaack, Ohio St. Sorry guys, no brownies this week. My dog found em..
-
4 pointsI posted earlier with my 314-8 that I will be using. I just picked up a Cab off CL thanks to Doc724 who gave me the heads up on it! So I thought I'd post a few new pictures.
-
3 pointsJust bought this to replace one of my 74' C-160's I stupidly sold last year. Came with a deck, snow blade and tiller for $600. Question: there isn't a hood ornament on this. Did they not put them on in 77', which I beleive this is. BTW: it's staying exactly how you see it except for the seat. It took thirty-something years to get this great and I love it!
-
3 pointsHad just finished first leaf pick up of the season. There will be more!!!!
-
3 pointsheres a little keyring i made by casting metal into a laser cutted wooden mould, i thin it turned out ok, let m know what you think? james
-
3 pointsAfter all this chatter I figured I need to do a little more investigation on the claims made in the post. A little poke here and another one there .... let's go back and check that once again, and all of a sudden you have the same issue but now your wiring harness feels like this guy feels. I decided to finally break out my wire piercing adapters I have had in storage for years [never used]. After having to repair several harnesses that had green powdery buildup, bulges in the insulation and stretched an inch or more under tension, and after hearing statements the pierce probes "do no damage 'cause the wires heal themselves", out came my unused set of adapters. I purchased these adapters many years back for that "just in case" event. These are Pamona / Fluke brand adapters which allow the user to adjust the depth of the piercing point into the wire. The adapter is placed on the wire with the screw adjustment all the way out, and you slowly turn the adjustment until the needle probe just pierces the insulation. This feature alone is worth the higher price tag these adapters command. These adapters also have a much thinner diameter probe, leaving a much smaller indentation than less expensive probes. I figure these would do less damage than almost all other probes on the market. http://www.amazon.com/INSULATION-PIERCING-CLIPS-PACK-OF/dp/B00HB7ETXY/ref=sr_1_15?ie=UTF8&qid=1415180991&sr=8-15&keywords=pomona+piercing+probes Two different types of wire were pierced in effort to prove or disprove the "self healing" statement. All these experiments were performed over two weeks ago while the crickets were chirping. Two + weeks later, I don't see any evidence of self healing on either the marine grade 14 awg wire or the automotive quality 22 awg wire shown in the pics below. Next comes the dunk test in salt water to see if any portion of the pierce has the ability to seal out the environment. Results will be posted shortly.
-
3 pointsGuys came over today and started to install sliding doors and hardware.
-
2 pointsI think I'll start with my story --I've been looking for one of these "little tractors" for about 5 years now, about when I got into "tractorin'." I'm a senior in high school, and am working towards selling off my collection or tractors --but I've still been on the hunt for an RJ or short Suburban. They're simple, and easy to store --and I'm in love with light, low-hp tractors. I've been hoping to find one to restore so that I don't have to completely get out of tractoring during college. I finally came across this tractor, in mid-restoration, about an hour from my home and did some horse-trading to get it. I'm very happy with my purchase. Now, for the questions and then pictures: First, is the pictured rim correct for a '58? Second, is the pictured belt guard correct --if not, I'd be willing to do an even trade for a correct one? Third, does anyone know what this engine would have been on originally? It's a li'l Techy. It has a gear-starter flywheel, and recoil. I prefer the look of the K-91s, so if I can find one reasonably --I'll pounce on it or trade. Fourth, is the exhaust pipe on the Tech. the correct one for the tractor? (Minus the last elbow, of course.) Fifth, the tires on the rear are BFG Power-Grips Garden Tractor tires --original? Sixth, what are the measurements for the tie-rod? Mine is a hack job, with tons of toe-in. Tractor and deck are complete, minus the exhaust guard --Have the original rims, but the tires are shredded. Thanks for looking and any help! --I'm looking to finish/do the restoration again. Hoping to go through the trans, and do a nut-and-bolt. Also have a set of WH hubcaps I'd like to restore for it.
-
2 pointsTHIS IS SO CLEVER...JUST THINK, A WHOLE NEW ART FORM !! -----
-
2 pointshttp://www.youtube.com/watch?v=2xAJVri2a1U
-
2 pointsYou're doing a great job!! Yeah it's never easy but ... just think how much history you're preserving.... Will be watching for your next update
-
2 pointsThe fuel cock and grommet are under the tank on the back of the tractor - the gas tank needs to be empty to change these unless you fell like playing Tom Thumb. Part 24 and 25 here http://www.partstree.com/parts/?lc=toro_consumer&mn=21-10K805%2C+310-8+Garden+Tractor%2C+1988&dn=810547R1-47R10048-00022
-
2 pointsCaptain Planet? C'mon now...
-
2 pointsIf you find those 2 attachments free then I give up.....
-
2 pointsSo, it took me longer than I thought it would to get pictures, but here is the Winterforce 2014/2015! The D-250 will only be brought out if large amounts need to be moved, and not during a storm, I may try to put my 48" blade on the 1277, but I don't know if the frame is much different than the newer style mount and will work, I'll check it out. And I'm going to add wheel weights on the 310-8 and use it without chains to see how the Carlisle All Trail's work by themselves. Can't wait for snow!!
-
2 pointsJust a thought. You probably should not use "starting fluid" into the carb on these low compression engines. Use "carb cleaner" instead. It is less volatile.
-
2 pointsRemember Glenn... he said he'd give you more.
-
2 pointsMy dog ate a whole pan of Brownies many years ago. We were ready to leave for the Watkins Glen Nascar race and it was like where did all the brownies go? My sister had a dog that ate 2 pies my mother had out for Christmas Eve. Steve, I sent you some reinforcements to help with your picks!
-
2 points1" by 3" long. That should do it. But,,,,,,,,,,,,,,,there is always the unknown extra stuff. Lol
-
2 pointsFor the official GRAND OPENING maybe a fire pit outside at night with some dancing girls on the balcony outside the Hayloft Lounge? Always nice to dream.... Seriously though, what a treasure! I know how hard you have worked to make the Iron Horse Barn happen.. I should be able to make it Saturday...
-
2 points
-
2 pointsGlen, that is a swap I would do in a heart beat, no biggie to do it either. You will thank yourself for not getting involved in the Techy. You'll have no engine runnin dizzy headache's too fix, more power, less oil burnin and a better all around engine. While the 500 is a nice tractor to find it ain't a Hemi Super Bird or a Corvette Stingray where originality is a must... Sounds like a win win to me! You can make it look 100% original and that would be very cooll, half the guy's out there won't know the difference anyway. Or... you can answer this call.. JERSEYHAWG Glenn!! Cleanup in aisle 7!!! We have a 6hp Techy that has thrown its rod and we have oil all over the place!!! Sorry Techy guys... it happens..
-
2 pointsInteresting enough, I stumbled across a few informative posts in magazine articles targeted at the professional troubleshooter in today's automotive arena. Some techs have no qualms about piercing a wire’s insulation any time--or any place on a vehicle. Yes, there are piercing tools that inflict minimal damage to the insulation. Yes, you can treat the pierced insulation with something like nail polish, liquid tape or something similar after the fact. However, I’m well acquainted with snowy weather, road salt and the impact of both on electrical wiring. I have fixed my share of wires and connections that road splash and salt destroyed. Often, visual inspection suggested that the wire’s insulation was damaged or compromised somehow. Sometimes it takes a while for symptoms to appear. By the time the owner brings the vehicle in for diagnosis, the copper strands inside the damaged insulation have disintegrated into a greenish powder! Consequently, I don’t pierce a wire’s insulation unless there’s simply no other way to make the voltage measurement. Instead, I backprobe connections wherever possible. I’ve been using the backprobes sold by Automotive Electronics Services (www.aeswave.com) for years. Likely, these are among the most popular ones on the market. Foreign Service By Dan Marinucci | October 2012 Motor Magazine. and from the supplier of automotive wiring and lighting products Water wicking is a term describing how water can travel internally through and along wires due to some of water’s very strong properties. When water seeps into very small cracks and seams in connectors and wires, it uses adhesion cohesion and surface tension to stick to things. Through high adhesion, water’s “sticking†property, water will hold to surfaces, just as rain sticks to the surface of clothing (rather than completely running off). It is in this manner that water sticks to the copper in harness wiring well, and gets into the small places between the wires and the insulation. Water’s high cohesion properties cause it to bead up and, and through surface tension, it will stick to itself, as shown on a newly waxed car. Water that gets pulled into the small spaces in wiring, between the wire and insulation, drags along more water because it sticks to itself well. The problem escalates when these properties propel the water up the wire far more than the level the connector may have been immersed to begin with. Water can travel great distances by wicking, sometimes causing corrosion along the entire length of the wire. This is the most damaging form of corrosion because it can be slow and difficult to detect until a failure has occurred deep in a wire. It can damage the whole wire length, and when the harness eventually fails, the entire length must be replaced. Sometimes corrosion can appear in the middle of the harness due to a break in the insulation from road damage, or through the use of a piercing probe. Look for signs of corrosion or breaks inside the wire. Using a piercing probe is discouraged, as it leaves a hole in the wire that can lead to corrosion itself. If there is evidence that a piercing probe was used in the past, all holes in the insulation must be sealed. Road debris can also break the insulation and allow moisture to wick into the wire. Swelling in the wire insulation can indicate the presence of corrosion at a break in the insulation. The corrosion will often extend beyond the swelling, requiring a larger segment of the wire to be replaced. Dark internal wire indicates signs of corrosion or moisture, and should be cut further back until clean bright wire is exposed. To begin splicing in a new length of wire, be sure to cut the new section of wire to be slightly longer than needed to assure there will be adequate slack. 1. It is important to avoid any damage-prone methods, such as insulation-displacement clamp connectors. They tend to create more problems than they solve in harsh environments. Use of these connectors also causes the insulation to be displaced or moved out of the way by a blade that cuts through the insulation to make the electrical connection to the copper inside. This is a weak mechanical connection, both mechanically and electrically. The exposed wire and weak connection also provides an easy target to corrosives, arcing, and mechanical vibration. Sealing the connector with tape is also not practical, because water can wick into holes in the tape. A fully sealed permanent repair is recommended to prevent the connection from failing in the future. ©2007 All rights reserved. Truck-Lite Co., Inc. and the last submission I will make revolves around the following YouTube video. Yes, it is 40 minutes long and troubleshoots a harness problem in a Chevy Impala, but the level of professionalism displayed by this individual is what I would expect from any shop. Give me 2 more individuals like him and I could run every other repair facility out of town. This gentleman goes thru great lengths NOT TO PIERCE THE HARNESS just for convenience sake. Notice, no sensors are randomly swapped out. Notice, customer (possibly you ) will not be charged for wrong guesses on the part of the troubleshooter. If anyone cares about how I think a true professional acts ..... here it is.
-
2 pointsIn fact both pinned topics in this section (and several recent ones by other members in wheel horse tractors) have covered this topic ad nauseam
-
2 pointsWorking with fiberglass is over rated... if you can machine a stainless tractor you can mix epoxy and watch it cure... Hell I used a trash bag as a release agent. There is not one hint of filler on this hood, just a coat of primer surfacer, base coat red and unwet sanded or buffed clear.
-
2 pointsMY STEERING WHEEL IS GARBAGE The original wheel is made by a company called SHELLER after some searching on the net I found one I could use as a replacement also made by sheller with a slight difference the new one is for a 3/4" tapered spline shaft and the original is for a 3/4" tapered key shaft found this NOS military surplus wheel on E-Bay vintage WW2 looks to be a exact match to the original First thing I did was use a tapered 3/4" pipe tap reamer to remove the splines then I made a small fixture and tapered broach guide for a 3/16" broach to cut a new key way the small alum fixture is to hold the wheel at the correct angle so the broach is straight up and down after cutting Brian
-
2 pointsHere's mine, a couple more wreck resurrections from the darkest depths of Europe-
-
2 pointsThis is what I will be using plus the fancy weights I made.
-
1 pointThis may be easier than I thought. I had time to play with the K Series on this tractor! The PM said it wouldn't start. He didn't say how, why or what the failure mode was. It just wouldn't start. Well it sat for a year in the elements and I don't think he garaged it all the time he owned it so after cleaning a mouse nest out of the top of the flywheel, I had to take every connector apart and clean them. The key switch was the worse. (Also found that the tiny wires to the Low Oil Light were corroded off making that light non-repairable). The solenoid was also rusted so no power was going through it. The ground off the battery was also not making good contact. An hour into it, I had juice to the starter and the voltage gauge. Pulled what was left of a badly fouled spark plug and replaced with a new one and tested for spark which I had. Motor oil actually looked good and was at the full mark! Popped the plug in and gave it a shot of ether and it fired. Next was to see what the fuel lines were like. I barely touched an in-line fuel filter at the fuel pump inlet and the fuel filter fell apart along with real dark gasoline in the lines. I siphoned the fuel that was left in the tank and it was totally black. Not gummy or foul smelling. Just black. So I know I need to flush the tank and replace the fuel line but I needed to know if the engine would run! I put a small 4 inch piece of fuel line on the fuel pump inlet and filled it with gas and leaving it higher than the inlet and then gave it another shot of ether and it fired right up and ran nice as could be. No knocks or weird sounds other than the drive belt banging around under the belt guard. (Probably a rusted idler). A little smoke when I cranked up the RPM's all the way but it was only during the transition. Not bad for as long as it sat! I'm happy. I already know I'll have a Bi*#@ of a time tearing everything apart. I had to use my easy-outs on three of the four bolts holding the tunnel cover on to get to the key switch and clutch switch. All in all, not too bad for fifty bucks!
-
1 pointI like to proceed as follows. It is not a waste of time either. 1. REmove the fuel cock & grommet. Replace with new. 2. Replace the entire length of hose from the tank to the fuel pump and do not use a filter. (there is a screen in the fuel cock) 3. Observe the fuel from out of the pump while engine is cranking. If good, proceed with carb cleaning. If low replace pump. 4. Clean carb and determine if cleanign is enough, or if a rebuild kit is needed. After this, it should be like new, and also you have spent little money. Every used tractor has needed most of this, so I have now made it a rule on each one.
-
1 pointThis link might be helpful. A lot depends on how you are going to paint. Spray cans or spray gun. Indoors or outside. How much you are will to spend, and how much experience to you have painting. If you don't get the answers you need from the link above, feel free to search "paint". You will find a lot of opinions on product, color, and technique. Above all else, there is no one who will criticize your choice of color. If it's red it's good. And...please use good breathing protection, even if using off-the-shelf spray cans. Paint can do a lot of damage to your lungs and nervous system. The effects of which may not be realized until much later in life. Good luck!
-
1 pointIf everyone did that we wouldn't have anything to do.
-
1 pointI picked this week (and took off from work) to get this thing done. As you can all relate to, I was quite disappointed when it pulled the P0303 after working all day to get it going. This morning, the parts store opened at 7:30, I was there at 7:45 and picked up 6 new plugs. Got home, pulled off the coil pack, and pulled out #3 and my heart sank.... It was the poster child for perfect plug With nothing to lose, I pulled out the rest. When I got to #4, low and behold.... a completely closed gap. Why in the world would cylinder 4 pull a P0303? In any event, just got back from a little drive and it ran nice. Parked it in the driveway and saw an oil stain on the driveway. Not sure if it was there before or not, so I moved the Jeep a little. I am worried about the pan gasket, that thing is a BEAR to get on. If it's leaking I'm paying someone to fix it! So mission accomplished. I have to wait for the monitors to set then off to inspection!
-
1 pointAs promised here are those pics... It needs a good wash down but not until the grass stops growing.
-
1 pointOk so it is mine now I love free stuff
-
1 pointMy 212-h with snow blower and cab. First wheel horse and gonna be my first season snow blowing. I can't wait!!!
-
1 pointI like them blond, 5ft, 6in, 125 lbs with lots of tattoos and body piercings.
-
1 pointi can see you are going to have some hours in this one. its going to take a bunch of them just to get things like you show above to operate how they should, then you have to make it look pretty as well... I'm sure you can do it though, I'm always amazed at your fabrication knowledge and skill...... thanks for all the detail.... i notice after your name you have..... are you sitting back right now with a cold one thinking about something?
-
1 pointJust remember, most questions like this are answered in the Kohler K-series service manual which is free for downloading from our manuals section. Figure 1-6 on page 1.7, and 12-44 on page 12.17 show the torque values and sequence. Section 12.16 also describes the procedure for proper torquing, running for 15 minutes, allowing to cool, and retorquing.
-
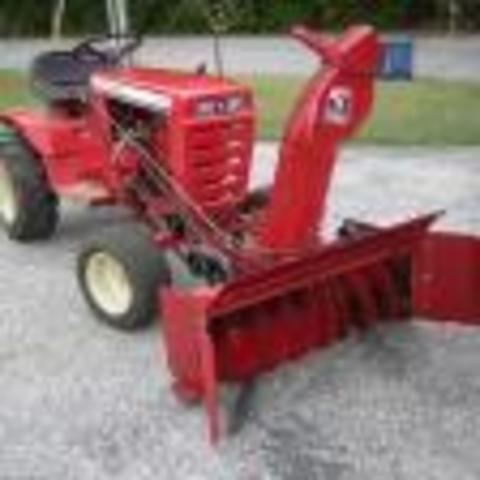
1 point520H with 44" two stage blower Brian
-
1 pointIt will be me on the 310-8 again this year -- Been clearing the driveway with this set up since 1991 (?)
-
1 pointI think I would need a few more 'horses' than I have to push this :grin: 24 feet wide!
-
1 pointIf gas is running out of the carb, the float or the float's needle valve is not working correctly. Shake the float and listen for fuel shaking inside of it. Inspect the valve for damage.
-
1 pointHere's my solution to people that "can't see" a big red tractor in the road when I'm plowing out the end of my driveway. 3 LED's in a 3/4 inch fixture Bright even in daytime. Plus I cleaned up the headlamp housing and bezel. Installed new bulbs. If they don't see me coming now they must be blind.
-
1 pointMy 74 C160 Not the greatest pic but my 96 314-8 when I first got it-low hours, been setting for several years under a tarp. Turned out to be a really good tractor.
-
1 pointAwesome snow removal machine Chris. http://s400.photobucket.com/user/Coadster32/media/pics053.mp4.html
-
1 pointThat's not a bad looking Horse but I had no idea that Dr. Frankenstein was a welder.


.JPG.9f2ecb26065c66527b0730084ab7fc7a.thumb.jpg.7dc8a04d9a53d44ee2b23f26ee94496f.jpg)


This leaderboard is set to New York/GMT-04:00