
Leaderboard


Popular Content
Showing content with the highest reputation on 02/24/2014 in all areas
-
6 pointsNelson muffler repair: This is my first attempt at a help tutorial. I am not a pro at restoration what-so ever, but a Wheel Horse lover trying to save an original part on my tractor. I have learned so much from others with a passion for Wheel Horse,(or the other "Color" tractor's) I have high esteem for you all.... This topic covers a 1980 C-125 K-301 original style Nelson Muffler. The start of the damage was from the bottom bolt loosening and falling off. This allowed the muffler to vibrate freely, only held in place by the U-clamp on the engine exhaust pipe nipple(Not sure on the correct terminology for this connection point). After an unknown amount of vibrating, the center pipe of the muffler snapped off, shown in picture "a". The "In" side of the muffler pulled right out. Unfortunately I failed to take a pic of the original damage. Picture "b" shows the repaired center "baffle" pipe. Picture "c" shows a-look see down the inside of the muffler- gives you an idea how the muffler works. I made the repair with a piece of EMT, electrical conduit. I measured the distance from the bottom chamber of the muffler to the top where the pipe snapped off.I didn't have the exact diameter of pipe so I used the original piece of baffle on the bottom where it fit snugly into the bottom chamber of the muffler. I had to grind down the end of the baffle pipe slightly to fit into the bottom chamber of the muffler, and yes you have to drill all of the holes!!! Pic d., shows an end look at the baffle tube, with a solid center plate. . Picture e. shows the baffle pipe inserted ito the muffler body. Put the muffler on for a mock-up mount and mark the proper position befor final welding. The diagram in picture "f" shows how the hot gases flow through the muffler. I put three good coats of paint on final finished muffler with, Picture "g" VHT high temp paint. This repair has been snow pushing tested. Over one hour of eight inch snow moving in NorthEast Ohio.
-
4 pointsLooks like a fun job to have ...
-
4 pointsSpring is on the way ,along with rain... be aware https://www.facebook.com/photo.php?v=1468264653387825
-
2 pointsYou need proof too?
-
2 pointsThe oil capacity is 1.5 Pints in a Kohler K 91 motor.
-
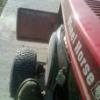
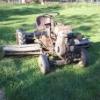
1 pointGood evening everyone, First post here, is going to be a big one but i need some help. I've been eyeing Wheelhorse rigs for quite sometime for snow removal. As a kid i can remember every surrounding neighbor blasting there driveways out with Wheelhorses & Blower attachments. It seemed as if the snow would throw for miles.. My current snow apparatus consist of a new Airens Pro 32 with a 21hp briggs, a old powerstroke that plows when it wants to & a decent toro that crapped out right before a storm. I had to buy the airens in a pinch when my toro went down and the "Polar Vortex" was headed my way... haha. It wasn't something i really wanted to do as i really was in the market for a Horse & blower but naturally nothing was available while in a pinch. So my question to you guys/gals is, 1. If i wanted to run a two stage horse or a berco, what machine is going to throw that snow the furthest. 2. Does engine size even matter if you can run smaller/larger pully sizes? 3. I see 520's, 416-8 & a one 518 up for sale. I understand the two 5 series i mentioned have bigger engines & there is also alot of other variables to consider rather than just the motor. Which of these is going to perform the best for me running a 2 stage blower. That's all it will be used for. 4. To who ever would, don't take this the wrong way..What is reasonable in terms of pricing? I've seen some of these units going for what i consider, astronomical prices like 3k+.. I understand alot of times ppl in general think there stuff worth it's weight in gold for some reason, but what is it with these 15-20yr old tractors? My neighbors weren't rich when i was a kid so i can't imagine they were spending huge coin every few years when they would turn out there old Wheelhorse's out for new ones. What would they spend on a bigger unit, $4000maybe $5500 hundred if they were getting getting the wool pulled over there eyes..? I know the commercial use Wright Stander i have was something like 8k new in 08, I've used it, added all the attatchments i need, replaced the motor for $1200. If i was to sell the 6yr old machine with a brand new motor id probably ask $3-3500 & it wasn't even used commercially. I don't see how the value of a lawn tractor thats been run for almost 20yrs & only cost $4000-5500 new can be worth $3000 also. I also remember as a kid, when my old man was fed up with fixing his lawn tractor it would go to the scrapyard because it was done, clapped out, used up & worth nothing. So i must ask, Is this just a niche where some ppl will pay big $$ for really old equipment thus the reason i see them selling for $3000? Hopefully someone can fill me in on reasonable prices & why they are really worth. Some of the hardcore horsemen might take all that the wrong way, it wasn't meant to, I'm just kinda boggled as to how some of these units are priced. 5. Here are some pics of the 520 I'm considering. Do any of you see anything obvious i should be aware of & anything missing that would prevent me from from mounting a blower..? & no it's not selling for 3k but i still don't understand how it's selling for what it is..lol. Thanks for taking the time to read the questions i laid out. Maybe you can help shed some light on them? Good day yall.
-
1 pointI need a throttle clip part #1277 according to the manual. I believe this is now crossing to Toro part #324-325. Not one site shows a picture of this silly little piece that is likely to cost me more then id like to pay but it is what it is. Can anyone confirm that the 324-325 is the part I need before I pull the trigger? it is the clip that holds the throttle cable to the throttle bracket on a Kohler K181S in a 856.
-
1 pointFor those of us interested in Military Historical Art and weaponry... http://www.buzzfeed.com/bennyjohnson/inside-the-armys-spectacular-hidden-treasure-room
-
1 pointWell Made some progress on resurrecting the damaged wheel. I brainstormed for a bit an came up with a plan my Dad and I could put into play. First I took the wheel and cut the busted stuff off it with a die grinder. The next step was to get it all steel shot blasted to bare metal. As soon as I get time I will throw it in the milling machine and mill it level. My Dad had a piece of schedule 80 1 1/4" black pipe. We put it in the lathe and bored it to fit a new heavy duty flanged wheel bearing and pressed it into place so the is no play. We turned it down a bit as well so that a factory grease cap will fit with no issues. This is as it sits now. Once we mill the wheel surface level we are going to fit the new "axle" assembly to it and weld it up. As you can see from the thickness its way above and beyond anything the factory ever thought of putting in. This is the damage before After shot blasting and removing the scrap with a die grinder
-
1 pointIf it's just for looking around, the iPad is fine, but being interactive I find it cumbersome to use. For me it's not going to replace my Macbook!
-
1 pointYou the man!!! Needed the update to keep me going. Might have to drop one by, don't think you would notice until I picked it up restored.
-
1 pointsince I got abused for going five days without an update, I'm getting another one in right now to avoid anymore complaining this week....... got a lift lever from Kelly saturday so that got blasted and painted this morning before work. I'm waiting on the rest of it to come back from plating and then it will get assembled and installed...... also pulled the oil pan and was greeted by lots of crap. when i flushed this engine earlier ( when i first got it working) with diesel, i tried to get as much crap out of it as possible but there was still a bunch left in there. thankfully the pickup screen has kept it all in the pan. hopefully any small stuff got caught up in the oil filter, if any. i could see where this could be starving the engine for oil. it had good oil pressure, so i think it will be ok. I'm not going to go any further into this engine as its such a good runner. i pulled the oil pick up and checked out the oil pump internals and absolutely no junk in there so i think I'm good. the engine will get buttoned up and detailed before putting the tins on. heres some pics..... upper engine looks very clean though, and even with it spending some time out in the weather, there is really no corrosion to speak of inside other than one counterweight is a little brown........... started to work on some of the external parts. one of the manifolds i had was really dirty inside and had some corrosion, so i thought i would see how it cleaned up for this one. the outside got a mild bead blasting the other day when i started to clean up the engine, but the inside was still bad. not sure if it leaked either, so i thought this would be a good candidate for drilling and separating. it will get cleaned up inside and re siliconed. little more work done on the block too. scotch brite and sore fingers........ i think the block is going to look nice when done. the corrosion on it was really bad when i first got this one and i thought it would be a hard one to get looking good. i think it will be ok. i had to bead blast it at real low pressure to remove the corrosion and crap. from there its had a lot of rubbing with fine scotch brite.......
-
1 pointWell...little late for me as I just finalized my divorce, long time coming though!!!!!!!!!!! I want a copy cause that was my first visit to Scotts and my first wheel horse show. Thank you
-
1 pointL>...877/531/1767 or www.lagtmag.com
-
1 pointsupport your local toro dealer!!!
-
1 pointWhere can I get a copy of that?
-
1 pointCool video Guys- My Great--,--,---.Great Grandfather carried this Shotgun from Pennsylvania/ Maryland to Ohio, then Indiana where they settled after the Civil War. I'm doing some Genealogy searches to find out more-it's very interesting-Thanks-Al Sorry I dont have better pictures-
-
1 pointThat's just amazing!!! I drooled when I saw all those pre1900 firearms!
-
1 pointHad my NOS Raider 14 out today for a cleaning so I thought I should get a few pictures,Rick
-
1 pointThink you found your problem !
-
1 pointI always learn a thing or two from each of these implement postings! I did not know that the 50 inch sickle bar mowers had two different sized frame plate mounts! Here are a couple photos of the 50 inch sickle bar mower frame (7-1312) that I noted above. Just like Evanloock indicates above their are two different sized 50 inch sickle bar main frame setups. The SMS -50 is wider and the 7-1312 is more narrow for different applications. The large main frame rests outside the frame of the tractor and two nuts and bolts on each side hold it in place. The second photo shows the rear bar that rides between two bolts in front of the transmission where the angled pieces come off the frame of the tractor in front.
-
1 pointMe and my apprentice has had a concerted effort over the last couple of days ! I'm hoping for it to be all done for May ! Watch this space . More pictures to follow Oh mark goo a need your decal services I'll take measurements tomorrow before I strip them off can u customise them for me as well.?
-
1 pointAs Steve said there will be little if any come out and if you have that side jacked up with the wheel off that would take oil away from that side of the tranny. Not a hard job, I use wax paper between the seal and the axle too help slide the seal on and protect it. Bob
-
1 pointAccording to your signature, you're the specialist, But if it was me I'd look at the wear pattern on the rag joint, you will find that the shaft couplers are at 90* to each other and that they bolt up to the longer side of the rag joint lugs to allow for maximum movement. Loosen the set screws on the shaft flanges until the pump and engine are lined up and tightened down, then center the coupler so that their is minimum flex in the coupler and then tighten down the set screws. Make sure that the keys are fully engaged with the couplers.
-
1 pointThe flat oil pan on your K301 should bolt straight onto the frame ok without having to drill holes . 2 bolts pass up from under the frame into the oil pan. The Oil Drain pipe should point to the flywheel side .
-
1 pointNice repair and documentation of the process... any picts of the finished product back in place on the tractor?
-
1 pointThanks guys, I am bidding on some on ebay right now maybe I'll get them. Charlie if this doesn't work out I'll widen my search to include cud cadet. Hammerhead that looks tough. My 5 yo would love to carry one like that to the antique tractor pulls.
-
1 pointMmm interesting. Only other Tires I've seen on a Ski Jump were attached to a 1965 Mini Cooper at the hands of the GB Top Gear Team. http://www.topgear.com/au/videos/mini-ski-jump
-
1 pointYes that is a safety switch for the PTO, can be eliminated, if you want basic wiring with out the safety switches wire it like a 1970 Raider 12 that should get you what you want, junking a good machine because of a wiring melt down ???
-
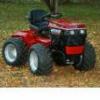
1 pointUnless you get 8" of snow on a reg basis a single stage blower will work fine, even a short shoot, the tall shoot only directs it better, a cab with a blower is a major plus, here is one of my 520's after a few hours of use. This unit has just tripped 400 hours and is very clean, weights all around, rebuilt single stage tall shoot, XL 520 cab, as it sets I would not take less than $2000 just to give you a idea.
-
1 pointI use SS hotel pans from the restaurant supply store for a low cost solvent type parts washer, 6" deep fullsize, 2'' deep perforated 1/2 pan and a full size lid. the 1/2 pan fits cross ways on the full size to drain your clean parts in or can be turned 90* and set in the large pan for storage or to soak parts in, the lid is used to cover up and contain the vapors when parts are soaking. I keep several 1 gal cans of solvent/mineral spirits on hand and rotate them in the " parts washer" 1 for dirty stuff, 1 for clean stuff and 1 spare for when the clean rotates into dirty solvent. If you let the solvent set un the pan "covered" overnight most of the dirt will settle out then you can pour off the solvent into your save container and put the heavy dirt in your junk solvent can for proper disposal, wipe out your pans and fill with clean solvent for a final cleaning, A full size baking sheet pan works good on the bench to contain the mess and parts when disassembling engines or transmissions, or to slide under a tractor before fluid changes to catch spills. Clear condiment squeeze bottles are great for applying a small amount of lube or solvent precisely. Make sure to label them for their contents.
-
1 pointMy $79 Hisense Sero 7 inch tablet became unreliable - wouldn't take a charge half the time, low battery lift and not a very responsive touch screen. Sooooo - I bit the bullet last Friday and bought an iPad Mini with retina display and MERCY - THIS THING IS GREAT!!!!!! If I know how much better a tablet - I'd bought one of these things many moons ago. Unbelievable screen resolution, looooooooooonnnnnnnggggg battery lift and a great touch screen. Sent from my iPad using Tapatalk
-
1 pointI bought my wife an iPad Mini with Retena for her birthday and in turn I got her old iPad 1. I'm not sure that I'm a tablet person as I really need a keyboard to type on. I'll give it a try but I hear my MacBook calling my name
-
1 pointA bit of trivia for you Dolmar fans. A gentleman by the name of Emil Lerp, the founder of Dolmar, developed the worlds first gasoline engine powered chainsaw in 1927.
-
1 pointPersonally, the side discharge deck works better for launching unseen objects. They are also better for blasting holes in vinyl siding, with even the smallest of those objects. Rear discharge decks, on the other hand, don't score nearly as high in this feature. Still, as a counter-point, the rear disch decks leave most of the object exactly where it was found, or just a few feet away.
-
1 pointOkay guys I took a trip to see Dennis yesterday for a rolling chassis. The new eaton 1100 is night and day, but I have a few questions. The power lift will not work when first started. It takes about a minute to get a response from the lift cylinder. My other problem is the reverse is very slow but I think I just need to adjust the linkage! It was a fair amount of work to do the swap and add the hydraulic lift system but it really makes the tractor! Thank you again Dennis!
-
1 pointTried it like Kelly said. Took off the dust cap and they fit. Not as tight as I would like. Might have to tweak the clips. guess I'll be in the market for a couple of older style 8" WH caps
-
1 pointSomeone may have hooked the battery up backwards too. I did that once and ended up have to replaced 20 feet of wire because two wires melted together.
-
1 pointIf you must have a 2 stage as stated above 16hp or more, I recommend a machine with hyd lift also, a 520 would be perfect. Some older machines in nice shape are still worth a few thousand $$ with attachments, have you priced a comparable machine ?? not a box store unit a real GT go to a JD dealer price a 425 or the likes with a blower, weights, chains and a deck I bet your at $9k easy so yes a low hour nice well kept unit is still a $2k machine with attachments, a bare tractor nice under 500 hours will run in the $800-1200 range add a nice deck $200-300 add a blower $200-300 a 2 stage blower $500-700 chains and weights $100-150 a cab $200-300 if your talking a XI series add about $500 to the bare tractor and at least $100 to each attachment. The 520 you have pictured above if it's as nice as it looks and under 400 hours it is a $1000 to 1500 machine, and if it has a deck even more so, I see weights and chains so I assume it has a plow or blower?? if it has a deck and snow attachment it is worth all of $1400 but I would offer $1000 and work up. As was said above you can't buy much new for $1400 now days, cheap throw away box store stuff, that in 10 years with good up keep is nearing the end of it's life, a good unit can last a lift time with care and maintenance.
-
1 pointI am really looking forward to seeing this tractor at the big show in June , seeing the tractor will be one of the highlights of my visit to the US , so june cant round come round quick enough, I also hope top see some more of Bobs artwork . John , Owning a tractor that someone has created for you must be a real heart warming feeling, but also a difficult one too , in so much as , How do you ever part with something that has been created for you . ? for me it would be an easy answer , i would never part with it as it would be tooo special .
-
1 pointA SMS-50 is for a wide frame tractor such as a 953, 1054, 1054-A or GT-14, not a long frame tractor such as a 1257. Hopefully you have one of the 50 inch mowers for a long frame tractor. Post pics of the mower.
-
1 pointAll my tractors to date are built on Case Ingersol transaxles. I hear the subject of duals a lot- I had a buyer talk me into putting a set onto a 4x4 tractor before he took it home. Yes they look neat and gnarly- BUT- I will tell you that to start with- these tractors lay down quite a foot print overall and you have to be paying attention when your driving them. This is particularly worse at a tractor show. The duals make them very unenjoyable to drive when in a show setting especially. They also increase the turning radius as the tires will touch each other when turning. That makes putting in steering stops necessary when they are added after the fact. Now- on Chevelletowns 520 4x4 this isn't as bad as he put some thought into it and used some common sense and went with a narrower tire. Running tires the size of Burlys would be in the uncomfortable area for me -John also planned the build on what he is using with no intention of duals. I have played with just a couple of the tractors and have a pretty good feel for whats realistic and whats not. And No- I'm not knocking anyones opinions - just adding some insight!
-
1 pointFun - took off each original skid.... Found center of the skid, then drilled a hole 1-1/2" north and south of center. Then I laid the cutting board template under each skid, centered them then drilled a small pilot hole through the cutting board material..,, Then, took a wood bit, honed it out so the head of the bolt would be flush with the material.. Then I took a 5/16" bit and drilled out the remaining material.,,,
-
1 pointI'm with Vin, they are kinda fragile. I've done mine a few times. I get to do it again soon because when I went to start my RJ at the Kent show last yr. the K90 kicked back and in the process one of the ears broke off the pull handle. (I think Vin and Matt got to witness that) The rubber was hard. I got cut from it and it hurt like hell. Give it a shot and try too fix it yourself, that way when it does come unwound at a show you'll be able to fix it yourself. It will probably take you a few times to get it right but you'll learn something new.
-
1 pointIt will be a surprise. Just have to wait till the show
-
1 pointOh Terry! I can help with this one.
-
1 pointHeres my downdraft to updraft air cleaner conversion top has 1 1/8" dia hole Bottom has a 1 3/16" freeze plug (Dorman #555-086) with 9/32" dia hole on center freeze plug is a light press fit in air tube Brian
-
1 pointI put some adjustable wheel on my blower. They work good
-
1 pointThey say necessity is the mother, or is a mother...I don't know which? Good eye Jason...on the temporary Power-Aid lid that I backed with a fender washer. At some point, I'll fire up the welder and plug the bottom permantly... but, in the meantime it will suffice for the time being.
-
1 pointInstead of worrying about the govt furlough all day... I decided to focus on turning this down draft oil bath into a functioning up draft unit. Had a few people tell me it couldn't be done, but that's when I usually do my best work. Picts here pretty much tell the whole story, any questions about the process...feel free to ask. Basically, all you're doing is moving the fresh air inlet from the bottom to the top of the unit. Once completed, and filled with oil...I tested it out by letting it run un-tethered for about a half hour in the back yard while I cleaned up. Then took it out for a couple hot laps around the house, up hills, and down, high rpm's and at idle... performed flawlessly, with no runs, drips, or errors. Actually, while running...engine sounds much quieter to my ear now. Would you believe, the wife even commented on how good it sounded.


This leaderboard is set to New York/GMT-04:00