
Leaderboard


Popular Content
Showing content with the highest reputation on 01/17/2014 in all areas
-
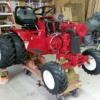
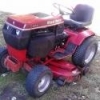
3 pointsFinally was able to go get my pair of 857s for 150.00 today. They need a little love but are complete except for one deck missing a lot but it will be used for parts. Engines are free so this should be an easy fix to get one running. A lot of you may think this was a great deal but I find myself regretting ever seeing them. It will take a LOT to make one useable. That involves time and money. All belts are rotted. The SGs will need attintion all cables and idler pullys frozen plus who know about the deck driveline. I will have to think hard before dumping them to hopefully get my money back. I think these horses turned out to be "nags".
-
3 pointsProbably a neck brace, and his other arm's in a sling.
-
2 pointsMy son's partner gave me the following photos taken around 1980ish. Her family owned Hasley Manor and Morton Manor on the Isle of Wight at that time. Her uncle is tending his horse while her grandfather looks on at Morton Manor Another uncle cleaning the wheel of his steed at Hasely Manor. Please don't bother sending begging PMs - the money in her family all went a long time ago! Period photos of WHs like this seem quite rare so I thought I'd share them. Andy
-
2 pointsThey have grown on me when they run right their really fun I pull everything with my little ranger
-
2 pointsA few months ago, I would have jumped on the tecky-hater band wagon with some of the rest of you, but after a few months of owning a C-160 with an OH160 Tecky in it, I've decided I really like this one. It starts as easy as my Kohlers do, and runs really strong! Matt
-
2 pointsIf the clearance is too tight you can burn a valve as it doesn't contact the seat correctly and seal the cylinder properly. The fact that the noise changes as you adjust them points to it being a valve / tappet noise. Sometimes with a used valve or a used lifter (If the ends of each haven't been reground square) you can end up with a surface with a ridge in it that makes it difficult to measure the clearance on with a feeler gauge. Onan twins can trap you on this one. From memory of the Kohler singles, I don't think its likely on a Kohler. I work on 100 year old Automotive engines where the clearance is .002" on the intakes and .004 on the exhausts. Its not uncommon to have to run thru the clearances 2 or 3 times to get them quiet, .001 too big and they're as noisy as hell.
-
2 pointsAfter being on order for a month it finally came in. Before After
-
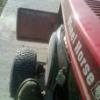
2 pointsX2 on the fifth hole in the mounting plate being for the lift cable on the hydro tractors. The "serrations" on the differential end cap are probably chatter marks from the tool used to spot-face the "pad" where the nut seats. The object of the game is keeping the through-bolts tight. High-quality locknuts and thread locker are your friends. Here's what happened to a friend's '86 417-8 tranz when a through-bolt decided to pass under the ring gear:
-
2 pointslooks like you have to use Snap-on tools if you want them to run rite
-
2 pointsYou think that guy is wearing a tie??? I can't tell in the picture. I like the band aid by his left thumb though.
-
2 pointsjust do a search on Amazon for led 1156 replacement and you'll have several choices. they are expensive at autozone
-
1 pointHere's my solution to people that "can't see" a big red tractor in the road when I'm plowing out the end of my driveway. 3 LED's in a 3/4 inch fixture Bright even in daytime. Plus I cleaned up the headlamp housing and bezel. Installed new bulbs. If they don't see me coming now they must be blind.
-
1 pointFeaturing Chasm... the all new, six million dollar man.
-
1 pointI bet it does Matt, I'd love to hear that one sing.
-
1 pointIts definitely a strong runner Craig, and when you load it hard, and the governor kicks the throttle, its got a real nice bark out the exhaust pipe. My only complaint, is the undersized fuel tanks on these 's. 16hp, and a small fuel tank don't go together very well, so I try not to stray to far from the gas can! Matt
-
1 pointWell that's an awfully long name "Other Euro Brands of Vintage Reel/Cylinder Mowers and other Walk Behinds etc" maybe we can shorten that a little bit to "Other Euro Brands" (Maybe it's there now?)
-
1 pointYou said that you just rebuilt the engine. What all did you do? Did you do it yourself? Did you replace the valves or have them ground? Did you check to see that a valve seat may be loose? Did you have the valve guides measured to make sure that they weren't worn?
-
1 pointAbout time you got in here Mike...I figured you would know the answer to that question. Do you believe the picture above of that bolt??? Un-real...
-
1 pointEvery 8-pinion differential I have pulled,,Being in an 8-speed or a hydro the locking nuts have been on the bolt side and not the nut side...if you needs parts to fix I have them on hand... Mike.
-
1 point4th picture up from the bottom: That stuff is sticky. Guess that's what I'll try next time. Thanks Terry.
-
1 pointIgnition switch connector body: http://www.pcsconnectors.com/2973422.aspx The "3 in a row" 15AMP R/R connector body is Kohler p/n 236602 The connector body for the old 10AMP "L pattern" terminals is Kohler p/n 237429
-
1 pointGet in touch with Horsefixer, he found a different way to go with the wiper Vs. the Original Cab company's.
-
1 pointI still think you stole 'em.
-
1 pointsorry I don't have pics yet but my buddy has a 1955 in real good running condition everything works he was wondering what something like this was worth, has been repainted any idea's guys of only seen 3 others on the net, I've seen a 54' and 56 which are the same, ok I finally had time to get pics of her today and this is it see what you think?
-
1 pointYou know...... I tried to start another forum for homebuilt projects, that site doesn't look like it's going to continue so...... I know that there are other sites out there, but if you feel that there's an audience for a "RedSquare" of other types tractors, I can convert that site to GTInternational.com or gtshed.com.
-
1 pointRight,sorted and paid You are correct with the non WH section I do indeed have a collection of non WH machines, wasn't sure if they were relevant here ?? That was fast, I seem to have turned red...
-
1 pointI think they run just fine.
-
1 pointThere is a farm tractor dealer near me that have the o-ring thread to 1/4" Flare adapters both male threads . Then they made me a hose with 1/4"female swivel flare ends. I had a GT-14 that leaked at the swivel at the trans. That's how I got it fixed. If I remember right it was 1 90 degree fitting and 1 straight.
-
1 pointGreat safety addition. Something is better than nothing. Glenn
-
1 pointUh Ohh, Time to become a Supporter cause' we like pics!
-
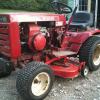
1 pointVery nice tractor Dan, looks even nicer in person!
-
1 pointI keep going to the garage to see if it has shown up here yet and is mating with my SK486. Yours looks so much nicer I think the offspring would look good. Marvin
-
1 pointCraig, you look so young! (Picture taken in living room this past Thanksgiving)
-
1 pointCrack pics. Glenn Cracked pics. Glenn
-
1 pointSing? Heck, I have 2 of his records!
-
1 pointSteve you are too modest you're a Natural. If you were on the Weather Channel, Direct TV would have no problem forking over the Benjamins to keep it on the dish!
-
1 pointI tried the Torrington number at Napa and they couldn't find one but that doesn't mean that they aren't available. The dealer had it in stock... Dean
-
1 pointWH stickers, and red spray bombs are cheap.
-
1 pointHow "F-R-A-G-I-L-E" is it?
-
1 pointThe new lights looks great... but don't assume they'll make you safer out at the end of your driveway.
-
1 pointIndeed there has been an increasing number of members asking about repair services for the indicator board. I started to design / construct a test jig for repair of the indicator boards a few months ago. Currently my free time is at a premium and I do not have the resources to dedicate to providing a "repair service" for indicator pcbs. If anyone wishes to continue on with the repair jig, I will happily donate the fixture to the cause. The indicator board repair is really quite simple and all repair parts are easily obtained. The issue that had stalled my investigation was the time needed to research how many different styles of pcb's exist in the wild and if they are wired differently for various series / models of tractors. Resistors and capacitors could be easily checked with a multimeter. Prophylactic replacement of all active components such as IC's or transistors would cost less than $10. No guessing or expensive test equipment needed.. Bottom line, it's a low dollar, easy fix, just takes a bunch of time. Unfortunately my time is at a premium right now. Chuck
-
1 pointJabronie or Gibronie is Italian slang for a "Loser". Thanks for watching this addition of "Early 20th Century Italian Slang". "Early 20th Century Italian Slang" is made possible by a grant from the Sicilian Brownies, (formerly la Costa Nostra), and Whatsamatta U and by viewers like you. Thank you for your support!
-
1 pointIan, Thanks for your comments. Let me put a link to the one video and you can see if it works. As far as U-Tube...do I need to create an account to upload...I really have no idea what needs to happen here. Do I need to create files or categories??
-
1 pointNever sells whole tractors, only parts. He's doing it for money not to save them from the scrap yard. I guess in a roundabout way he is saving them from the junk yard piece by piece but I would sooner see a whole tractor get saved then the parts of one. Thats why I stole that Charger 12 even though it didn't run….now it does though…And my son sure is happy because of it Actually, I love tractors, when I was 12 I built one from an old walk-behind, worked on them ever since, I also had a motorcycle salvage yard when I was 18 to cover my tractor hobby, when I sold the salvage yard, I had over 400 motorcycles. Now I do the tractors because I love it and it pays my bills. Sure, some people hate what I do, but then there are people out there that will hate someone for anything, no matter what they do. So, I am not to worried about pleasing people unless it is someone who bought a bad part. So, it is more that just being about money. I am sure many people would do what I do (or what they love) rather then the job they do now. Grace & Peace Lv. 25:14 - Joe Thanks to all of the people with the positive posts. I try hard to run an honest business that is fair and helpful to everyone. Grace & Peace Lv. 25:14 - Joe
-
1 pointLooking great with some paint Mark. Hope you haven't broken anything. Have you been inside it to check it's condition since you got it?. had a look at the IPL/Exploded view and there may be a few weak points that may need beefing up as your changing the 'Duty Use' it was designed for, i.e mowing grass on lovely undulating terrain and is now Climbing Garden Steps, Walls and Rockeries . Nothing that is outside your comfort zone with fabrication etc .
-
1 pointHad planned on using the C-120 earlier this winter, but just now got it set up the way I wanted it. Tonight was it's first workout in the snow and It did pretty well. Google decided my picture needed some animation, and I have to say I agree...
-
1 pointThat's pretty darn neat! I like that!
-
1 pointI have also had the tube taken out,I just don't see the point.If you puncture he tube you have to break it down and patch it. What is the purpose of tubes in new tires ? If the new tire is leaking the shop will make it good. And some folks don't want to spend $200. on tires they cant afford,or just don't need,if an inexpensive and easy fix will do.
-
1 pointBackhoe - NOT FAIR!!!!!!!!!! Nice machine...
-
1 pointHere is a pic of mine (same pic I used in a separate post recently). Haven't had much of a chance to tinker with the loader. I will likely remove it and bring it and the tractor into the basement for some basic maintenance and may be a bit of paint on the loader. This will be a winter project. Anyhow - wanted to make a showing on this thread!


This leaderboard is set to New York/GMT-04:00