
Leaderboard



Popular Content
Showing content with the highest reputation on 01/17/2014 in all areas
-
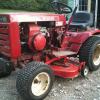
3 pointsFinally was able to go get my pair of 857s for 150.00 today. They need a little love but are complete except for one deck missing a lot but it will be used for parts. Engines are free so this should be an easy fix to get one running. A lot of you may think this was a great deal but I find myself regretting ever seeing them. It will take a LOT to make one useable. That involves time and money. All belts are rotted. The SGs will need attintion all cables and idler pullys frozen plus who know about the deck driveline. I will have to think hard before dumping them to hopefully get my money back. I think these horses turned out to be "nags".
-
3 pointsProbably a neck brace, and his other arm's in a sling.
-
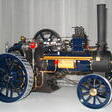
2 pointsMy son's partner gave me the following photos taken around 1980ish. Her family owned Hasley Manor and Morton Manor on the Isle of Wight at that time. Her uncle is tending his horse while her grandfather looks on at Morton Manor Another uncle cleaning the wheel of his steed at Hasely Manor. Please don't bother sending begging PMs - the money in her family all went a long time ago! Period photos of WHs like this seem quite rare so I thought I'd share them. Andy
-
2 pointsThey have grown on me when they run right their really fun I pull everything with my little ranger
-
2 pointsA few months ago, I would have jumped on the tecky-hater band wagon with some of the rest of you, but after a few months of owning a C-160 with an OH160 Tecky in it, I've decided I really like this one. It starts as easy as my Kohlers do, and runs really strong! Matt
-
2 pointsIf the clearance is too tight you can burn a valve as it doesn't contact the seat correctly and seal the cylinder properly. The fact that the noise changes as you adjust them points to it being a valve / tappet noise. Sometimes with a used valve or a used lifter (If the ends of each haven't been reground square) you can end up with a surface with a ridge in it that makes it difficult to measure the clearance on with a feeler gauge. Onan twins can trap you on this one. From memory of the Kohler singles, I don't think its likely on a Kohler. I work on 100 year old Automotive engines where the clearance is .002" on the intakes and .004 on the exhausts. Its not uncommon to have to run thru the clearances 2 or 3 times to get them quiet, .001 too big and they're as noisy as hell.
-
2 pointsAfter being on order for a month it finally came in. Before After
-
2 pointsX2 on the fifth hole in the mounting plate being for the lift cable on the hydro tractors. The "serrations" on the differential end cap are probably chatter marks from the tool used to spot-face the "pad" where the nut seats. The object of the game is keeping the through-bolts tight. High-quality locknuts and thread locker are your friends. Here's what happened to a friend's '86 417-8 tranz when a through-bolt decided to pass under the ring gear:
-
2 pointslooks like you have to use Snap-on tools if you want them to run rite
-
2 pointsYou think that guy is wearing a tie??? I can't tell in the picture. I like the band aid by his left thumb though.
-
2 pointsjust do a search on Amazon for led 1156 replacement and you'll have several choices. they are expensive at autozone
-
1 pointHere's my solution to people that "can't see" a big red tractor in the road when I'm plowing out the end of my driveway. 3 LED's in a 3/4 inch fixture Bright even in daytime. Plus I cleaned up the headlamp housing and bezel. Installed new bulbs. If they don't see me coming now they must be blind.
-
1 pointLike the title said I decided to sell two things from my Wheel Horse collection. First is my Wheel Horse sign that I got from a local dealer, I'm really sad that I'm selling this one. The second piece is my little B111 tractor. This was my first actual lawn and garden tractor and the start of what became my current collection. I'm sort of happy to see it go since I just don't have the time to do anything with it anymore. I haven't touched it in almost 2 years now. They are both going to a good home and a fellow Wheel Horse collector so that makes me happy. You may ask why I'm selling and that is because I have found a car that I want to buy and I need to start raising the funds to buy it.
-
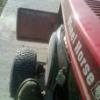
1 pointQuick picture I snapped from the drivers seat earlier today. The glare was too strong for any other pics to turn out worth a darn. It's not a very good quality picture from my cell phone. The tractor is a little dusty also.
-
1 pointI bet it does Matt, I'd love to hear that one sing.
-
1 pointMan...that Techy's on steroids.
-
1 pointWhere's the AMC Rules "Rear-View Mirror" photo? There is a fellow on YouTube that has a motorized wind screen on his Burgman. Just the thing for cool weather. Looks nice - now you have me thinking about some wheels!
-
1 point220 400 600 grit emory and crocus cloth. Carb cleaner with spray nozzle. Air blast hose source. Kerosene as solvent / clean agent. PISTON & SLIPPERS: One by one, remove each piston from cyl block and progressively reface "wax on...wax off" the brass slipper until scars and scratches are GONE. A magnetic base stand-alone magnifying glass is a bonus to inspect finished surface. When done polishing one, spray carb cleaner to clear the tiny pin-hole in center of slipper. Set it back into the same cylinder and proceed to the next piston, full circle of the cyl block. Take care...be meticulous and don't rush. Also take care to NOT round the edges of the brass slippers (no radius on edges). As you work with each of 9 pistons, inspect the sidewalls of each. Some scuffing may be present but there should not be any chips or dents at all. The slipper retainer can't be twisted or any of the 9 holes slopped out. VALVE PLATE (swash palte). Using a circular motion, scuff the bass side it of first on 600 grit, just to show where the scratch and gouges are. With any luck, they will polish out using the 600 grit, but I've had some that took the 220 grit to start, the progress to crocus cloth. The base of the clyinder block spins on the brass side of this plate so it is IMPORTANT to make it perfectly smooth, or it will again gouge the valve plate. THRUST PLATE (sits atop the brass slippers). This is hardened steel and requires precision grinder to resurface. It likely has near micro-scopic scratches, which is enough for HOT oil to bypass. The 9 slippers spin on this so it must be perfectly flat for the same reason as the valve plate. GEROTOR assy: Both sides of it have to be smooth, and each of 2 parts the same thickness. This sits in a round cavity on the back of the Charge Pump housing and the cavity is only slightly deeper than the gerotor is thick. So, if you grind a tenth off of the gerotor assy parts, then you must also grind a tenth from the back of the Charge Pump housing to maintain tolerance. PUMP END CAP: Lay it flat on surface plate and slide back/forth on emory paper to remove all signs of former life. Remove (save) all the O-rings and backup rings, then resurface the top of it in the same. The gerotor MAY have gouged this and all signs of the scars have to be removed. That's about the extent of refinishing surfaces, now do it again with the HYDRO MOTOR. It has nearly identical parts and the surface refacing is about the same. Use the kerosene to flush parts clean as you are working with them and set components aside in a plastic bag to keep clean. These Sundstrand Hydro units a highly susecptable to dirt of any kind so it is of UTMOST IMPORTANCE to keep your work area clean, and to flush clean every part / assembly as it is reworked. When reassembling the pump and motor unit, have at-hand a little bottle of RED Engine Assembly Oil. Put a drop or two of this RED oil on mating surfaces just so they are not bone dry when the whole thing is given the initial test run. Also note the location of the pin in the Charge Pump Housing. It must be oriented down...toward the motor. It can be mounted 180 deg out of phase, then nothing will work. Enjoy Here are a few pics that MAY be of assist:
-
1 pointDid you have the piston on TDC of the compression stroke?
-
1 point4th picture up from the bottom: That stuff is sticky. Guess that's what I'll try next time. Thanks Terry.
-
1 pointGet in touch with Horsefixer, he found a different way to go with the wiper Vs. the Original Cab company's.
-
1 pointI'm thinking that this is what happens when you outsource work to a photographic studio. That's probably a Snap-on advertising poster on the wall and the nearest outfit they had in wardrobe was a dental surgeon's. Andy
-
1 pointcongrats neil
-
1 pointTo all FYI I just got off the phone with Lutco who makes the radial bearing that are on the cross shaft. They will not sell them to us, but they told me of another comapny that will. I hate to say it but JD's use the same bearing Lutco/ JD part number AA22098.I did a qwick on line check and found it for $16. I am going to get one from my local dealer and make sure next week. Good luck guys!
-
1 pointIt's a major award. It should go right in the front window.
-
1 pointIf you do decide to bring the cultivator... I'm pretty sure it won't last long.
-
1 pointOK thank you I will check into this tomorrow and let yaw know if everything looks good or not
-
1 pointI am starting to like the way a lot of them look without restoration. In fact I now regret restoring one of my old rusty horses.
-
1 pointUh Ohh, Time to become a Supporter cause' we like pics!
-
1 pointTake a look at this picture. When you have the shifter removed, looking down into the transmission, this is what the shifter forks should look like in neutral.
-
1 pointVery nice tractor Dan, looks even nicer in person!
-
1 pointWould be interesting to see what the rear axle bracket looked like...must be a problem there??
-
1 pointCraig, you look so young! (Picture taken in living room this past Thanksgiving)
-
1 pointDo you have the price paid for the tractor when new? I don't known of any other tractor models sk/sb with the plactic wheels.
-
1 pointKeep it away from any wheel mares.
-
1 pointI tried the Torrington number at Napa and they couldn't find one but that doesn't mean that they aren't available. The dealer had it in stock... Dean
-
1 pointIn the Cross ref link I post above has the cross over to # 1532 Torrington # M-Ââ€16121 MOTION IND #00090903 Hopes this helps
-
1 pointHow "F-R-A-G-I-L-E" is it?
-
1 pointThe new lights looks great... but don't assume they'll make you safer out at the end of your driveway.
-
1 pointIndeed there has been an increasing number of members asking about repair services for the indicator board. I started to design / construct a test jig for repair of the indicator boards a few months ago. Currently my free time is at a premium and I do not have the resources to dedicate to providing a "repair service" for indicator pcbs. If anyone wishes to continue on with the repair jig, I will happily donate the fixture to the cause. The indicator board repair is really quite simple and all repair parts are easily obtained. The issue that had stalled my investigation was the time needed to research how many different styles of pcb's exist in the wild and if they are wired differently for various series / models of tractors. Resistors and capacitors could be easily checked with a multimeter. Prophylactic replacement of all active components such as IC's or transistors would cost less than $10. No guessing or expensive test equipment needed.. Bottom line, it's a low dollar, easy fix, just takes a bunch of time. Unfortunately my time is at a premium right now. Chuck
-
1 pointAwesome picts... are you quite sure the money is all gone?
-
1 pointNever sells whole tractors, only parts. He's doing it for money not to save them from the scrap yard. I guess in a roundabout way he is saving them from the junk yard piece by piece but I would sooner see a whole tractor get saved then the parts of one. Thats why I stole that Charger 12 even though it didn't run….now it does though…And my son sure is happy because of it Actually, I love tractors, when I was 12 I built one from an old walk-behind, worked on them ever since, I also had a motorcycle salvage yard when I was 18 to cover my tractor hobby, when I sold the salvage yard, I had over 400 motorcycles. Now I do the tractors because I love it and it pays my bills. Sure, some people hate what I do, but then there are people out there that will hate someone for anything, no matter what they do. So, I am not to worried about pleasing people unless it is someone who bought a bad part. So, it is more that just being about money. I am sure many people would do what I do (or what they love) rather then the job they do now. Grace & Peace Lv. 25:14 - Joe Thanks to all of the people with the positive posts. I try hard to run an honest business that is fair and helpful to everyone. Grace & Peace Lv. 25:14 - Joe
-
1 pointLooking great with some paint Mark. Hope you haven't broken anything. Have you been inside it to check it's condition since you got it?. had a look at the IPL/Exploded view and there may be a few weak points that may need beefing up as your changing the 'Duty Use' it was designed for, i.e mowing grass on lovely undulating terrain and is now Climbing Garden Steps, Walls and Rockeries . Nothing that is outside your comfort zone with fabrication etc .
-
1 pointGot the D 200 out two days ago and went down to my neighbors house to help him move some compost. Two or three buckets in I had another seal fail and started leaking badly. I had only had time to get one of the cylinders repaired this past summer and knew I was on borrowed time. I used the loaded several times thru the summer with no leaks but the cold weather had it's way with the old brittle seal. One thing of note from the teardown. I relayed some information previously in this post about the backing rings for the "O" rings that had been told to me by the hydraulic repair guy. He said that they didn't need to be replaced as they just support the "O" rings. I will now disagree with him as that is exactly the part on the piston that failed and I would replace with new if they show any signs of wear. The seal supplier where I picked up my new parts recommended different types of seals for the piston and shaft seal and said they were much better than the "O" rings so that is what I bought and figured I would give them a try. Note the "T seal" for the piston is almost shaped like a tri rib tire and the backing rings come with the T seal as a kit and are split for getting them in place easily. These seals are made of a harder type of plastic except for the wiper on the outside of the end cap which seems a bit softer. The seal on the outside of the end cap is a standard "O" ring with a backing ring. Please note I was buying parts for three other cylinders but they didn't have everything I needed so the quantities are not correct for what you need. Here are a few pics with the invoice for part numbers I'll get these new seals installed and report back if I have any problems.
-
1 pointThat's pretty darn neat! I like that!
-
1 pointMust have missed this topic the first time around
-
1 pointi will be using my 416H this year for the gravel and sidewalks down the street.. and my ariens 24" walk behind blower tackles the real deep stuff....... it just loves this stuff, remember throwing it at least 20ft each side of the driveway on this snowfall, which was our freak storm ( for quad cities winters) 2/11....... if you look at the pic below, just about all the thrown snow is out of the pic either side.....
-
1 pointHere is the 857...with my daughter at the reigns. and my 702...with me at the reigns. I can't wait for it to start snowing this year...
-
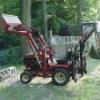
1 pointHere is a pic of mine (same pic I used in a separate post recently). Haven't had much of a chance to tinker with the loader. I will likely remove it and bring it and the tractor into the basement for some basic maintenance and may be a bit of paint on the loader. This will be a winter project. Anyhow - wanted to make a showing on this thread!
-
1 pointOk. I tested the compression and I have between 85 and 90 PSI. I did start poking around with the plug though and it seems as though I'm not getting a good consistent spark. My next step is to investigate that.


.thumb.jpg.24351e7ddaa9b6d44cf3bd793c6e3548.jpg)












This leaderboard is set to New York/GMT-04:00