
Leaderboard


Popular Content
Showing content with the highest reputation on 12/03/2013 in all areas
-
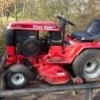
5 pointsMan o man, feel like a million bucks. Taking a walk on cloud nine. what a feeling. The hook is in , a 1964 854. If your wondering why the late announcement, I have been spending hours trying to figure how to put the pictures I took on my way smarter than me phone. well bottom line, the phone wins.plus I spent bou coup hours in the garage,,,gazing.lol Thanks to everyone for encouragement!
-
3 pointsAre you gonna have your third eye done too? Good luck tomorrow Dino.
-
2 pointsGood luck with your second eye surgery tomorrow Stevasaurus!
-
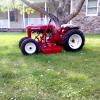
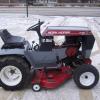
2 pointsHowdy...... Just came across the RedSquare Forum a few days ago....after I purchased my 3rd WH. I am not a collector.... I didn't even know there were fans that collected them. I just like WH because they have been great tractors for me. My first WH was one my Dad and I purchased back when I was a teenager....the only photo I khave is the one posted.... With my 1 year old daughter sitting on the seat. She is now 37 years old. Maybe someone can tell me what WH this is. I currently have this WH 208-4. I have had this for 20 plus years... Also bought this used. It has served me well. I had a guy drop an engine in about 4 years ago.... Can't even tell what it is.... Not plates on it. It got me by....but I mow and fog for mosquitoes at the same time..... Burns oil that bad. Anyhow.....I just picked up a 312-8... 540 hours on it. It is in real nice shape.....I had a local lawn mechanic that I know go over it...and do some basic work. He said it was is awesome condition. Everything looked good...ran good... No smoke....no leaks... And the mower seemed to operate just fine. Hard to test it out with snow on the ground !!!!!! Just changed all the fluids....lubed everything... Sharpened the blades,.... And put in a new battery. Happy with the find.... For $650.00. I think I did Ok. Just going to use it for mowing... 3/4 of an acre. It should last me till I croak!!!! I always liked the Wheelhorse.... Because it gave me great service. I will probably keep the bagger and see if I can adapt it to my new 312. I really like the bagger... Especially in the fall. I will then see if I can sell my old 208. I will keep the forum handy for advice......you guys know everything. Thanks for the forum and all your knowledge. I will send a new photo after I get me 312 cleaned up .
-
2 pointsThanks guys...itsi a god thig I cna touhc tyep 4 teh lsat 4 weacks.,,,eye showd be abel to sea god aganai on Firdya...tanks
-
2 pointsThanks for the pictures! I definately have the # 5007 transmission with the 1 inch diameter shaft. I looked online at napa (whose website is being very slow for me this morning for some reason), and it appears that part number 9815 has a couple of applications. http://www.napaonline.com/Catalog/CatalogItemDetail.aspx/Manual-Steering-Pitman-Arm-Shaft-Seal/_/R-NOS9815_0297818337 I also looked at the motion industries and found this, which looks more accurate, but I've never really seen one in person so who knows? http://www.motionindustries.com/motion3/jsp/mii/product/01295997/SKF+Sealing+Solutions+9815+Oil+Seal+-+Inches/en?category=Seals%2C+Gaskets+%26+Accessories%3ESeals%2C+Rings%2C+Washers+%26+Seal+Accessories%3EOil+Seals I may be better off with the motion industries piece, especially if someone here has already used it and it works. what do you think? eightlitermopar
-
2 pointsAny above options are great, I tried them over and over. My worker 416-8 made me pull my hair out, it may not turn out to be any of the above issues, yet any one of them could make your problem happen. I got pretty good at tearing apart all tin, exhaust, intake, carb, replacing fuel lines, pump and filter, removing/cleaning tank, new intake gaskets, then started with electronics...key switch, coil/plugs/wires, ignition module, trigger, jumped every safety switch, etc. Each and every time it would start and I swear it sounded better and ran smoother, but when I would get on it and drive for a few minutes it ran terrible and would die out. Some times it would smoke like a train and other times just seem like it was going to blow on me, but every time after sitting it would start and run smooth....common sense was telling me one thing, but the thought of running over it with a dozer was really looking good to me, And I mean it! I had it with that darn Onan and finally felt like others on here feel about them, but I could not walk away and let it win me, I atleast wanted to tear it apart to see what was making it run that way. All the wires looked fine, compression was around 115psi on both sides. Finally looking in the same places as earlier right behind the upper steering shaft I pulled the wires completely out just to reassure myself that it had nothing to do with those and...... Lets just say "I" personally can not put the blame on those darn Onans, atleast not this time, although every time someone talks negative about an Onan I somehow link the engine with the non engine tractor issues. Good luck and keep the keys out of the dozers until you get it fixed!
-
2 pointsMy vote is to stack. Cool factor indeed. Also on a technical note, up for discussion of course, I feel that it may help the single lung Kohlers with the common overheated head gasket problem around the exhaust. If the pipe is longer, it can dissipate more heat away from the head than the short mufflers typically seen on these models. (Just my $.02 though)
-
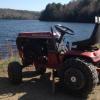
2 points854 for plowing. Got it to weight 1000lbs with me on it and pushes 13inches out of my driveway.
-
2 pointsThank you all for your collective advice. I am going to install the tire chains!
-
2 pointsI bypassed the safety switch and it still wouldn't start so i did what i should have done in the first place and put a different battery on. She struck up first time. If brains were gunpowder, i don' think i'd have enough to blow my bleedin' hat off!
-
1 pointWell, if you have an RJ or Suburban that needs a Clinton 1200 series motor, this is your final chance to reserve a beautifully rebuilt motor! I'll be going to college in mid-August so I will not have a chance to do any more for a while. Most rebuilds consist of: Sandblasted block/sheetmetal New crankshaft New valves New piston/rings New Connecting rod New Crank bearings New Gaskets Rebuilt ignition Rebuilt carburetor New Air cleaner New Starter Resurfaced tappets Mildly Ported Block bored Valve guides reamed oversize and new seats cut Kill Switch wire installed New spark plug wire It takes me on average 20-25 hours of my time to redo one of these motors and $100 worth of machine work to bring the block back to specs. They run like new, look better than new and will be a great addition to any vintage Wheel-Horse! Cost of a rebuild is $475-$550 and I will buy an old engine core for $50-$75. I have done over a dozen of these engines to this quality of work and you will not find a better rebuild anywhere! I own an RJ58 with one of my rebuilt engines and it has been in use since 2005 (2 of those years mowing a half acre every week) and it runs just like it did on day 1. I ONLY HAVE THREE ENGINES AVAILABLE!!!!! I can ship anywhere in the USA on your dime. Here are some past rebuilds I have done: And as always, I have a full inventory of NOS parts to build these motors and support the hobby Charlie
-
1 pointjust finished a face lift on one of my 1886's. I love these tractors. they came out in 1971 and were a beast of a tractor. full hydraulics on front and rear, foot pedal hydro, three point. huge solid frame. this machine caught wheel horse with there pants down. who would of thought. bolens had those crappy tube frames. in 1971 all wheel horse had in there line up to compete was the gt14. to compete they came out with the automatic 18 (d series) both wheel horse and bolens used the 18hp kohler k482 engine. this sparked a little battle to one up each other. bolens ht20, then wheel horse d200, wh d250 then the bolens ht23 and bolens added an imported diesel model. this battle gave us so many models to enjoy. I own several of both models, I just enjoy the bigboys hope you enjoy the pictures brad
-
1 pointHerb...NAPA part number 610-1051....called a POSI-FLO fuel pump...1.5 to 4 PSI...I have a couple and they work well....
-
1 pointI thinks you are correct. My wife, out of the blue, today tells me she wants to go to "that thing in Pa in June Van mentioned". Who knew chicks dig tractors? In all actuallity my wife thinks I'm a nerd for playing with my wheel horse but like I told her.......'heck babe, you married me so who's the real nerd now?' Bwahh ha ha ha!!
-
1 pointI use a electric pump on my C-160 with no problems
-
1 pointlooks like the 416 adventures are set to continue for a little longer yet....... 2 new additions yesterday...... 1991 416-H no engine, 1995 416-8, junk onan, serial number is 400 apart from my 1995 416-H next to the shiny one..... the one on the right has the most potential for a restore, nice clean straight almost rust free tractor, with a good polish I'm sure i could get the paint looking great, but I'm thinking it will get stripped and some powder on it. have a kt17 series 2 that would look great in place of the onan. who knows what will happen at this point.....
-
1 pointHe needs a replacement shifter boot to keep the water/snow out of his transmission. Try a $40 replacement seat from Rural King, Northern Tool, Tractor Supply or other "Farm & Family" store. I understand the reason for removing a perfect seat, but a 2 X 6 would be to rough on my butt! My $40 seat.
-
1 pointNice tractors my dad had a AMX for his first car your AMC looks nice.
-
1 pointWell I tried and I tried,but I can't fight it anymore, I'm going to pick up another Horse today!!!! I was told when I bought my first one that you can't own just one,boy were they right! So I'm heading out after work to pick up 1969 Raider 10. So I guess my question is, is there any Raider "issues" i.e electrical issues, engine issues ext..... I am still a noob so I'm just looking for a little info on this series. Have a great day yall!!
-
1 pointHe looks good clean shaven!!!
-
1 pointgoo goo googly eyes?
-
1 pointYou can switch it over to battery ignition with a set of points and plunger and a coil.
-
1 pointI sure will. My first day of painting is hopefully tomorrow. I'm pretty nervous. Ill be sure to take pics. Thanks guys
-
1 pointYears ago, my brother had a furniture stripping and refinishing shop. I worked with him on weekends. He taught me how to paint and finish. There were so many products out there, and when I was working, the products we used were much different than the products of today. So most of what I learned, I had to re-learn years later as I went from finishing furniture to painting tractors. But, the best thing that I was taught was to practice, practice, practice. You may be impatient as I tend to be, and want to jump right into painting the tractor. Don't do it. Start with some big pieces of cardboard. The big thing you will notice is that painting with the finish coat is entirely different than painting with primer. Get the feel of the gun. Adjust the settings. Adjust the mixture of the paint/thinner. Try spraying horizontal surfaces first, then try vertical. Notice how much paint you have to spray before it runs. Notice how many coats it takes before you have coverage. When you feel comfortable with spraying, and you feel you have the right mix, then and only then move on to the tractor parts. Small parts like brake pedals, foot rests, front axle, spindles and such, are easy to paint, and are quite forgiving, as is the frame, transmission, and most cast parts. Remember that everything has to be painted both sides, and with multiple coats. Be patient. Don't expect perfection the first time. Then when it comes to what I call the "show" parts such as the hood, fenders, seat, belt covers, and dash tower, start with areas that are going to be inconspicuous like the underside of the hood, backside of the belt cover, inside of the fenders, etc. Shooting the larger areas of sheet metal will get you in trouble every time if you don't plan, and aren't patient. Also remember, when painting with a gun, move your body with the gun as you paint. Don't just stand still and move your arm. Doing so will cause the gun to move in an arc, causing the paint to be heavier in some areas, and thinner in others. Good luck, take lots of pictures, and use good breathing protection.
-
1 pointWow good info. Thanks so much! I have cleaned my gun well, I have scuffed up all the primer and as for all the other stuff I have no idea...
-
1 pointthey say that because they don't know how you are going to apply the paint ( brush, roller, spray). With new eco laws in place, the reccommendations for maximum dilution have been cut way back so as not to violate the VOC rules from the EPA. The "maximum" thinning statement on consumer enamel paints are based more on the manufactuer not violating current VOC restrictions more than making the paint easy to apply via a spray gun. Calling tech reps to ask for other possible thinning ratios will be a futile excercise. Tech reps are forbidden to make any recommendations that would result in "off label use" of their product and put them in legal jepardy. This is all of secondary concern to the characteristics of the spray gun and nozzle size you intend to use. Most gun manufactuers publish a recommended viscosity rating at which they obtain the best atomization from a particular family of spray gun. You will need to MEASURE the viscosity of the paint / thinner mixture to come close to the needs of the spray gun. Before you thin the color coat, a decision will need to be made on the "speed" of the thinner (how fast the thinnner evaporates from the paint film). How fast the thinnner evaporates depends on the type of thinner used plus the environment the thinner evaporates in.Mineral spirits are a slow thinner - Naptha is faster and Acetone is the quickest to evaporate from the paint. Slower thinners are used in higher temperatures. The slower tinner allows the paint to "lay down" flat before drying. Slow thinners used in cold temps will cause runs and sags but will perform well in higher temps. Fast thinners used in high temps might promote paints to dry in mid air before they hit the metalwork. This mid air curing results in a very grainy, sandpaper like "dry" finish. No sags but no glossy either. My first lacquer paint job looked like 600 grit sandpaper. Too fast of a thinner on a hot summer day. Gawd awful. We forgot to mention humidity and air flow across the painted metalworks - that's a whole 'nuther story. Pick your thinner, dilute the paint to the vicosity required by the gun and then begin to setup the mechanical adjustments on your gun. air pressure correct? at the gun or at the tip pressure? which one have you measured? how about an air filter at the base of the gun? it would be a shame to spit a water droplet in the center of a possible flawless paint job. you did clean out the white "snots" from the air passages of the harbor freight gun? didn't you? if not then at least run some thinner thru the gun first to get rid of possible oil residue on the gun internal parts. Oil will promote "fish eyes" an ruin an otherwise good finish. Once the gun is setup for a good fan pattern and proper material delivery, start to work on your technique. Know how to maintain a "wet edge"? How much stroke overlap you going to use so as not to promote runs or drips? Google and Youtube are your best friends on these subjects. Best advise at this point would be to practice on a primed piece of sheet metal and get your gun technique down on both vertical and horizontal positions. Don't practice on your tractor tins. Wait a minute? What primer did you use? I'm sure it will be past its recoat window if its already been laid down. Enamels usually have a "recoat with 1 hour" restriction. After that window you have lost your ability to have the color topcoat chemically bond to the primer. If the hour is gone, you must wait at least an addiitonal 48 hours for the primer to evap all its thinner. If you don't wait, you will get a wrinkled finish (the primer shrinks under the top coat and drags the top coat with it). After 48 hours, you no longer have the ability to achieve a strong chemical bond between the top coat and the primer and now you must scuff the primer to create a rough surface the top coat can mechanically bond with. Make sure if you scuff you clean the scuffed surface again with surface prep. Top coat will have a hard time bonding to a scuff dust film on the primer. If you are intent on using harderners, please read up on the all the dangers of using isocyanate based hardners without proper protection. To date, I have not found a simple face mask filtration system that properly captures this potentially deadly vapor. Please consider the dangers if you are using this addiitove in enclosed spaces. Starting to see how everything about the process is inter-related? Don't want to scare anyone away with all the ifs, buts and warnings. My hope is with the proper preparation and armed with some idea of all the interactions, you will have a chance of success on your first attempt. Sorry for the long read but maybe the time taken to type this out may save you time in not having to redo your first spray job. Good luck. p.s. the best results I have achieved with enamels have always been at the very lower limit of the published temp ranges of the paint. Rustoleum, etc usually have a 50F lower limit for application. I have repeatadly sprayed in the lower 40's and have been amazed at how well the finish laid down AND hardened without any hardner added. Haven't figured out why that is so .. yet.
-
1 pointGreat. Thanks so much
-
1 pointI clean mine with steel wool and coat it with VHT vinyl dye. http://www.amazon.com/dp/B000CPJLWQ?_encoding=UTF8&psc=1&s=
-
1 pointThanks Bob. This could help me a lot. What's a good way to polish up an old steering wheel? Its got some paint on it n areas. Just paint it as well?
-
1 pointThe only thing I have run across to watch for is be careful not to mess up with the electricals, ie: crossing wires or hooking up the battery wrong because it has the "breakerless" ignition and parts (coil and trigger switch) are hard to find and exspensive. Good luck with it!
-
1 pointIt looks like (in picture # 3) that you have the cast iron 2 piece transmission WH # 5007. If that is correct, then you need the SKF # 9815 seals. The ones I bought last year were $2.77 each at Motion Industries...NAPA should carry these also. The WH # 1232 crosses to SKF # 9815 and in this picture, there are 3 of them on the bottom right in the 2nd picture...!st picture is of what I think you have ( 5007 trans) The 83-2840 seals are for the 3 piece transmissions (center casting with 2 steel side plates). This is a cap seal and that price is correct...you can only get them from TORO. I can't believe I do not have a good picture of the cap seal, but you can kind of see it on the axle housing on the left side of this picture of a 3 piece transmission. The seal actually sits on the out side of the axle housing and the cap is about 1/4"...
-
1 pointDefinitely a 1962 by the front of the frame and screw-on metal dash. My money would be on it being a 552..... nobody replaces a Kohler with a smaller Tecumseh engine!
-
1 pointThe best snow plowing tractor I've ever had was my 1990 520H. I plowed with it for several years, my 400 foot driveway and my neighbors, with no weights or chains and it never balked. Had a 48" plow on it and even the 18" to 24" drifts didn't stop that beast.
-
1 pointThanks for the pictures lane ranger! The reason I am confused is because I don't think my axles have seals! I was looking but could not find anything. Perhaps this is why it is leaking? The hubs came off fairly easily, the one side needed some tapping with a hammer... I see that some sites like mowparts.com still have seals under the number 83-2840, would this be correct for my axles based on my photos? Those little jokers are 20 bucks each, so I want to get it right! Thanks again! eightlitermopar
-
1 pointI have an 857 I restored in 2001. She was a trailer princess until this fall when I put a mid-grader blade on it and used it to move gravel and backfill topsoil for my new garage. I felt kinda bad about putting her back to work The 857 is a great tractor.
-
1 pointI put 23x10.50x12 AG's on my C-145. After installing chains they hit the gas tank. I got some wheel spacers from Advance Auto and got some longer wheel studs. Now they clear.
-
1 point
-
1 pointNice. Regarding the pics.....Any chance you can email them off your phone to a computer and post them from there? I have the same issue on my phone and I think the only successful way I've done it was to upload them to a host site like flickr or something from the phone then download or post from there.....little bit of a PITA. That being said, I'm obviously not skilled in pilfering of phone pics.....
-
1 pointI love black pudding!!! there's a restaurant I go to that serves it as a starter with petit pois and a poached egg...
-
1 pointplowing snow 1985 314-8 mowing 1993 314-8 snow throwing 1979 C141 automatic tilling 1974 C-160 8 speed
-
1 pointThe 1st year I plowed with my Wheel Horse I had chains only. It did a pretty good job, but lost traction when I tried to move piles from previous snows. Once I added weight to the tires, it was unstoppable!
-
1 pointMy GT-14 had a stack when I got it. I made sure it was well supported and just left it on.
-
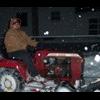
1 pointI want to ride my horse on a winters night in snow. I love cold winter nights. I hope we get snow!
-
1 pointGood to read your stories and recollections of the '50's in the U.S. I won't hijack or detract from the subject of Neil's Thread , only to say that I see so many similarities of situations, morals, principles and values to my memories growing up in those years. Having been born in '52' , I just about made it into this world after the end of Rationing (except for meat products) and so mainly aware of the later '50's. The important thing is to record your memories in some form or other for your children etc. Trust me , they will thank you for it. I value dearly , my memories of time spent with my Maternal Grandparents. More so because my Grandfather spent his later years writing his memoirs. I now have his words (converted to Word Doc) of his life, family, events and experiences from 1895 (he was born in 1891) to 1985 (he died in 1992). I read it very often and take great comfort from it.
-
1 pointCause it's cool, and it scares the heck out of the neighbors mwahahahahaha. (maniacal laughter) I love to fire up the 10HP puller with a stack and flapper and tear off down the road popping wheelies(yup got a wheelie bar) just to see the looks I get in the trailer park.... Then I'll hook up the truck to it and drag it down the road with the brakes on just to prove I can.
-
1 pointoffset is trickier with the rear mounted tank. I had to change the centres on mine to get clearance with 10" rims
-
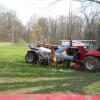
1 pointActually, I was on my way home from TN, passing very near to a breeder friend of ours who just happens to have a litter of 14. Since I haven't had a puppy-breath fix in a while, Alicia and I decided to stop in for a fix and a visit as they are just off of Rt 81 along our way. While heading to their house, I pass this place with a gaggle of WH's sitting by the garage. Figured if there were that many, they had to be a member here! Oh, and the closest the Member Map shows is Torino, but he's a bit north of Pilot, VA. And the curly tailed fellow is looking pretty good these days too!
-
1 pointI have ran into some of these Moron dealerships also, seems like more and more of them are becoming this way. For the life of me I can not figure out in todays tough economy why they would act this way. Seems to me that making a sale and satisfying a customer would bring them back for more sales. When we were a dealer years ago I remember my Dad and Granddad bending over back wards to make sure the customer was satisfied. After we closed the dealership we still had some customers come back for parts and service. With the net providing even more competition it's got to be tough. That's why forums such as this become more valuable than it really appears. If people are going to continue to use,restore Wheel Horse's. Parts along with knowledge will start to become harder to find. Red Square is not just a forum it's a very valuable to tool to those who work, restore and just plain mess around with Wheel Horse. To ever loose this forum would be a handicap to all who use it not just for socializing and entertainment but to those who seek answers.
-
1 pointjust come in from applying all the new decals. I'm very happy with what terry and i came up with.... a big thank you to terry for putting in so much work....... alright, the pics that maybe one or two of you have been waiting for........ because i polished up the paint, to help the decals stick to the paint i wiped down the areas where they were going with wax and grease remover. tackle the hard stuff first, terry cut these in half for me to help apply them around all the critical areas, you need to make sure the throttle slot, the steering and lift/motion control lever holes all line up. would be easier to remove the dash console to apply them in one piece, but that looked to be a bigger pain, so this is the way i went..... right hand half..... left hand half on, had to make sure to line up the halves and the red lines at the same time. again a pain to do assembled like this, but the decals are easy to pull up if you start getting off of where it should be.... rest of dash panels/ covers done, all holes /slots cut, gauges, switches etc installed.... started on the hood with the front, making sure to line up the ends/sides etc all even. approx. 1/4 gap all round decal. left hand side hood decal applied, try to juggle all the gaps to find a happy medium here, you will notice that the front and side aren't exactly in line, but i try to get the bottom gap right with each other and since the blackout on the front of the hood never lines up with the bottom of the side of the hood, you've got to sort of fudge it a little. i start at this point and get it how I'm happy with it and then follow the bottom of the decal/bottom of the hood margin the same all the way right to the back of the hood as i position the decal. pop riveted the hood catches. will paint the rivet heads black so they blend in..... plow decals on. we came up with a warning decal the same style as the lower dash/motion control linkage cover decal but with the wording from the late 70s plow decal..... i also wanted the 90s style id tag for this plow even though its a late 70s plow, i used the model number and serial from my metal tag.... seat pan decal on..... and a pic for steve, used the little stool quite a lot today! saved my back for some abuse another day, I'm sure there will be something stupid heavy to lift and screw it up a little more..... all done... ready for some snow.....lots of it, please......


This leaderboard is set to New York/GMT-04:00