
Leaderboard


Popular Content
Showing content with the highest reputation on 06/07/2013 in all areas
-
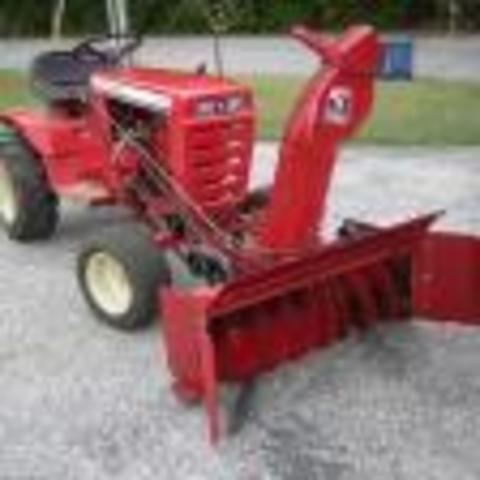
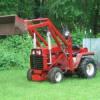
3 pointsOriginal motors in older collectable machines makes sense when your talking about value. An RJ is worth more when the original motor is in it over one with a yank start Briggs bolted to the frame (for example). The 520's in my opinion are just common easy to find newer machines and have not become collectors items, so most guys own them for utilitarian purposes (mowing, plowing, towing carts), not for any collector value. I think anything that makes the 520 do "its job better" is a great idea. Heck, I would venture to guess the value of this 520 would increase after the Honda transplant is complete. Just my opinion of course... Mike.............
-
2 pointsYou gotta be honest, hoping to get 600-1000 hrs from an engine does sound woeful. I know modern agri diesel's are different animals, but 1,000 hrs is the oil service interval on some. (Deutz German)
-
2 pointsThank you to all those younge guys who payed the ulimate sacrifice back then and are still doing so now . i visitedt the DDay cemetaries a couple of years ago along with a tour of the Beaches . To walk along the beach was very humbling At the American cemetary on Omaha beach you can look out over the ocean and it is a very emotional place . & let me tell you the cemetery is kept in an immaculate condition . The grass around every single headstone looks like it is cut with a pair of hairdressing scissors . If ever you get the chance to visit france , take a 3 day tour of the full history of the DDay landings , it will bring tears to your eyes to see the sea of headstones of thousands of younge men from every nationality & most of the deaths were from boys all under the age of 21 Thank you, but sadly in many ways we have failed them for what the world has become today .
-
2 pointsHere's the start of my project in the transmission threads -'79 C- 101 8 speed - going all out for a full restore -couldn't pull off the tranny work without Red square I'll be show'n her off when I'm done
-
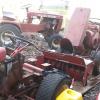
2 pointsYa I rebuilt this one............. NOT worth it. I could have saved money just going strait to this solution. so much quieter. more power. its ok though you shouldn't have one this nice.
-
2 pointsI imagine Steve may be home conducting laboratory experiments...as we speak.
-
1 pointMy intent here is to show lots of pictures so if anyone is rebuilding one of these or some of the others...you can do it without fear and I am adding some very helpful information. I had a post that lead up to this that has some information in it also, and while it overlaps, I wanted to do the rebuild separate. This post is meant to be used with the manual...the pictures help explain better then the pictures in the manual. Now I want to share what I learned as I rebuild this...I realize that some have done this, but this was my first time (transmission virgin) and I know I am not the last one to do this. If I can help or make this easier, then I have given back a little from all the help I have received from this site. Here are a few shots of what this looked like whee I opened the trans. Notice the 1/4" ball bearings on some of the gears. Those are from the #1533 bearings. This is a shot showing gear placement in the left side of the case. Notice the bevel of the reverse gear (front right). The left side is the shallow side of the transmission halves. These are the parts of the differential..the 2 casings on the outside, the 2 axles, the differential bull gear, the 4 posts and the pinions that go on these, and the bolts and nuts that hold it all together. I can't get enough looks at the gears before I tear it apart...next 2 pictures are for future reference. I found a good assortment of 3/8 and 1/2 sockets that made fair to good arbors for pounding out and tapping in most of the bearings and seals. These are the bearings and seals you need to do the R&R. You can get all the stuff from Toro or the site that Jason gave in the related post. One note...the Toro#1303 seal is discontinued. This is called a cup seal, because it has a cup shape. I replaced it with a kind of match (SKF #7410) same dimensions but more like a regular oil seal...it will work. This place used to be Berry Bearings in Elgin...now it is "Motion Industries"...the web site MotionMRO.com...they can match up any bearing or seal. Excellent info. and prices were very good. Shot of the bearings and seals removed, cleaned and sanded. Used Valspar Restoration series...I like the red match with my 702 and I like the hardness of the paint. Showing bearings and seals installed...notice (arbors on right). Putting differential back together...show axle in place with bolts in place. Added pinion posts and in 2nd picture...added pinions (alternating one up and one down). Added Bull Gear Added other axle and case and bolted together. At this point, make sure you can rotate the axles...they should rotate in opposite directions. Placing input shaft and gear (one piece) and the reverse idler shaft. Installed the 2nd & high shift rail and fork. (one on the left). Also installed both ball bearings, spring and stop pin, and low & reverse shift rail. The 2 sliding gears were then placed...the grooves face each other and the smaller gear goes on the bottom. I had a pencil magnet that I used to hold the 2nd ball bearing, while I took an Allen wrench through the hole to hold the bearing out of the way while I placed the low and reverse shift rail. the picture also shows the reverse idler and brake shaft in place. Another view showing forks and gears. Showing reverse idler (bevel up...I hope) in front. Splined shaft installed through the shift fork sliding gears. The cluster gear is then installed( 2 wood-ruff keys here...one on each end). Also, the differential and axles are placed (note the nuts are facing up). different angle yet one more angle Put together..old 5 gal wood create works great as a work bench (all shafts fit through and keep work level). Used a hard rubber hammer to tap halves together. No leaks when I filled with 90wt gear oil...approx 1 1/2 qts. Checked shifting and started to put the 702 back together today. A final picture or a video tomorrow (hope). I want to thank Rickv1957 Fan, MikeRJ, Buckrancher,Suburban550,IndyWH Smokin'Joe, the Helmett and Charlie for all their help and advice...a huge thank you guys.
-
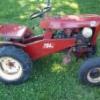
1 pointThe wife and I were talking about the panzer tractor that got away over coffee this morning. then when I did my morning CL search theres this T 70 Panzer a hour & 1/2 away owners states was main mower last year. so in the truck for a Sunday drive. when I get there sure enough theres still grass on the deck. starts first pull after he turns gas on. he shows me a later model Craftsman tractor & says he could'nt keep it running & the only thing he could depend on was the Panzer. the plow was on it cause he plowed the drive way this winter with it. I had to have it. so here it is
-
1 pointThat is all. Sent from my 416-8
-
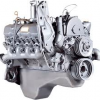
1 pointA Honda done properly will in my opinion make the tractor worth owning. The onan sounds good in person, looks good on paper, but frankly I would never own one. Not very durable and most do not make it past 1500 hrs without letting out a valve seat. The question is how will the honda age? A 520-H is not a collectors item, but rather that cadillac of all wheel horses. Its a shame a Magnum series twin was not chosen by wheel horse.
-
1 point...and your fiber output too.
-
1 pointBILL JENKINS 610-495-7822 cell 610-587-2920
-
1 pointThanks guys, it was the crab playing about... A good clean up of the carb had the 312 running sweet again.... Just in time for a rather heavy delivery yesterday.. And I even managed to get the rest of the lawn cut..
-
1 pointIf you can find an old bolens walk behind the hubs should work.
-
1 pointI tried to calculate the THEORETICAL running time of a 12 HP Kohler on 1 gallon of gasoline. Paramaters = RPM constant @3600 Gas = 6lbs / gallon Air = 100 gal per lb. Air / Fuel Ratio = 15 / 1 12HP displacement = 29 cu inches I get about 40 minutes per gallon (theoretical) ????
-
1 pointJimD I think you need to reduce your fiber intake...
-
1 pointIs this what you meant to say? If he removed the rectifier and the engine ran better, maybe the rectifier is part of the problem? I'm no electrical expert, maybe someone else can help out here. Another thought, when he cleaned the carb, did he remove the fuel needle(s) and clean them thoroughly? They may have tiny holes which should be run through with a tiny wire, or at least sprayed with a little carb cleaner.
-
1 pointBill Jenkins had a couple sets of Repros a few months back. I bought a set a couple months ago and they are top notch. Don't have his contact info handy, but i'm sure someone around here could chime in with that info.
-
1 pointNot a bad deal then Norman I wonder why Ians tractor was cheaper than yours , I guess maybe beacause it would take about twelves blokes to lift it LOL so it would be a liitle difficult to steal it .. I may just have to give them a call Thanx for the tip
-
1 pointToo funny!
-
1 pointI'll be bringing a 60 and a 61 Suburban. I'm trying to decide whether to bring my RJ 58 or Coles 854. I only have room for 3! I'm also bringing a set of weights for the Squonk and some Grants for Steve!
-
1 pointNext question then. All the electrical wiring we are concerned with plugs onto terminals on the back of the ignition switch. The wiring can either be captured in a single black plastic connector- or - if each wire to the switch is fitted with a single push on insulated terminal, the wires would not key automatically to the correct switch terminal and mistakes could be made If you have a single black plastic connector on the wiring, all wires would connect to the switch at one time and would (should) be in the proper orientation If someone wired in a new multi connector to replace a corroded one, they could have made the wrong connections to the new multipin connector. Do not go any further until you understand one very important warning. If you connect 12 volt power to the wire leading to the WHITE wire for the magneto kill function - you will burn up the magneto within seconds. Never let 12 volts find its way onto the magneto KILL wire. First off, we need to identify what ignition switch is currently on your tractor. There are basically 2 types we will be concerned with. One is for magneto engines and the other is for coil based ignition engines. A picture of the back side of the ignition switch without any wiring attached to it would be helpful for us to see - post it here. If not, I'll post a visual comparison of the two types you are likely to encounter as replacements. Correct style ignition (note terminal designations - No "I" terminal exists on a mag switch and the mag swith has an "M" terminal which the coil based ignition will not have) IF you have the correct switch and IF you have individual wires plugged into the back of the ignition switch, I believe you may have the trigger terminal of the starter relay incorrectly attached to either the "A or "R' terminals of the ignition switch. The starter relay trigger wire should be attached to the "S" terminal of the ignition switch. The Kolher M wiring diagram I posted also shows a "map" under the switch. The "map" calls out what terminals on the switch are connected together when the switch is in each one of its three possible positions. Look at the START function of the switch map. B+S means the BATTERY is connected to the "S" terminal of the ignition switch when the switch is in the START position - and only in the START position. The map show no connection to the "S" terminal to any other terminal in the RUN position, therefore your wiring is suspect. The only time the starter relay trigger (3rd terminal as you say) show have 12 volts on it is when the ignition switch is in the START position. This is at least one of your issues Your additional clarification of the symptoms has allowed us to make forward progress.
-
1 point
-
1 pointI plan on taking my 56 Ride Away SR, 551- rat rod and 701. I also have another tractor that is sold to another member who will be giving it a nice home. Will also bring a small dump trailer to haul parts and a bunch of parts for sale.
-
1 pointWow, lots of recommendations. I think I'll throw my 2c in. Trickle charger and a splash of sea foam.
-
1 pointLOL...let's hope so.
-
1 pointSteve might be Sportin a new Hawks shirt this year!
-
1 pointWhat a great recommendation Steve! I never knew there was a difference. Thanks for the clarity!!! I have trickle chargers on the bike and boat in the winter I now see I need a floater instead to make sure my batteries last
-
1 pointI will be bringing an empty trailer.
-
1 pointThis whole thread has been about gas, but a trickle charger was mentioned above. Better then a trickle charger is what is called a "Float Charger". The difference is a trickle charger can over charge a battery...a float charger maintains the charge. Chicago Electronic Power Tools makes them...model 37137...and I have them on all my horses. I have gotten at least another 2 years out of a four year battery so far...still waiting to see how long they will last. If I had a horse set for about a week without it, I would have to put a 10 amp charger on for about 15 minutes to start the horse...with the float charger...I just hop on and go...even this last winter. SEAFOAM AND FLOAT CHARGERS...EXCELLENT.
-
1 pointHere's my 854 this is the first tractor restore / rebuild I did this poor tractor had sat in a hedgerow for a long time when I found her after a complete tear down and rebuild last winter I built a stainless steel sickle bar mower for her Brian
-
1 pointI've had a 1975 D-180 for about 25 years and pretty familiar with some of its quirks. The forward/reverse lever relies on its pivot point for "feel" - where it pivots is a nut visable thru a hole in the side of the frame. Over time this will gradually wear/get loose? and the "feel of the fwd/rev is loosey goosey and the tractor will lurch fwd or slow down (the lurching fwd can be a bit scary) anyway, this nut needs to be just snugged up a bit - maybe a 1/4 turn (when you can feel enough friction so it'll stay in position) Last week when I used mine it 'lurched' fwd on me - rather startling - and I drove over to the shop and turne this nut about a 1/8 - 14 turn and went about my busness. No help on the engine dieing. This model is a brute of a work 'horse' I do stuff with mine sometimes that I cant believe would be possible - I love that thing.
-
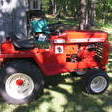
1 pointI don't think i really qualify for voting, But I'd love to put my 702 up. It is all original condition as far as I can tell, I never have wet sanded or done anything to it. The hood does not have one dent! The picture of it in the truck is when I first brought it home. It came from south bend from a older guy who collected bolens gt's. He is deaf but can read lips, he was a really neat guy and we have seen him at a couple shows. The 702 came with a mid mount grader blade, a mower deck, and a snow plow. My dad bought it and I thought I had bought it and was going to pay my dad back when I got home, he would not let me pay him as much as I tried and I thought he was going to keep it for himself. Chritmas morning came and the greatest gift yet came. I opened a container with a two prong key, I knew exactly what that meant. Attached are some picture of my tractor, this is my favorite tractor to hop on and cruise. It always fires right up, and I plowed snow with it this winter, and have graded the drive with it. I am hoping to hook up the mower deck in a couple weeks. Again, I don't think I deserve votes, just wanted to post the 702 as I've never really told the story on it. a link to some snow plowing pictures
-
1 point
-
1 pointMy vote is to put some non-ethanol gas in it with some type of staybil and run it dry when you are finished.
-
1 pointOK. I'm in on this one, with my 1963 33E Lawn Ranger. It came out of a cornfield in Greencastle, Indiana. Rear-end completely locked up, motor frozen, and generally in very sad shape. I paid $40 for it, and wondered on the way home if that was too much. It was always going to get a Kohler, but other than that the restoration started off as being a return to factory condition: But then one day some inspiration hit me, and I just had to bastardize her:
-
1 pointI just add fuel saver to mine and it sits that long and sometimes longer without an issue. Occasionally I add some Seafoam to the gas also. Maybe add a trickle charger to the battery if it's not newer.
-
1 pointYou can store it at my place, so we don't have to worry about an inactive horse! Sent from my 416-8
-
1 pointI remember Doc. Had a great time that day. In fact I am finishing up some stuff for Ken this week. Thank You. Your Mug shot Mug will see you in PA
-
1 pointFor consideration I present to you my 1963 Model 653, that I purchased from the original owner back in the fall of 2011. Here's a short video called "Passing The Torch" I made the day I picked up the tractor from Bob...not everyday you get to take ownership of a piece of history originally purchased 48 years ago...so, I definitely wanted to honor the opportunity with more than just a picture. h Bob stated to me that he actually had this tractor listed multiple times on Ebay, but couldn't seem to find anyone who would commit to purchasing it once they found out it was a Tecumseh powered unit...I guess their loss is my gain, because it's been nothing but a great little performer for me. I mean look at this little guy...hard to believe it's half a century old this year...and still going strong. The first couple of detail picts are the day it arrived here at it's new home...the rest are different configurations I've had it in over the past year and a half since I've owned it. We've definitely had nothing but fun with this little for sure...still mowing, and showing with the best of 'em.
-
1 pointWhen you get her all set up we can race
-
1 pointSo today I started to assemble part 38 Mid Mount idler Support. Started by laying out the holes on the 2"x3" square that I cut last night. Didn't have a 3/4" drill bit but I made do with an 11/16". This meant that I would need to grind 1/32" off of the circumference of the 3/4" rod to make up for the smaller hole. Really not a problem anyway as it made a stronger weld. With a 3/4" drill bit I would have just chamfered the end.Also if your 3/4" rod is coated you will need to grind that coating off for a good weld. Start by placing a small tack on the assembled parts. Use your square to check for squareness. Usually the tack will pull the opposite side as it cools. Take a hammer and tap the opposite side so you have a right angle. Weld that side. Go 90 degrees and check and make square by tapping with the hammer. Check to be sure and tack it. Check and tack the opposite side. Usually I make the 3rd tack and do the 4th right after if I was square to begin with. This squareness is the most important thing that will affect your later work. If it's not right at anytime your tacking,grind the tack off and adjust, then re tack. Once the inside has your 4 tacks you can weld the outside. It won't pull out of square with those 4 tacks. After welding the outside finish welding the inner. Congrats,your first sub assembly is almost done!Later we will add the 2 spacers and the little thingy (borrowed that from Ian!) that engages the tach-a-matic. I had time today to find part 15 Spacer No Longer Available from Toro or Parts tree. Tractor Supply Company had it with the pulleys. Pressed it into the pulley but after looking at the Diagram I may need to put it on the other side. Well that's about it and the pictures follow.


.JPG.9f2ecb26065c66527b0730084ab7fc7a.thumb.jpg.7dc8a04d9a53d44ee2b23f26ee94496f.jpg)


This leaderboard is set to New York/GMT-04:00