
Leaderboard


Popular Content
Showing content with the highest reputation on 02/21/2013 in all areas
-
6 pointsUnevenness or warp in the gasket sealing surface of a cylinder head may cause vacuum or pressure leaks in the combustion chamber. If left unchecked, cylinder head distortion may result in less than optimum engine performance and visible symptoms including oil leaks around the head area and possible blowout of the head gasket material. If hot combustion gases are allowed to continue to leak past the aluminum head, erosion of the aluminum gasket sealing surface can occur and render the cylinder head useless. The procedure below explains how to renew a flat(ter) surface on the cylinder head gasket sealing area to prevent defects in the gasket surface from destroying additional head gaskets or the cylinder head itself. Float glass is certainly not the end all argument for a perfectly flat surface but can easily provide sufficient flatness for the purpose of improving the sealing capability of a LGT tractor cylinder head. In preparation for renewing the cylinder head, a few common items will need to be obtained from local suppliers. The surface of an ordinary pane of glass makes a very suitable flat surface to perform this procedure. Several sheets of Wet/Dry 220 grit waterproof paper will be required. Water in a spray bottle will be needed to wet the abrasive paper to keep aluminum debris from collecting on the abrasive paper and clogging the grit prematurely. Wetting the glass pane slightly will allow the paper to "suction cup" itself to the glass pane when the cylinder head squeegees the water from underneath the paper. The cylinder head pictured below will be used for this process. This is a high compression head from a Cub Cadet 10HP Kohler engine. To observe the progression of material removed from the head, I apply a very light "guide coat" of black spray paint to the gasket sealing area of the cylinder head. Complete removal of the guide coat will signal the completion of the flattening process. First, establish a stable and flat surface on which to lay the glass pane. The float glass I used was 1/4" thick - pretty stout stuff. Edges of the glass were beveled for safety. Make certain the glass surface is clean. Any detectable residue such a grease, dirt or stickers on the glass will cause a dimple in the abrasive paper and prevent the cylinder head from renewing perfectly flat. I usually run a single edge razor blade across the surface of the glass pane to assure no residue is present. and onto the back of the abrasive paper. Allow the paper to soften somewhat so when flipped over, it will lay flat on the glass pane and hold the paper in place with "stiction" Flip over the abrasive sheet and wet the top side to allow aluminum particles removed from the cylinder head to float away from the abrasive and not clog the sheet prematurely Place the cylinder head gasket surface side down on the abrasive paper. I leave the spark plug in the head to allow for a better grip on the head throughout the process. Move the head in an even figure 8 motion across the abrasive paper. Apply a slight downward pressure on the head and inspect the progress every 20 or so figure 8 rotations. The downward pressure applied to the head is approximately what you would use if you were applying polishing compound to car paint. No need for excessive pressure here, let the tools do the work. After the first 20 swipes, inspect the head to check your progress. Notice the black guide coat is being abraded away on the "high spots" on the cylinder head. Another 10 to 20 swipes on the abrasive paper and inspect the progress. The blacked areas are the guide coat still present in low spots between the areas polished by the abrasive paper. Another 20 or so swipes and note how the shiny portion of the gasket area is increasing in size. Another 20 swipes And the final 20 swipes produces a gasket seal area without any evidence of guide coat left The head material removed during the process . The slurry produced from this process is also highly abrasive. You may want to keep the slurry away from any nearby hand tools or power tools. The final step is to gently wash away any silicon carbide material from the glass pane. Rinse the pane prior to wiping it down so as not to rub any abrasive into the glass surface.
-
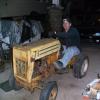
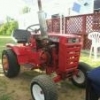
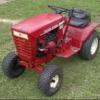
2 pointsMy two non standard Wh's.. 312-8 fitted with 26x26x12 Kubota tires at the back on widened rims, roll bar, ag tires on the front and a battery/weight box on the front... It's looks have changed a little over the past few days, but it will return to this set-up in a month or two.. And of course
-
2 pointsThanks for posting that, Don. I've been hearing about Townes for years, but never really took the time to check out his music... maybe it's time. Along the way, Townes influenced one of my long time favorite musicians, Steve Earle. Steve followed some of Townes' musical direction, and unfortunately some of his personal lifestyle choices also. Fortunately for those of us who enjoy his music, he came out alive and healthy on the other side, and is still writing and recording and performing on a regular basis. This is one of my favorite tunes from Steve's El Corazon album. That's Emmylou Harris on background vocals. -------- I'm glad this thread is here. roscoemi, just noticed your post, I'll have to wait until tomorrow to have a listen, but thanks!
-
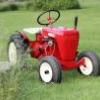
2 pointsWhen you go from this ... ... to this ... Up for consideration is my: 1958 Wheel Horse Ride-Away Jr. RJ-58 - s/n: 101916 See the full story of this tractor, its history in my possession, and the full restoration article: CLICK HERE
-
2 pointsHERE"S MY C195 Brian
-
2 pointsI'm posting this one for my son Ryan, this is his 1974 B-100 auto, we fixed this up for him a few years ago, it has a 8hp instead of the orig. 10hp that was blown up, but he is bugging me to put a 10hp back in it, this started as a $25 beater, this was not a full resto, but was 95% torn apart blasted and painted, he drives the snot out of it in the summer at all the local tractor shows, and does very well with it in the tractor games. What we started with And what it ended up as Winning his first trophy, he has won a few since then, he polishes and cleans it for every show in hopes of winning again.
-
1 pointhere is one i saved from the scrap yard, restored then sold on ebay to a guy that used it for plowing it didnt have a model like c- or d- or anything like that, it had a kohler 8 horse? i think and it was 3 speed forward 1 reverse. oh yeah and decals came from redo your horse i do believe,,,,,this was a long time ago haha it was painted with ih red from tractor supply, the valspar stuff
-
1 pointBecause this post has suffered from apparent "site upgrade issues". the pic of the plate glass thickness has not yet made it into the post. The plate glass used in this post is 1/4" thick with beveled edges to protect the user from cuts and scratches. Don't let this process scare you away. You are not "milling" the head, the last time I looked, 220 grit paper is not a good substitute for a Bridgeport milling machine. The process I described abrades off less than 0.002 inch in most cases. The pressure needed to accomplish this is equivalent to compounding a new paint job. Don't rush, let the tools do the work. Just use the common sense any first year 9th grade shop class noob would use. If you do attempt to gorilla the process, the abrasive paper would simply push off the glass before the glass plate would crack. If you trip and fall on any tools laying around your shop, that one's on you!! A table saw surface is certainly an option. For those who believe all table saw surfaces are flat because they are "machined" probably have never checked theirs. Most manufacturers find it "acceptable" if their machined tops are within 0.003 inches these days (less than what we are trying to achieve on the finished cylinder head). I included a picture of the residue from this procedure to confirm this is a very "dirty" process with abrasive material released from the wet dry paper. I personally will not take responsibility to recommend using a fine tablesaw to accept the residue off this process. Right tool for the right job, etc. In the end, your tools, your choice. Finally, a piece of plate glass is much easier than a table saw to carry to a neighbor's house to help with an engine. And all said and done, plate glass is squirrel proof and after your are finished, it can be easily stored in your shop. I'll be happy to address any further concerns about this process. Chuck
-
1 pointFor an initial "Does it charge?" test get a reading directly from your battery posts. Take a reading with the engine off, and compare it to a reading with it running. If the running voltage is higher than the non-running voltage, then you are charging.
-
1 point
-
1 pointAnd you can be assured that the table saw top is true (flat) because it is machined. Also, you don't risk breaking the glass. Unless the glass is placed on a completely flat surface, the downward pressure that needs to be exerted on some heads while you "mil" them, can crack the glass.
-
1 pointThey say "Cowboy's High Horse"Guess that's where the expression comes from? "Livin' high on the Horse!" :smile:
-
1 pointHere are a couple pics of my custom C161
-
1 pointHello again guys. I thought I'd add this drawing that my girlfriend drew of me on my little raider 10 in the snow back in January. I'm pleased that she is starting to find a new love for them and she now wants her own horse. That's a drawing of the following photo..... Thanks Charlie,
-
1 pointNice, another Gene Logsdon fan!
-
1 pointPoor mans power steering: A needle roller between the axle and the spindle. And skinny front tires might be a big help. Gear reduction steering pieces bring big dollars.
-
1 pointTwo of the best guitar players ever.
-
1 pointThanks guys for the replies thus far. I knew there were some electrical guys on this forum that have had to sift through the code, so figured I'd exploit your wisdom for my gain. I'm not lazy, but reading through the code just wasn't as simple as I'd hoped. And I have a better-than-basic knowledge of how to wire things, but making stuff follow the NEC always requires advice. I hadn't considered using the bundles SER cables mostly because I fear someday someone else in my household might hang something on the wire bundle or compromise it in some other way. And with a 60+ amp breaker "protecting" the bundle, I figure it would take an aweful lot of energy to blow open. I've never used plastic conduit for anything other than outside work. I didn't know if there would be restrictions inside since to me the codes aren't always elementary or intuitive. It sure is cheap stuff, that's for sure. i went ahead yesterday and mounted the box to the wall. Other than some knockouts I removed for the wires being fed by the box, I haven't poked any big holes out yet, so can still do about anything to connect it to the main service. Since I move at a glacial pace, it will probably be a few weeks before I bring power to the box. So I still have time to think about things. I have wired in a lot of stuff at work over the years, mostly 3-phase but don't need to do much at home. Even simple hook ups seem to take forever for me. I'm always amazed by you guys who do these things for a living at how fast and efficiently you can work. While I'm still standing there trying to figure out what size wire to use, you've already run conduit and pulled wires. While I'm staring at the diagram on a transformer trying to decide what terminals to use, you're doing final cleanup. When I'm trying to strip the jacket off a SOW cord, you're already on to the next project. I've always figured if I had to do it over again and pick a trade, it would probably be electrician. Thanks for the help! I'll be asking again hopefully this spring when Dad and I finally pipe power down the hill to his barn. Steve
-
1 pointThanks Dave! I don't have a clue but, I have seen these pins in the past. I removed them from theHorse shown. Should I replace 'em? That's the question. My bank barn is 1850, 18" stone walls, lofts, ladders, more. Been in restoration for 10 years, More than liveable these days.
-
1 pointMY stretched B80
-
1 pointthis is mine, commando V8 now powered by a 16 hp. briggs twin. all kinds of 50s touches, louvered hood, winged orniment, piston shift knob,stainless twice pipes. soon to have a SS.battery box,fender pan painted & a funengineer black & white tuck& roll seat cover. been working on it a couple of years off & on, but i realy want to take it to the big show this year. heres how it looked when i bought it as a parts doner for my charger V8.
-
1 pointTime to add a new song Townes Van Zandt cover of the Rolling Stones song, Dead Flowers. Great singer but was troubled by drugs and alcohol. passed away at to young of age of 52. http://www.youtube.com/watch?v=RYRj4mRzjNo
-
1 pointHere is a picture of the rims that will go on when it's done:
-
1 pointbecause i inherited this one from my grandpa
-
1 pointFor consideration is an original unrestored 1989 312-8 that I purchased new in June of 89 along with a 42" S D Deck, Chrome Wheel Covers and a Vinyl Tractor Cover made by original Cab company. This Tractor was mainly used for mowing and also snowplowing for a few years, currently used with a front mounted Dethatching Tine Rake as evident by the Transport or Lever Bracket above the left front axle. The only parts that have been replaced other than maintenance items are The Seat, 2 Front Tires, Clutch/Brake Interlock Switch and upgraded Footrest Pads to the Deluxe Pads. This Tractor has had a very good life in the Garage when not in use and has served me very well, currently with 514 Hours. It is hard to believe I have owned this for almost 24 Years and is also responsible for starting my wheelhorse addiction and shares Garage Space with a 1984 C-165, 1986 417-8 and a 1991 520-H and by the way the 520H got quite a workout here in Maine Today. Thank You for your Consideration!
-
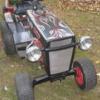
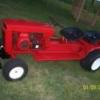
1 pointThis was one of the many versions of my "RAT" Gasser and the incarnation I should have left alone IMO... this version went to the 2011 Wheel Horse Show and played its part well. Made up of a 60 Suburban front end, Early RJ58 tranny, high Rat Rod shifter, White header dump, Blue Clone Power and the evil "666" on the hood...
-
1 pointwell i'll take a stab at it. This is my 400 suburban. I bought it cheap from my local dealer, it was out behind his shop covered completely in vines. I pulled the vines back and knew I had to have it. It looked like crap. some would have left it there to rot. Took dad and I 4 years or parts gathering, E-tanking, sand blasting, priming and painting to make it look the way it does now. I do have a plow blade, sickle and a mower deck that need work for it they should be done this summer!! thanks for looking.
-
1 point1977 B-100 8-Speed
-
1 pointFigured I would enter mine too.... 1956 RS-83
-
1 pointHeres some up dated pictures I do have the stock rear wheels and tires just looks better this way.
-
1 pointYou're so close, don't miss it: Their Web Site is: . . . .www.WheelHorseCC.com You'll find every model of Wheel Horse, many are perfect restorations, some are just as great workers, lots of unique modifications and tons & tons of parts, really just about everything you could be looking for. Bring lots of questions because all the answers are there, you can talk with the owners on how they fixed or made parts for their tractors, probably the exact same model you have. It's really a lot of fun, both on Friday and on Saturday, and even more fun if you bring your tractor. The show is free as is all the information; food and tractor games going on, all day into the evening. Seemed like 2,000 people and probably close to 1,000 tractors & parters last year, and just Wheel Horses.
-
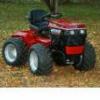
1 pointIts been suggested to post these here so I will put a few of each up. These were built during last fall and this winter. Was kinda fun building something different for a change. Have no fear as I am back to building horses again! The Red Cub is a 582 special with the twin 16 hp Briggs- to date this is the nicest -smoothest- Best "seat of the pants" feel out of any of the 4x4's. Here's a shot of my boy test driving the 318 JD just after we had about 10 in of snow this winter. The JD is now running a 16hp K-series , sports its original power steering. Its OK for a Deere! And here's a shot wrapped in fresh green n yeller.
-
1 pointWow that would be rough on our hills with that solid mount front axle. Here is ta link to it.


.JPG.9f2ecb26065c66527b0730084ab7fc7a.thumb.jpg.7dc8a04d9a53d44ee2b23f26ee94496f.jpg)


This leaderboard is set to New York/GMT-04:00