
Leaderboard


Popular Content
Showing content with the highest reputation on 09/12/2012 in all areas
-
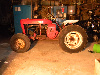
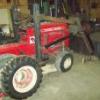
2 pointsim almost finished restoring my 551, i need to order my stickers and finish rebuilding the motor. im using my honda motor till i can finish the rebuild then ill swap the hood stand with the one i have that hasnt been cut. ill also need to find or fabricate a few items heat sheild, belt gaurd, plow mounting bracket, key switch and choke & throttle. anyway all in good time i guess. Hope you all like it.
-
2 pointsA guy stopped by last weekend and said he had an old Wheel Horse snow blade laying in his barn for the last 10 years or so. Said he wanted rid of it for $50.00. I said I'd take it sight unseen. He went back home and picked it up and delivered it to my door. I asked him if he had the bracket that mounted to the rear axle of the tractor. He said it was still bolted on his old WH. He went back home and took off the quick attach bracket and also found the snow chains for the rear tires. He brought the stuff back and we were both happy then! This snow blade looks like an early 1980's model. It looks to be in great condition without much wear and tear on it. He said he only used it a few times. I may bolt it up to my 310-8 machine and see if we get any snow this year! Hammerhead
-
2 pointsHey everybody, there is a nice tractor show in Centerburg Ohio this Saturday and Sunday. I will have a huge display of Wheel Horses there and hope to see some other Redsquare guys show up if possible. I know it's kind of a late notice. But it is a nice show to attend in the geographical center of Ohio. State Route 3. I will have about 14 WH's there and my WH collecting buddy Packrat will have 8 or so Horse's there including his monster 7763 double engined beast! So if ya get board this weekend, head on down to this nice Farm Days Show. Here's a pic of last year!
-
1 pointSo, I don't really have my 854 running that great yet, but did at least get the gas tank sealed so it doesn't leak every where. Still, I couldn't help but keep an eye out for some attachments for it. A guy posted a red cultivator on a "green" forum and didn't know what brand it was for, and I thought, by gosh, that looks like a setup for a slot hitch! I searched all over here and didn't find any pictures that looked quite like it, but did find some literature for an AC-6 cultivator and I think this is the later version of it, minus the depth wheels. When I went to go look at it, I showed the guy the copy of the AC-6 brochure and he said, "you know what, I got a plow the same time I got that thing, and I think it has the same style hitch. Would you be interested in it?" It threw me for a loop because I didn't have any of the plow info printed out, but made a deal for the pair anyway. I'm still not having much luck in finding any info on this particular model plow. Anybody know what it is? On the back of the moldboard it says "BRINLY 8", so I know it is a Brinly 8", but I'm not sure if it was actually made for Wheel Horse or not. At least it's the right color, and it does mount in the slot hitch pretty nice. I can't wait to try it out!
-
1 pointdo a compression check it sounds like the valve seat might have come out. does it loose power under a load when it starts to miss ? is it spitting gas out of the carb and run better with the air cleaner off ? if this is the case then it is the valve seat let us know what you find and i"ll give more advise where to go from there. eric
-
1 point8 speed B/C Parts manuallists (b-60 ..b-100 included) item #6-41 in diagram "clutch return spring" part # 1014. I was unsuccessful locating that part on my sources, but saw one at auction w/o # and wouldn't take a chance on it. Mine: C120 lmeasures 4 1/2 " coil (5 1/4" hook to hook) and approx or = 5/8' diameter. One of thes members will have a good spot and I'll look around meanwhile. Thanks
-
1 pointa 1075 is a short frame big block tractor. the long frame's did not come out untill 1966 . i believe the 875 and 1075 are the same basic tractor. except in order to install a 10hp kohler in a short frame tractor correctly , it needs a special shallow oil pan style engine. there is a few other parts dedicated only to the 1075. besides oil pan for sure, im not %100 positive but i think the belt guards , air filter, and maybe the hood is a touch longer for clearance. or maybe im thinking about the 854 on the hood. maybe just the dash tower on your tractor is from a 875. someone else will chime in with the complete correct answers.
-
1 pointActually the tecky runs great
-
1 pointWell I ( and my 8 yr old daughter) tried the aluminum foil on rusty chrome ...well I'll be, it actually worked fairly well. I am posting 4 photos , the first two are the hubcaps before cleaning and the other two are after cleaning. Also I should mention that my daughter(did I mention she is 8) did one of them and I did the other. What a lil helper she is(sometimes) LOL. One other thing to add, we only spent about 10 - 15 min on each one and these have NO polish on them.
-
1 pointIf the gears are the same I would just go ahead and use the best gears available. The gears in our transmissions are straight cut gears that will mesh OK. In the automotive world with gears cut on an angle and hypoid gears etc you can run into problems with the wear patterns. But on a garden tractor with probably only a couple of hundred miles on the gears, wear patterns arent really an issue. Our biggest problems are usually due to pitting from water in the trans, I dont recall ever seeing a sigbificant wear pattern on a tooth from mileage.
-
1 pointWhat do you guys think of this? Building and Using a Leakdown Tester by Mike Nixon A Better Way Everyone remembers how to do a compression test: screw in the tester, flip the kill switch to "off", hold the throttle wide open, and press the starter button. The cylinder takes in air and compresses it, and the tester traps it. The maximum is reached when the gauge holds more pressure than the engine can produce. The weakness of this test is that throttle position, engine temperature, ambient air temperature, and a host of other factors can make the results vary considerably. What's worse, a compression test checks too many engine components at the same time. A poor reading can indicate so many things, it's hard to tell which engine part is at fault without doing a lot of other tests. A leakdown tester avoids this difficulty. Air is pumped into the cylinder from an outside source, and the gauge reads the percentage that escapes, which not only eliminates all of the aforementioned variables, but as a bonus, makes it a simple matter to pinpoint the source of the leakage by wiggling and rotating engine parts while the test is underway. "That'll be $1,500, and uhh, it still smokes." But how does it work in action? Okay. Let's say your brother-in-law rebuilt your engine. You've suspected that the guy is mechanically challenged, and sure enough, the finished product smokes like a chimney. But he's your kin, so... Finally, you have a shop look at it. A good compression test combined with the smoking leads them to a diagnosis of trashed valve guides. Seems reasonable and you approve the work. And the engine still smokes. Now you really have a problem, not to mention the shop, and your brother-in-law. Enter Mr. Goodwrench, who produces a leakdown tester, and performs the following test. On each cylinder in turn, he sets up the tester and reads the percentage of leakage. They're all good and low. Hmm. Undaunted, our hero retests each cylinder, but this time he lowers the pressure setting on the instrument, and, rotating the crankshaft a smidge each time to slide the piston down the bore a little, picks up the problem, plain as day. On the #4 cylinder, the gauge now reads 60% leakdown when the piston is partway down the bore, indicating cylinder damage, which the teardown verifies. Seems your brother-in-law didn't get one of those pesky wristpin circlips all the way into its groove. It subsequently popped out, and the wristpin wore a handsome trench into the cylinder wall. Why didn't the shop find it when the head was pulled for the valve job? Because two of the four pistons were at TDC. Why didn't the compression test pick it up? Because despite the trench, there is still plenty of cylinder area (the pin is more than an inch below the deck) in which to build adequate pressure for a compression test. WHOOSH! Leakdown testers are way cool. Not only does the amount of air escaping from the cylinder register on the gauge, it can also be heard, enabling the source of the leak to be pinpointed prior to the teardown. For example, high readings accompanied by hissing in the carburetor indicate burnt, tight, or carboned-up intake valves; the same thing in a muffler points toward--you guessed it--exhaust valves. A breeze coming out of the dipstick hole on the other hand indicates worn or heat-softened rings. And air escaping from an adjacent spark plug hole pinpoints a blown head gasket. Not For Everyone There's a catch, of course. You need an air compressor to use a cylinder leakdown tester. And, you need to now how to find TDC (top dead center) on the compression stroke for each cylinder that is tested. Can you do it? Sure. If you can adjust your valves, you can use a leakdown tester. Rolling Your Own Ready-made leakdown testers are easy to find today. You don't have to mortgage your house to a Snap-On dealer. So, if you are concerned about the condition of your engine but aren't into making things, or don't have the time, you can buy a leakdown tester for about $75. If on the other hand you have an air compressor that sort of implies that you're a certified tinkerer. You're probably also into making things, and for you, throwing together a leakdown tester is no big deal. Here's the rundown: The pressure regulator This is designed to be screwed onto an automotive paint spray gun. Grainger's is probably the cheapest, followed by Sears and Ace Hardware. The gauge that is often attached is, unfortunately, the wrong kind for our purposes. The pressure gauge Get a quality, back-mount, 0-100 psi gauge. As of this writing Grainger has the best deal. For the professional touch, carefully pry off the bezel and cover the faceplate with a copy of the label shown here. The spark plug adapter Make this by clamping an old 12mm plug in a vise (protected with wood or aluminum stock) on the hex--not the threads--and whacking off the porcelain with a well-aimed lateral hammer blow. Then grind off the rolled-over seal above the hex, grind off the ground electrode, put the plug back in the vise and drive out the remaining porcelain with a drift (if hard, the rolled seam hasn't been sufficiently removed--on some plugs you must grind partway into the hex to completely remove the seal). Tap the hex end with a 1/4" pipe tap (NGKs are hardest to tap but seal the best afterward). Screw the bugger onto a 1/4" to 1/2" pipe reducer, and that onto a 12" grease gun hose (about $5 at Wal Mart and just about anywhere). The damper valve This necessary part is merely a restriction between the regulator and the gauge. The easiest way is to plug the middle pipe with epoxy and afterward drill a 0.040" (#60 or 1mm drillbit) hole. Using it Adjust the cylinder to be tested to TDC compression (all modern inline fours firing orders are 1-2-4-3). Plug your tester into an air compressor line and adjust the regulator to get a "0" (or 100 psi, if you didn't remake the face) reading. Screw the hose into the spark plug hole. Connect the two. If the crankshaft turns or you hear all the compressor's air rushing out of an obviously open valve, the cylinder wasn't set exactly on TDC compression. Try again. When you get it right, the piston will stay put and the tool will indicate the amount of air that is escaping from around the rings, valves and head gasket of that cylinder. All cylinders leak a little. Large ones leak more, smaller ones less. Racing cylinders lose only 1 to 2%. Production multicylinder engines in top fiddle pass 5% and less, and no more than 10% regardless of the mileage. More than 10% leakdown means there's something wrong. YOWIE! In the event of a high reading, first take the time to double check that you are in fact at TDC on the compression stroke, not on the exhaust stroke (where both valves will be open). If that checks out, and the leak is (as it is usually) a valve, remove the valve cover and, with a hammer, carefully tap on one or both of the rockers for that cylinder, watching the gauge as you do so. This will often loosen carbon from around the valve and the reading will drop to a reasonable level. Parts List


This leaderboard is set to New York/GMT-04:00