Leaderboard
-
in all areas
- All areas
- Markers
- Marker Comments
- Marker Reviews
- Articles
- Article Comments
- Article Reviews
- Classfieds
- Classified Comments
- Classified Reviews
- Wiki's
- Wiki Comments
- Wiki Reviews
- Blog Entries
- Blog Comments
- Images
- Image Comments
- Image Reviews
- Albums
- Album Comments
- Album Reviews
- Files
- File Comments
- File Reviews
- Posts
-
Custom Date
-
All time
November 28 2011 - April 26 2024
-
Year
April 26 2023 - April 26 2024
-
Month
March 26 2024 - April 26 2024
-
Week
April 19 2024 - April 26 2024
-
Today
April 26 2024
-
Custom Date
08/07/2018 - 08/07/2018
-
All time
Popular Content
Showing content with the highest reputation on 08/07/2018 in all areas
-
15 points
-
14 pointsAttended the Yesteryear Power Club show this past Saturday in Clay City. Was my second year attending the show. It is not a large event but fun. This also is the third time taking Horses to a show for me. Was able to get Best Lawn Tractor award with my 701 that has sickle bar, HL-5 lights, tombstone weight, and trailer hooked up . First time winning an award with my tractors. Was very surprised as there were over 35 garden tractors. Many of the garden tractors there were restored and very nice looking. My ole 701 is all original except the hood which someone painted before me. Wheel Horse had the biggest turn out having over half the quantity of garden tractors that attended. This was also the second year straight that a Putnam County Antique Tractor Club member has won the award
-
8 pointsI've been dreaming of a new shop space to work on tractors and generally store things at my house. We already had a three car garage on the house and could only fit one vehicle in it due to the large space that kids toys, bikes, zero turn mower, shelving and a workbench already occupied. Well.. that stuff and a few or so little garden tractors... but they don't take up that much space, right? Anyway... we'd been talking about building my dream shop for several years. We live on a large in-town parcel, so there's plenty of room, but as with most things, it comes down to when it can fit in the budget. I drew it up several times on the building designer at Menards dreaming of when we could go forward. Well, in the early 2017 we decided to go ahead with it, and I came up with my final layout plan. We proceeded under the option of build the shell, and finish what we can later. We went over and over the list of things to do now and later. Things I wanted that had to be done now for sure were the rough in for the in-floor heat and the attic trusses. I had a contractor friend who would GC and frame it for me if I bought all the materials and he could do it on his own schedule. Yep, done. I figure I could have built it myself, but it would have taken most of the summer of every night and weekend, as well as the headaches of arranging the subs for the stuff I couldn't do, but if he could do it, and he has all the contacts/subs already... I'm money and time ahead to work some extra overtime and avoid the headaches. The previous owners of our place had a gravel RV parking next to the house. The old poorly done timber walls were deteriorating and leaning with age.It was convenient for parking the trailer, and nice when the kids were little that we could park off the driveway so they could play, but every year inevitably it was always a weedy mess by mid-summer. Step one, remove ugly timber wall. Lucky for me my neighbor had an chainsaw with a garbage blade on it. He came over and we were able to cut the wall into 12 ft sections that we loaded on the trailer for the dump. Next, met with our contractor friend to stake and mark it out. Since part of the goal was to reduce the amount of gravel, the equivalence of one car parking space was being removed and returned to grass on the left edge. Then just before the excavator was to start work, the kids and I did a little groundbreaking for the big project. Some gravel removed and sand base laid down and compacted. Concrete guys laid the forms for me on a Friday night so I could lay the insulation and pex for the in-floor heat. Like any kids, the call of the sand pile was irresistible. Next day I had help to lay the insulation boards and pex. Might seem silly to see two people carrying these boards that weigh all of 2 lbs each... but notice all the pavers? I'd been hoping for good weather to do the insulation and pex..... what I got was great temperature, bright, sunny......and 25 mph sustained winds with 40-50 mph gusts. So.... two guys to carry each flippin' board and weight it down. Ugh.... made the process much longer. Got the pex down, which went very smoothly. Three zones, stapled to the foam board. Monday morning I get a call.... inspector won't pass it because there's no pressure test on the pex. Ugh. Nothing about that in our building code, but what am I going to do? Project can't go on without his initials. So... I build a pressure manifold, tie all three zones into one long line and charge it up. Tues morning, concrete guys are onsite... inspector shows up and says ok. By the time I get home from work, I have a new slab. Lumber pack shows up the day before the family and I are leaving for a week at the cabin. When I pulled out of driveway, construction was underway. We got a few progress pics through the weeks from various friends. And I returned a week later to this. Totally the best way to build a shop! I was out of his way, he was out of mine... worked out perfectly. I installed the overhead doors, had the electrician come and trench the electric over. Got the gas line roughed in for the boiler as well while the trench was open. After that, the excavator came back with the final top dress for final grading. We bit the bullet and decided to go with sod right away. Even got the kids to help for a little while. Couple of neighbors (one of whom happens to be a professional landscaper) came over the chip in too, and three pallets later.... Now we're at slow progress time. I bought all the construction materials on a Menards 11% rebate, so once I got the rebate check I started to finish the interior. Got the vapor barrier up, and ceiling rocked with 12 foot 5/8" type x. 105 lbs each. Ugh. Thank God for drywall lifts, right!? More rebate checks allowed for the insulation and rock for the walls. Then we came to a complete standstill..... got enough stuff moved out of the house garage to get both the car and truck in for the winter, but with no heat and no ceiling insulation the shop was just a big storage box for winter. Spring this year rolled around and prioritizing shop work made it to the list. I realized it's going to be much easier to get the interior done before I move in. So... started back at it. I got the floors masked off and got tape and mud done... then the girls helped me paint. Did the floor with Rock Solid polycuramine kits from Menards... grey with flakes and a textured topcoat to make it less slippery if wet. This is a long and multi-stage process. First it required renting a diamond grinder and grinding off the curing sealer. Then powerwashing three times to remove all dust and debris. The base coat went on, cured for a few days, and topcoated three days later. Then I let that cure for a week before moving in. It's supposed to be cured in 24 hours, but why rush it if not necessary? Finally ready to move in. Got some used kitchen cabinet take outs and installed them for the workshop area. Really looking forward to getting stuff organized and cleaned up now. It's totally a dream come true. Still have to buy and install the boiler and get the ceiling insulated... but those are things that can be worked around. Up until this point it's been much easier to have minimal stuff in the way. If you made it all the way to the bottom, thanks for taking the time to read it. Get more done, have more fun!!
-
6 pointsStill waiting on word back on the charger 12....... Then this popped up. Just couldn't pass it by sooooooo. I pick it up tonite. Comes with a snow blower. Tranny pops out of gear. That's fine with me. I've rebuilt two 8 speeds an a 3 speed. Think I'm getting the hang of them. And yes my wife still loves me. She's even coming for the ride
-
6 pointsI finally got the 8" front wheels on the 312. Maybe over the winter I can find tine to paint the 42" deck. Mowed with it tonight and it mows great. I still need to add a little toe in on the front since switching out the front. Here are a couple of before and after pics with the new wheels and deck.
-
5 pointsTaking a “bathroom break” for a couple days, on account of good behavior I suppose. My German kid Jil is in town for 3 weeks and she hasn’t been on the buggy for a couple years, since the suspension and Subaru upgrades. Well, I thought I had a couple cracks to take care of, ends up after I took the side panels off and started looking around, I don’t know how the front end hasn’t broken off the car! Doing a bunch of repairs this week, along with reinforcement to transfer power and suspension shock through the chassis a little better. After all, the car was built for about 40 horsepower, now there’s about 165 ponies out back. Everywhere that has green tape, along with some other prepped areas, need repairs. We are also prepping for the replacement front seats, going from fiberglass molded seats to suspension seats and 5 point harnesses. It’s good to have help in the shop this week!
-
5 pointsMy friend Rodney Burger just bought two pair of Carlisle 6/12 Farm Specialist rear tires for his Wheel Horses. First time I ever saw these. Sold on Ebay!
-
4 pointsI'll let you know if it works or kills me. The logging mule has received its latest mod.
-
4 pointsI inherited my first Wheel Horse, an 312-8, from my brother, who happened upon it in his travels. It didn't appear to have been run in some time as it sat outside with weeds growing over it. After about 30 minutes we had it running. Needed a new fuel pump ($17), fresh gas, and a little WD40. We spent a good couple hours freeing things up and putting tubes in back wheels and she runs like a top. More to come...
-
4 points
-
4 pointsRick Give me a call if you have issues or mess one up. I will send a replacement if needed. Terry aka(Vinylguy)
-
4 pointsWow. That is just what I have been dreaming of for the last twenty years. However, whenever the idea is floated, the wife always gives it a thumbs down with a "why don't you just get rid of some of your junk? Building a bigger building will just encourage you to get more". Well duh!? Anyway, great building Jason.
-
4 points
-
4 points
-
3 points
-
3 points
-
3 points
-
3 pointsI put a pair of those on Skonk. Bought them down the street at my tire store.
-
3 pointsI've always thought that would be the best rototilling tractor, with an 8-speed and electric lift seems like it would be a great combination!
-
3 points
-
3 pointsHere's a couple pics from the top of Big Spencer Mountain
-
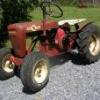
3 pointsAs a side note, I somehow manage to keep finding myself more projects to do. Especially when I already have too many projects and not enough time! But this followed me home the other day, Im not sure what I want to do with it yet. I believe its a 1077.
-
3 pointsW/H made the Charger 12 from 1968-72... That's 45-50 yrs old. The Sundstrand auto is model 90-2046 (if original) and actually not too difficult to service, if needed. The tuffest part is just refinishing the internal parts of the pump to restore the hyd pressure. Not difficult, but time consuming to do it right. I've done 8 or 10 of them over the years and have the same 90-2046 unit in my '72 Bronco 14. To do it yourself...with new bearings & seals...probably < a C note. Here is a pic or two of the guts of the 90-2046 unit: I have SOME spare parts, if needed.
-
3 points
-
3 pointsTerry customized my order for Putt Putt, for a rediculously cheap price... not that I’m complaining. I feel though, like us as customers get the better end of dealing with @Vinylguy every time! It must be that he just enjoys what he does
-
2 pointsMy wife wants to have chickens. We can't have them where we live. As a joke a while back I bought a couple of metal chicken lawn decorations and planted them in a flower bed and waited for my wife to see them. Took a while but she got a good laugh out of it and named them after a couple of neighbor's that moved away that we miss. I found another one and didn't tell her again and she finally found it and joked they were multiplying. I named it Ralph after my retired next door neighbor engineer. Picked up a big ceramic Rooster on my way home the show. She named him Homer as he's what you see when you get home. It's our 30th Anniversary this weekend so I got her a coop and we made a little display in hope that someone sees it and turns us in for having chickens. @stevasaurus thought of The Dead Chicken Society but since these were never alive in the first place I un gruesomed it a bit. Hope to get some good laughs out of it. We'll do more landscaping after it cools off!
-
2 pointsIf you need to remove the steering wheel then you will have to remove the roll pin as Cleat stated,Keep in mind that the steering shaft is located by thin metal and any heavy hammering can cause serious damage.I have had more than one that in order to get the roll pin out I had to take the upper hood stand off and remove the steering shaft.Take the assembly to a solid surface,support the shaft and use a BFH to get the pin out.If you are doing a full resto then it may be worth the effort but if you want to use the machine then you may want to think about opening up a can of worms for things you really don't need.A tach on a governed engine tells you what? I honesty believe the gauges WH mounted on the 520 were to add to curb appeal.
-
2 points
-
2 pointsOk so correct me if I am wrong, the clutch needs to be let out fully and then check the belt tension to ensure it is snug or would need slight force to flex it, correct?
-
2 pointsI would use low range on that for safety and easier gear reduction movement. if you can, also reduce the entire log dragging on ground, with a curved metal skid up front , that would help a lot. I have used old wheel barrel shell as a sliding skid on front of log, also used a car hood, either of those would give you the mechanical advantage, good luck ,pete
-
2 pointsThat's great! Just shows that sometimes nice originals can outshine a restoration paintjob!
-
2 points
-
2 pointsWith the clutch feeling full spring pressure it should take slight force to flex the belt. The belt guard is your friend in keeping the belt in place and allowing you to clutch it without grinding gears.
-
2 points
-
2 pointsBeen really busy lately, but I managed to find some time and get a mower deck I have mounted today. Just waiting for a new pulley to get in, and ill try it out!
-
2 pointsHello there! As @953 nut and @wallfish mentioned, the electrical system needs troubleshooting. A $20 volt/ohm meter will bring you a long way in electrical. Using the continuity setting, like an arrow againt a wall, you can test to see if a switch is making a connection or not. Voltage is just looking for a channel to run through, you are making sure the gates are in the correct position to allow the voltage through.
-
2 pointsThis is gonna be one COOL machine when finished! I really like what I’m seeing so far Richie. Very good call on relocating the front axle, I know that it is extra work but worth it in the long run.
-
2 pointsBeautiful garage! I haven't figured out how to get enough 11% rebate money from MENARDS to make my next trip free! You put a lot of thought and time into figuring out what you wanted and did an excellent job!
-
2 pointsBarry, You can refinish one yourself. It is tedious and time consuming, but it can turnout well if you have patience. I know because I refreshed my GT 14 dash and hydro panels. Check out the following thread for tips: http://www.wheelhorseforum.com/topic/57298-raised-letter-dashboard-restoration-technique/?tab=comments#comment-582635
-
2 pointsLooking awesome! How are finding time to work on this with your honey do's as well?? Randy
-
2 points24x36 can't believe I forgot to mention size! It will be. Gotta wait a little while to afford that. Ceiling was supposed to be 10' but I got 10' 6". Lower cost ladders stop at 10' 3". Yep... Plumbed in a condensate drain right next to the pex stubs. It ties into the floor drain.
-
2 pointsCould be a money pit. You would be smart to have it running so the tranny can be tested before putting any money out. If the seller is not willing to work with you, walk away.
-
2 pointsI just got a set for my tractor and I couldn't have been happier! Terry was so great to deal with and I would do it again ! 👍
-
1 pointPicked a 1998 tractor because that was the first year they used a 12.5 Command engine and then picked a 42" side discharge deck to fit it. Click on the pictures If these are not correct post the model number and serial number off you tractor. Should be under the left side of the seat. Better description of the deck. They are sized by their width of cut - not the width of the deck. Side or rear discharge? Two mower blades or three? Garry
-
1 pointThe 8" look so much better. Been wanting to do the same to both of mine....
-
1 pointIt may be that the Sundstrand Hydro-gear 90-2046 pump and such is in good working order. Once you get the engine running, the way to test is: 1) run it around the yard for 20 min or so...until it gets to operating temp. 2.) chain it to a tree and see if it has the power to spin both back wheels. 3) if both spin (has a 10-pinion LSD) it is probably good to go, without a rebuild. 4) Change fluid (ATF is pink) or oil and use OEM filter.
-
1 pointExactly the same size as my heated shop ... which is way too smal! Oh well we'll make do. If you like I can pm you on some infloor suggestions. Let me know you need help in that department. Personally I would not have done infloor in a building such as this. Once you fill it and lite it off it's like marriage. ....your committed to keep it running.
-
1 point
-
1 pointNice Jason ...real nice Thanks for the . What is that about 22 x 32?? Couple of things I like and a couple I woulda done different. The lighting is real nice and what's not to like about infloor!! Go with a tankless to run it, that's what we use. Any chance you put a floor drain in by the tubes for a drain for a high eff. one? Here there is no requirement for pressure testing the loops but we do anyway. Had an unruly concrete dude stick a shovel in one once and a run with a hole in in from factory. I woulda spaces the tubes a little closer. Then you can run lower water temps thus less gas use. For a shop it's probably not a big deal tho. Is that a pull down stairs for stowing horse parts in the attic?? I woulda had the big door an eight footer. looks like you had the head room. Now the real work begins tho....getting it set up the way you like. Air compressor & piping, sound system, wall art, stocked fridge...cot for when in the dog house.....
-
1 pointThat is the only place I buy decals! Great quality and very good prices. If you become a Supporter here they offer a good discount too.




![20180803_181206[1].jpg](https://www.wheelhorseforum.com/uploads/monthly_2018_08/small.5b68cc38a3363_20180803_1812061.jpg.f345f817cdb9209b5b4a03afeb45d63a.jpg)
