
Leaderboard


Popular Content
Showing content with the highest reputation on 07/03/2017 in all areas
-
16 pointsStarted a new project I've been day dreaming about for awhile now. I've always been a fan of square hood and more recently round fenders. Figured I couldn't go wrong with a big block kohler either. Started with an 857 that had no engine. So for now and until more parts arrive I have a short frame, big block kohler with round fenders and no cutting of the hood to make it all fit. There's still lots to do but thought I'd share the progress so far.
-
10 pointsYou know Karl is going to put up the rw&b theme tommorow so happy 4th everyone.... I know only the 3rd...couldn't wait, favorite holiday kinda thing! Please remember our fathers from 1776.
-
9 pointsI've had some interest from guys at work about how I made this hitch so I figured I'd share it here too. We have EXTREMELY rough forest ground here and I needed a tractor/trailer connector that would be tough and safe. Vertical pin gives left/right like any hitch. Horizontal pin gives up/down movement. A Huge improvement by itself. Then - the rotator on the trailer nose gives another level of protection with the ability to twist. I got the idea from multiple online sources (logging, homesteading, and .... a bicycle trailer!) and combined them to make what I hope works out well... several trips into the woods and so far so good. The trailer has a piece of flat stock bolted to the nose. The next thing in line is a heavy duty dolly caster with the wheel removed. The piece connecting the assembly together is a 2 inch square block of steel with holes drilled horizontal and vertical. The only thing I might change is that the pin going through the tractor tab should probably be going through 2 tabs so I may make up a fork-like thing to put into the 2" receiver hitch instead of using the tab hitch. It's just sloppy there with only one tab. The wheels/tires on the trailer will be changed to 22.5 x 7.5 x 12 soon. Those are the wheels I showed broken in another post.
-
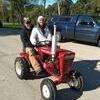
8 pointsWe pretty much live out here from April to October. Cabin fever campground fish and hunt club. Excellent fishing and no jet skis. Only 18 miles from home so we can run home and work on orders then back to the lake for supper and some top water
-
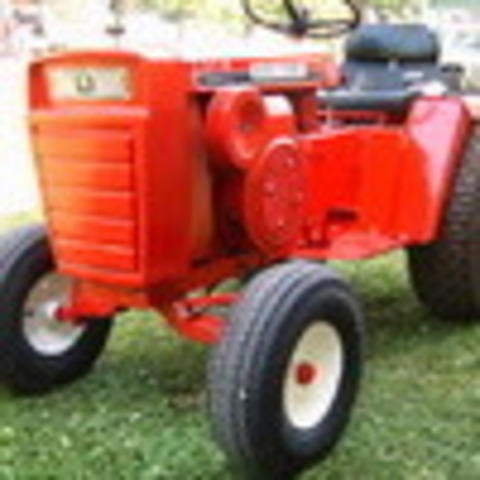
7 pointsHi guys hope you like my new Was from the original owner and is in great condition has a 12 HP and brand new all around AG tires with a 48in mower deck, not a spot of rust, every light works and even the cigarette lighter works! The guy kept it in his shed and ran it twice a year. I really look forward to having this tractor.
-
7 pointsTerry @Vinylguy has us covered!
-
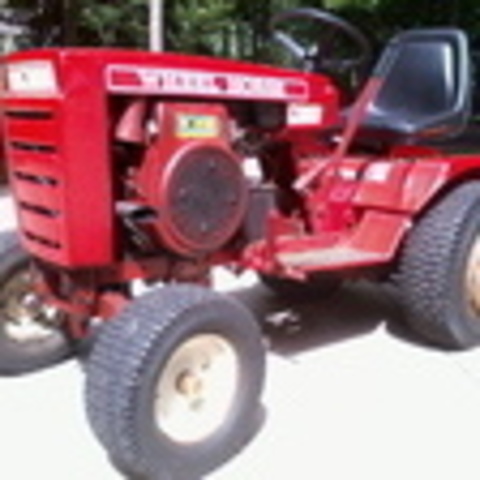
6 pointsBought this tractor last fall in anticipation of the Big Show. Bought new seat and tires. Then in January I got ahold of Terry about a throwback to the 1965 (first year for hydo's) 875/1075 . My 520 is a 95 so I thought a 30 years in hydro would be kinda cool and mine would be different from sea of 520's at the show . Terry and bounce ideas back and forth and came up what you see . In May it went off to the mechanic for some tlc . Well my son , cousin, mechanic and Terry (Vinlyguy) surprised me with this. We're still working on the dash plate as I added a cigarette lighter. @Vinylguy ill probably just mail you my dash plate so it's right . Anyways I made it to the Big Show for the reveal and I think it was big hit with all the complements it got . Literally we where finishing up on Thursday, buying footrest, painting them and putting them on . Now for the bad news yesterday the daughter was driving it to get pictures and it wouldn't hardly climb a small hill . Hopefully this doesn't turn out to be just a "pig with lipstick" and the hydro isn't trashed . Off to the mechanic again! There's still some more finishing touches to do (maybe a wet sand and buff) fix the exhaust and I'm still missing a few small parts . I might play with the graphics some more (sorry Terry) to tie in the 30'th anniversary as next year's show is anniversary models (I just make my own 1 of 1 ) . Figured I'll show you one half of the barn to show how bad my addiction is . This isn't all of them as the other side of the barn looks like three round hoods blew up . I really need to thank Terry again , he's one good guy ! Here's a before pic . and one with Terry and I coming up with ideas .
-
6 pointsBrought my big show purchase to the lake and gave it a test run on the lake front. Needless to say I am overjoyed with the results. Beautiful cut and runs and drives like new. What a machine.
-
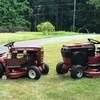
5 pointsMy Wife and I bought our Son in law/ Grandson(who is 4, and loves Papa's 314-8) a 265H toro/Wheel horse tractor with a 38" side discharge mower with bagger for their new house. I paid $100 for it. It has 900 plus hours on it. The tractor wouldn't start when we bought it and found the rod was broken. Week One: Replace engine with same 15HP I had in a Husqvarna LTH15. Changed oil, filter and air filter (Kohler parts) and it was up and running. Took tractor for a spin and realized something was wrong with steering. Week two: Replaced wheel bearings and center axle pivot pin. Much better steering! Mowed lawn and realized mower deck made lots of noise. Week Three: Get new belt and picked up new bearings from local dealer. Get home to replace bearings and find bearings are wrong ones and spindle shaft is worn from the bad bearings. Order bearings and spindle shaft from a big online vendor because dealer would take a week to get it....... .Week Four: Today. Get package containing new bearings and spindle. Open box and realize spindle shaft is wrong one(My fault ordered wrong one) Say hell with it and order new one from dealer and install old spindle shaft and old bearings in deck so My SIL can mow lawn next weekend.(He is mowing an acre with a push mower and I keep telling him "Next weekend the tractor will be ready to bring down to you) They live an hour and a half from us. Put back together and take it for a spin and turn mower on and bad noises and vibrations......... this is the result. I give up for today.............
-
5 pointsYes , everyone have a fun time tomorrow , be safe and have a !!! jim that's almost a perfect picture for a 60's fireworks ad . Just missing the man dressed in slacks , wearing dress shoes and smoke his pipe .... !
-
5 pointsHave a great Independence Day Have fun but be safe
-
5 pointsThis is what they will look like, an earlier picture of The Machine
-
5 pointsThank you john. I try. I get frustrated and have to step back for a bit. I have been working on this house more and more. Pretty much do it all myself. Thats why it takes so long, lol. Its kind of our retirement plan. Hope to sell it in a couple years and move to South Carolina. Master bath is almost done. I installed my new water heater last month, new central heat and air in January, then add on 40 hours a week keeping the Mouse happy and everything else along the way. Anyways, I am working on it again. Hope to be there next year with it. Pics of what I have been doing. At least it's the right color.......
-
4 pointsYou mean the guy on stilts in rbw & top hat Jeff ?
-
4 pointsWhile reading another thread this morning an older thread was mentioned and it will probably help here too, take a look.
-
4 pointsNone really. Well except for drilling out spot welds on the dash tower. I hate drilling spot welds out. I followed an ancient trick called research. Found an old thread that @Kelly had started explaining the differences in oil pans and block styles. Found the right oil pan (eBay), trimmed the oil dipper (engine turns over with no funny noises) and quite literally bolted it together.
-
4 pointsSeeing that your replacement engine came off a 160 you won't have to drill any new holes. The 160 motor will bolt directly to the frame through the two oil pan flanges on the left side. The right side flanges will hang over the frame. No worries. There are two threaded blind holes in the pan that you will run bolts up from under the frame to secure that side. If I was doing it for a living I'd say give yourself 4 hours to do everything including electrical and cables. Since I'd be doing it for myself it would take a day....I like to tinker.
-
3 pointsThis past week trying to get my beloved street rod back out on the road, working on 39 year old brake lines ...,Jeff.
-
3 pointsAnd it's always when you're trying to help someone else out!!! Jim
-
3 pointsI have been there...
-
3 pointsAs @953 nut Says "Thank A Veteran " Everyone have a safe 4th and stay off the interstates tomorrow evening , idiots will be on the roads.
-
3 pointsSome days are like that! I feel your pain!
-
3 pointsNicely done!
-
3 pointsSweet Mother of Wheel Horses, that is beautiful.
-
3 pointsJACK IT UP IN THE CENTER OF THE AXLE AND PUT STANDS UNDER THE FRAME.
-
3 pointsAll of the pictures and videos disappeared last Friday, June 30 when photobucket decided to hold everybody hostage for 3rd party usage. I spent Saturday and Sunday replacing everything right off of my computer and You-tube.
-
3 pointsWas great seeing it at the big show Jeff... your custom Wheel-a-Matic 520 really turned out awesome.
-
3 pointsHopefully get some video today . My brother in law and nephew are in from Arizona . Yesterday the nephew learned to drive the 67 lawn ranger and now he wants to drive the big tractor .
-
3 pointsMakes me want to hang on the my Commando now.
-
3 pointsWhat; you don't want to sit on a bomb? By the way, the gas tank on most of our since 1963 have been under the seat!
-
3 pointsTrailer I got to tow behind one of my RJ-35's... that I have yet to reassemble. One day it will happen.
-
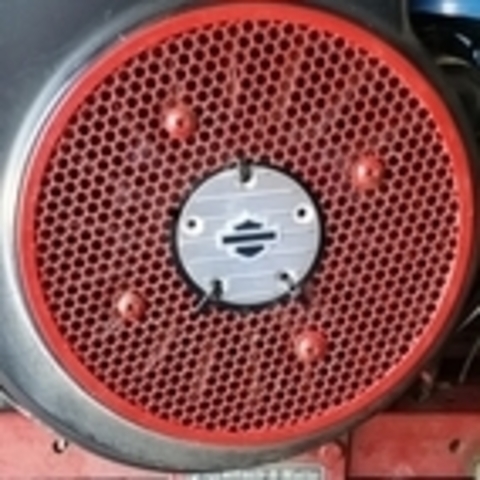
3 pointsFinally got her together! Everything went together well, adjusting the valves is a real bear on these. Grinding the valve a hair at a time is painstaking. So glad it's done. Need to run it in a little more then comes the transplant into the How you line up the timing marks. The mark on the crank gear is hidden by the ball bearing so they put one on the crank itself. Heavy duty Oregon starter. 4 1/2" long compared to 3 5/8 stock. Had to cut the tin to make it fit. Shes a runner!!
-
2 pointsDid you try this... ...
-
2 pointsWell I got the frame cut and did a test fit and replaced the front steering shaft bushing while I had it apart. I'll be using 1/2" plate to give a little more clearance for the hydraulic pump.
-
2 pointsThis is my favorite way to jack up any tractor ...
-
2 pointsOne vote here... for leaving it's working clothes in place.
-
2 pointsWe are up and running, It's a credit that after almost four decades it will still do it's job easily.. my intentions are still to strip and rebuild but I keep looking at it thinking it's great as it is 😉 Removed a few panels and gave Rocky a basic clean up, years of crud gone in the bin..
-
2 pointsI would recommend take the deck off and remove the belt and spin the spindles individually this will help determine which is bad if any also check idler pulley. PTO Problem. Is the battery good? This if not the clutch will not work as it should? I would also take it off and inspect it make sure bearings are good and make sure it's not burt up. I did all these things to my xi and help me determine my problems. I added a push bar to the front of my bumper.
-
2 pointsSince you will be removing the entire cradle mount, you will also need the proper pto hoop and mounts.
-
2 pointsWell we got it rebuilt... it's a tight fit! Just waiting for ewan to post an update
-
2 pointsI don't see any reason why it couldn't work. I think you are going in the right direction. Nice talking with you yesterday by the way!.
-
2 pointsThere is a lot to be said for sweat equity, When we built our new house I calculated that we saved over $ 80K by doing a lot of it ourselves. That would have been closer to $ 100K if we had to pull that much out of the IRA and had to pay income tax on it.
-
2 pointsTerry that is what it is all about liven the good life. Enjoy.
-
2 points...and, a nice bass too.
-
2 pointsI like it . I see no cutting , but how much cussing was involved ?
-
2 pointsNope. A straight forward swap.......except.......I believe the 141 has a wobble mount engine. The 160 doesn't. The oil pans will be different. Simply remove all traces of the wobble mount and bolt the 16 direct to the frame like it should be.
-
2 pointsNo issues with tranny... I'll just chalk it up to driver error. needs a little adjustment and it'll be fine !
-
2 pointsBeing from old farm family we repair things. Some times you have to build something to repair another part. That was the case with steering bracket. I had an extra for a C-120 but they made a few changes on the 312 bracket. Little different angle and deeper bracket for the fan gear. There was just no way to weld it back true alignment with out a jig to hold it. The jig had to be sturdy so I started with a 3/8" plate. Had to notch the plate so it could be bolted down, and added spacers to move it up from the plate. The angle and vice-grips are to hole it in alignment. Then we brazed it back together. I was out of red paint so I painted it black. Don't have a picture but it's back in the 312.
-
2 pointsThe "520 Wheel-A-Matic" standalone logo really looks sharp!
-
2 points@EricF that's what I want to work on is the stripping through the wheel-a-matic . If we can get more black behind it it should standout more . Or I just might lose that script all together and move the chrome 520 badge up like the 65's had . Then on the lower crowl I'd have my 1965-1995 30years of hydro anniversary sticker mocking the original hydro of the 520 if that makes any sense. It's a work in progress.


This leaderboard is set to New York/GMT-04:00