
Leaderboard


Popular Content
Showing content with the highest reputation on 04/08/2017 in all areas
-
12 pointsGot the decks on the 520's today. Sharpened blades, greased and ready to mow. 2 48"s and one 42" mulcher. The 520's seemed happy to get some fresh air.
-
9 points
-
8 pointsThis is what you need... Just got done 2 days ago doing the driveway. The ditch by the dirt road is still too soggy to get that done. Beats the heck out of raking
-
7 pointsMy son got bit by the Horse bug, and I think he likes it!
-
7 pointsEveryone sitting comfy here we go, in the beginning there was darkness,.... hang on wrong story. About two years ago, might be six, I bought a 1973 Auto12 because I wanted a '70's wheel horse which was a hydro. Well I already had three tractors so after a while this one just sat in the corner, l know that's not against the law and positively encouraged on RS, but I really wanted a purpose for it. Then came the idea for a loader and this tractor seemed to fit the bill as a donor. I put it up on the workshop bench and the head scratching began. First mock ups using 4x2's because the steel I planned to use was going to be 200x50x5mm 'box'. From now on I'm going to call them the driving wheels, the steering axle, and forward means pushing to load the bucket. So l wanted to mount the loader towers behind the driving wheels to keep the weight over the axle, l needed to keep them close because the further back they went the longer the wheelbase would be of the machine and l would be losing reach with the booms. Of course right where I was looking to build there's the hydro pump on one side and it's filter on the other, also the main engine to pump drive belt is in there too. The pictures show l couldn't work out any kind of ark for the booms to travel in, plus where the heck to place lifting cylinders where they wouldn't foul on the pump, filter or wheels. This is how it sat for quite a while. After doing some research on hydraulic rams, stroke length etc, I came up with a plan and bought some of the steels I'd need. First the subframe, clamp mounted up to the driving axle (more detail on this later) from there l could position the towers, spot weld them on, then start working out how high they would have to be to give a decent angle for the booms and of course make sure the booms would be long enough for reach. (beyond the driving wheels. more tomorrow.
-
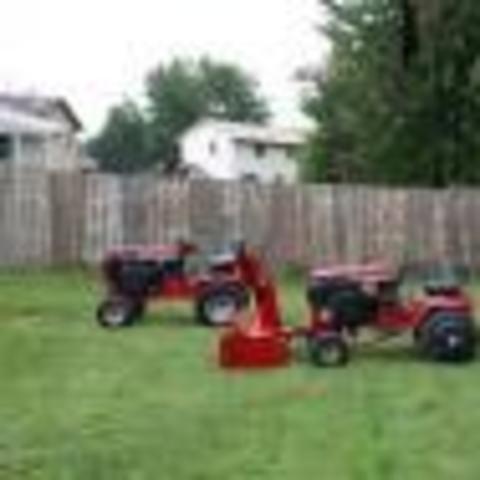
6 pointsI got a soft heart for the old tired ones but the price was too good to pass up. I will dig into them this weekend and see if they both will fire up after new plugs, cleaned carb and fresh fuel. 1994 314h with 900+ on it; All four hub caps 1991 520h with 1200+ on it; All four hub caps 2x 42" SD Deck. Both spin and are quiet that I could tell in the spindles.
-
6 pointsKate made this video and posted it on facebook. It's from last year's show.
-
6 pointsWe have one of those Stihl Yard Bosses with the rubber paddle. Makes quick work of what the DOT leaves you! Sent from a tiny open area in Wallfish's van!
-
5 pointsHad the 312-H out after work this afternoon with the lawn roller and rolled the front yard. Thinking Spring!!! finally after the snow storm scare we had here Thursday. Think I might have to put some Regal Red on that "Farm Store" roller.
-
5 pointsWELCOME TO RED SQUARE You have a regular 3 speed uni-drive transmission #5053...if original. This is basically your regular 5025 transmission...with a few improvements...like shift rails. Try doing this and maybe we can kind of determine what it may be. If it is a differential bolt...it would do the binding in either direction when you came around to it. Try a few things and let us know. Put the rear of the horse up on blocks. 1. with the trans in neutral...turn one of the tires (in any direction). The other tire should turn in the opposite direction. Do this on both sides. Now hold one of the tires from moving, while turning the other tire...both sides. You should be able to do this...easily. This tells you that the differential is OK. 2. Do this in each of the gears. Put trans in gear...turn the input pulley in a counter-clock-wise direction. Both wheels and the brake shaft should turn...the wheels in the same direction. Being this was full of water, I would open it. What is going on is inside and opening is the only way to find what is really wrong. This is a great part of the restoration. It could be a bolt from the differential case, it could also be a piece of gear that broke off and got stuck in part of another gear. It could also be, depending on how long this had water in it, rust just holding the trans from working. It could also be part of a bearing that disintegrated and a part of that is the culprit. This trans is easy to open, and anything bad in there is available. Take some pictures and let us know. If you click on this link, it will show you pictures of the inside of your transmission and how to rebuild it.
-
5 pointsLong overdue update: Hard to believe it's been nearly a year... Mark is out and doing better. Not able to live on his own as in many ways he's much like an average 12 year old. He'll be 30 in June. Girlfriend from before the incident has stuck with him and is caring for him. Things could be a lot better, BUT, they could also be much worse. Through the grace of God he is alive and able to visit, and enjoy a meal, and have a relatively decent conversation. Couldn't really ask for more than that. Been a while and man we've had a ton on our plate but things are looking up. Wanted to thank you all for all you support, Prayers, PM's, sharing of your own injuries and TBI experiences, it's all been good stuff and my Bride and I are truly grateful. Grace and peace!
-
4 pointsI found the forum by accident when I was looking for parts for my non-working 616Z Zero Turn. I thought I would join and learn what I can about these great machines. I've made several posts before finding the introduction portion of the forum. I've spent the last 25 years in a electronics field and before that as a machinist. I will have to admit that I almost went out and purchased another zero turn simply because I dreaded the idea of taking this one apart. Arming myself with a CD purchased off the internet I was able to see that the task I was dreading so much was so easy. The only hard part was going out shopping to purchase a flywheel puller to take the massive flywheel off. I guess I should say I was looking for a cost effective puller so I could funnel money into my other hobby of flinging lead down range towards a bullseye. Now I have another vice as I have caught the Wheel Horse Virus. Currently looking for a Tractor project now.
-
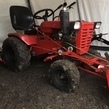
3 pointsI picked this one up recently, it has the double blade mower deck instead of the single and has electric start, it runs well, but not sure if it drives haven't gotten to try it. other than the seat it is in excellent condition with an 11hp Briggs and Stratton. I got it from a lady that has been mowing with it for 40 years and was just ready to upgrade. Here are some pics.
-
3 pointsHere they are installed, Jeff.
-
3 pointsWeather finally getting to point I can get some work done. Problem is I have way too many irons in the fire. I managed to get the fenders and foot treadplates sandblasted and mocked up. Now I can try and determine backspacing and weld up the new centers onto the rim blanks.
-
3 pointsI have been going thru this tractors electrical system in an effort to make it original or close to it. When I checked behind the fuel tank, I knew I had my work cut out for me. I needed a voltage regulator since there wasn't one and the ignition switch was not correct. I also bought a solenoid and a new battery. I rewired the entire tractor and the generator warning light and cigarette lighter do work. The carb was a Carter but was as bad as the wiring inside. I used the carb I went thru from the B-80. After getting it all back together I am happy to say it runs better than it did before. It starts without choke idled all the way down. Here is a quick video of it finally running right and a pic with the hubcaps. IMG_0555.MOV
-
3 pointsYour post gave me an idea. Have you seen the rubber drum with rubber paddles Stihl add to their weed eaters? They do a fantastic job of moving sand and stones. Take a single stage snowthrower and cut the flights off the auger assembly. Add 37" angle iron full length around the auger tube and then bolt 37" rubber strips of conveyer belt to the angle iron. The rubber strip width needs to be enough they would extend beyond the bottom of the auger housing. Might be easier to relocate the auger bearings to lower the auger in the housing. Reverse the auger direction of rotation and instant sand and stone slinger on steroids. Garry
-
3 points4 years, hard to believe.
-
3 points@Mastiffman I saw them when they were just posted on cl but I said to myself I just can't now. I just picked up a 314-8 a few weeks ago and I don't want anymore work now. I'm glad a member of Redsqure got them. Good luck.
-
3 pointsI believe these shown below are the same weights in red. I like them in red but kind of miss seeing the deep dish white wheels.
-
3 pointsThe only issue I had was with the fuel pumps losing prime after sitting for a long time. And this had nothing to do with the Magnum. If the fuel tank under the seat is half empty, the fuel level is below the pump and it would not prime itself. The easy fix is to fill the tank when you are finished using it. Some have installed shut off valves, primer bulbs, or electric pumps. Some of the Eaton 1100 Hydros require a 10 minute warm up before the lifts will operate. Some will lift instantly. This is not a problem, in fact Toro recommends the warm up before operating any of the Eatons.
-
2 pointsHe got the boots!
-
2 pointsA couple more oldies same place, Jeff.
-
2 pointsSorry,,,,i had to hit this post,,,,,,I thought you said Onion rings,,,,lololool and it was looking interesting... I'm hoping some one will be along shortly,,that can help.... Howard 857Horse, in Va
-
2 pointsWhen my friend bought his first house and subsiquently, his first mower, I convenced him to hold out for a wheel horse. I found him a 1996 314H with about 600 hours that he absolutely loves now. Thanks to Wheel N It, he also has a front plow blade.
-
2 pointsI have done some cleaning and put the ramp up. Thought I would throw a couple more pics up. Still need to punch a couple of holes at the base and pin it to the concrete pad. Randy
-
2 pointsCub weights look right at home! Did the same with my 520. Filled the roller and got the first spluge of dog poop on the tires for the season! sent from Brrly's basement using crapatalk!
-
2 pointsA differential bolt may have come loose and the nut is binding between the bull gear and case. You're gonna have to open up the tranny. Do NOT drive it...it will break the case and you will be very unhappy.
-
2 pointsI have steep side ditches and mow them by having a single wheel weight on the 'up' side of the tractor. To stay seated, I put all my weight on the up side of the seat. The seat tower is made up of very thin metal and it broke out much as yours did, so I re-inforced it using an old circular saw blade and angle iron to beef it up. The seat was nearly ready to let go and it could have caused a bad injury if it broken and dumped me off in the rock pile at the end of the ditch. Just a poor design from the start, and even the early tractors are pretty weak at the rear of the seat tower, but at least they have thicker metal So guys, check yours out for cracks at the rear of the seat tower. Anybody with a 520 needs to look at the idler pulley on the belt that drives the hydro. the previously mentioned seat tower has some thin bushings that are the wear surface for the idler arm and if that bushing wears through, your seat tower will wallow out in short order. Not an easy fix. Mine is fixed ugly so it would be a treat to see what someone with talent would do to fix it. Meanwhile,all you guys with low hours 520's should oil up the bushing/swing arm on the tranny idler to make sure it does not experience excessive wear. i also found that a rubber band made from a motorcycle tube cuts down on the vibration on the swing arm vs.the factory supplied steel spring [that keeps the idler tightening against the belt.] Some of the hydros have an air piston/ shock on the idler and they are a much better system. That tells me that Toro had some problems with tractors like mine and saw the need to improve them.
-
2 pointsNot a sweeper but, might work. One of these might be adaptable http://bercomac.com/en/product-category/rotary-brooms/rotary-brooms-for-lg-tractors/ I have a 48" tow dethatcher but, have thought 'bout a front mount tine dethatcher. Of course my helpers can use steel spring hand rakes. Meet my two helpers.
-
2 pointsSuch attention to detail in the restoration and it's documentation is a great credit to you, I agreed with earlier replies, there are a lot of members following, especially the D owners out there, they're probably like me, opened mouthed with admiration. This is straight out of the top drawer D man.
-
2 pointsYeah I couldn't pass them up. I got my last with decks. Sold one Deck yesterday and when all was said and done with that sale and then purchasing these two I paid $125 for them both and the decks. Paid $60 to rent the trailer and $25 in fuel... Yeah I learned my lesson last time about asking about them online. ha ha. I wasn't letting these get by me. I'm pretty excited to tear into them and see if they run. The 520 is missing the whole seat assembly. The sheet metal looks pretty good on both. They both have solid headlight bezels but the hoods are roughed up. Nothing a little bumping out of the dents won't cure though. I will have to rivet the front of the hood back to the top of the hood on the 314h though. The 520h is a confirmed 520h-s (Swept front axle). I haven't checked the frame for damage done by a 5ft deck but all in due time. The 520h tank for sure smell like someone poured turpentine in it!? So there is work to be done. But it should be fun! I couldn't believe that they both had hubcaps. They are not is great shape though. a little better than the ones that came on my 1990 520 which I only had three of.
-
2 pointsI painted mine Regal red and I like them, I have a set of rears that aren't for show just snow plowing, they are black but they are not oem. If I find correct rear ones they will be regal red to!
-
2 pointsI've got a dozen or so GTs and one hubcap! 1 hubcap! You make one trip and come home with 8!
-
2 pointsJohn I like you have waiting for this for years One of my life's dreams to see this great country and not be in a hurry to do it. I am thinking 3 years to do it all.
-
2 pointsJust to be clear Jim, I don't have Ags on any of my working tractors. I do have a nice pair on my Commando 8, but it is just used to pull a lawn cart and for show transportation. What I do have experience with is Two link Vee bar steel chains on turf tires and four link rubber chains on turf tires. And as I have stated before, IMO, The rubber chains have better traction on the asphalt than the steel chains and without any risk of damage to the coating. An example, with the steel chains, I had to plow my steep drive down hill only and I could not climb the cleared driveway with the plow raised or lowered. I had to circle around to the less steep stone road to get back to the top. With the rubber chains, I still start at the top and plow down, but I can even plow up with about a 1/2 blade cut. On stone roads or grass, I believe the steel chains provide slightly better traction. As experienced by other members, the rubber chains provide a rougher ride. I agree with this, but I believe this is due to the wider spacing on the 4 link and not the fact that they are made of rubber.
-
2 pointsMust be new development. Last I spoke he did did not have them. Report back on fix.
-
2 pointsSeems a shame to "drive her til she gets tired" when replacing one gear is not difficult. Probably only needs the one gear, a new gasket, some gear oil and no special tools. I'm a rookie with transmissions, but just finished repairing a 5025.with the same problem and it was a piece of cake. Just sayin'...
-
2 pointsSort of a crapshoot, there could be pieces of the damaged gear lurking in places that will damage other gears or bearings. do you feel lucky? Probably need one of these. https://www.wheelhorseman1000.com/product-p/2.htm
-
2 pointsBuying a package is the way to go! I see that you got wheel weights and chains too. Great buy.
-
2 pointsA discolored wire is cause for concern. Either the wire to terminal is not making a clean tight connection or the terminal to terminal connection is not clean and tight. Any resistance to current flow causes heat. Garry
-
2 pointsWell got the frame all welded up inside and out. Weld the crack then weld on both sides of the weld. It was easier than I thought, just jacked up the tractor and let the front dangle and it closed the crack up. It was tuff getting in there to grind the crack till I thought of using the dremel with a diamond bit and it was simple. Now she is nice and straight, and the hood and belt guard lined right up like it was suppose to be.
-
1 pointIt's been that way all four hours I have owned it. 😊 The tractor is a basket case, but its hard to turn down a tractor, blade and deck for less than $50!
-
1 pointI live in KC and I always look at Wheel Horses listed on CL in Iowa. You are in a happy hunting ground.
-
1 pointYou came to the right place. This manual should be helpful.
-
1 pointGotta love those 520s !
-
1 pointNice set of skins Jeff, your set for another 22 years. Glenn
-
1 point
-
1 pointI thought it was a nice tractor overall. The only thing missing is a hitch for pulling a trailer and it will need a seat and possibly a battery.
-
1 pointHere they are with the embossing painted I used Forney brand "china" markers,Jeff.


(800x673).jpg.cc3aefcd170c6bab1f22408014a1eb53.thumb.jpg.37c62115dec7a1fc65b8e86afd6af643.jpg)


This leaderboard is set to New York/GMT-04:00