
Leaderboard


Popular Content
Showing content with the highest reputation on 02/21/2017 in all areas
-
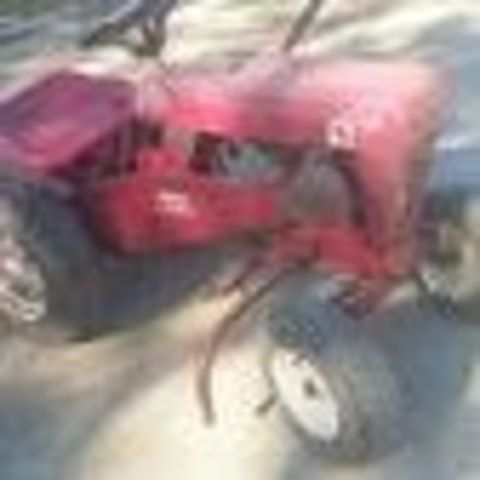
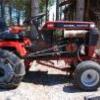
7 pointsMy raider 8 breaking ground tonight. It's a little different plowing with a cab. Gets a little tippy.
-
6 pointsIt should easily move back and forth. Since a bit of oil helped, I'm guessing it has some crud or dirt stuck in there. No need to remove the engine yet, just remove the arm and loosen the 3/4 bushing nut. Everything will come apart except the the shaft should remain in the engine. Clean everything and re-assemble. With the disc, spring and arm off, you can feel if the shaft is binding in the bushing nut.
-
5 pointsThis is from a K 181, but I'll bet it looks the same. I'm holding the shaft in my hand in the 1st picture. See that little washer to the right...that butts up to the block when tightened. It could be sticking a little. The 2nd picture shows the shaft and gear in place. The shaft sits into the block on the left...if something is stuck in there (and it does not take much), that could be the issue. You would have to take the engine apart in this case. May be able to move it around enough in the 1st picture.
-
4 pointsSo the other day I built a kohler for a customer and had no way to test run it. So I put this together. This is first version as I will be making improvements to this in the future.
-
4 pointsRead this thread and you will learn the importance of having your engine components measured prior to buying any parts. Lots of kool tips too!
-
4 pointsFinally installed the hydro assembly on my 753. Planning on a full resto in the future so I'll go through it at that point. Just happy to have it all on.
-
4 pointsAshton, read the eBay ad above carefully because there is a lot of information in that ad to help you out. You will need to do some measuring to obtain the correct rebuild parts. Also, "search" info on this site as there is tons of helpful info right at your fingertips .
-
4 points
-
4 pointsI sure like those tires, Steve.....Might do that with my 857 someday...
-
4 pointsBob I hope you don't mind but these are some really good detailed photos of this pump. I tried making a link to your post but couldn't figure it out . @rmaynard I'll hide post if you disapprove or have mods remove it . Don't want to break no rules. rmaynard The Brake Lining Guy Joined: November 25, 2009 Supporter 5,802 9,769 posts Member No:2221 Military Member: Coast_Guard Location: New Windsor, Maryland ID: 3 Posted April 27, 2016 (edited) Raining here today, so I have plenty of downtime. Took some pictures for you. Here is the vacuum operated (pulse) pump assembled Notice the IN and OUT markings on the top With the screws removed, the pump splits open revealing the diaphragm. With the diaphragm removed, the one-way valve assembly is seen. One screw is removed and the valve cover is removed. Notice the INLET side (left) has a fine coil spring, and the OUTLET side (right) has a flat disc. There is also a gasket to seal the cover. On the left we see the INLET disc, and on the right we see the OUTLET spring. That is how it supposed to be assembled. I hope this helps. Edited April 27, 2016 by rmaynard 9 people like this
-
4 points
-
3 pointsI had the gas tank off the raider 10 for some maintenance and decided that now was the time for some lighting upgrades because the rear of the dash was easy to get to. I had a on-off-on switch laying around that gave me two circuits with just one switch. I am relacing the missing headlight system with a new LED and also easy to direct LED side lighting. Circuit one will have just the headlight and a rear power outlet for the electric spray pump. Circuit two will add the side lights to the head light. I think you get the idea. The dash stays neat and uncluttered and you have a cool little accessory for little money. I found a free switch on a junk Murray mower so the idea came from the fact that it was a on-off-on switch. I will put pictures up when i get the lighting mounted.
-
3 pointsImprovements ??? Are we talking a Cradle mounted dynamometer and magnetic pick up to measure torque and RPM.
-
3 pointsI wouldn't pay $400 for it either , but I understand the $400 asking price. He probably has over $300 invested in original tractor purchase price, paint, decals, seat, oil, filter, cleaners, abrasives, etc. Plus 40-50 hours of labor.
-
3 points@prondzy or @Shynon can answer this question for you.
-
3 pointsJust chiming in to follow Dan...I already know your fab skills are way outta my league.... but I am excellent with a metric crescent, heat wrench and a BFH! Gimme a jingle if you need those skills!
-
3 pointsIt is a slow restoration since I do not have the tractor in my place of residence The petrol pump is broken, right? You must have a lever for your actuation, right?
-
3 pointsi think this should be close enough. Now heres my rear light choice. toolbox had holes drilled in it already soooo i figured why not use one lol More to come soon has we make up light bar in front
-
2 pointsGood afternoon my name is Carlos and I write from Spain, I have been asking some doubts and it is time to go putting the restoration.
-
2 pointsNever started a restoration thread after joining some years back so decided it to try it out. It's gonna be slow going cause I'm pretty busy at work but hopefully everyone will be patient with me and I'll try to post a lot of pics. This is the motor from my 310-8 we got in the 80's when I was growing up. It's been down for over ten years but it is still in good shape. I pulled the motor several years ago and sent it to the machine shop. It's been bored.010 over and has had some mild valve porting. I pulled the motor out of storage this weekend and did a through cleaning followed with paint. My plan is to clean and polish all the accessories for the motor then spray with clear to dress it up. These are some pics of the block with the breather cover polished and sprayed with clear.
-
2 pointsI have a 20 x 25 foot garage that I have been storing my various Wheel Horses and John Deeres in. It's also home to my son-in-law's Harley. Right now it's over full and it's a pain to walk around everything and a real pain to get a tractor out that's buried in a corner. So, I bought a new lofted barn from one of those rent to own shed places. It's a 10 x 16 with a loft, verical z-metal siding over osb inner walls. It's supposed to be delivered sometime this week, probably tomorrow. Paid more than I was going to pay, but decided the loft would be a good to keep things off the floor. It will be home to about 4 tractors, most of them will be Wheel Horses, so it will be my horse barn. It will probably get Wheel Horse signage while the other garage will remain my main work shop and home to most of my John Deeres and probably the 520-H, plus of course, my son-in-law's Harley. I always wanted a red barn, so I guess this is close enough.
-
2 pointsSeems like the warm weather (70 degrees here in PA) has brought out some WH from the sheds. I've been watching a 418-A on CL for about a month now, but the seller was asking way too much. This weekend, I went to see it because the weather was good. I made him a reasonable offer on, much lower than he was asking. He said he'd consider it, then phoned me a few hours after I got home, and accepted my offer. Includes a nice 418-A with 680 hours, a 48" plow, weights & chains, 4 hub caps, a 48" rear-discharge deck, and a Craftsman garden cart for $800. The 418A came with owner's manual, sales brochure, and service records. It only needs some adjustments, no repairs. PO was an elderly gentleman who has his grandson cut his grass for him now (with a newer, yellow mower). I also noticed a rusty old B-100 with four flat tires sitting nearby, and they said I could have it for another $50. It will probably be just a 'parts tractor', but has some parts I need. Seems like people are taking advantage of the good weather to clean out their garages and barns, so there are deals to be found. A friend gave me a 1968 WH snow thrower just to get it out of his shed.
-
2 pointsI did a similar test rig last summer and also had plans to improve it for longevity. I never got around to it and may never do so. Handy though when you need it.
-
2 pointsThat weight hanger is awesome @cschannuth
-
2 pointsI used this on my dad's 78 C-161 for some touch up and it matched really well. It dries hard and fast. Premium Decor 12 OZ, Gloss Fiesta Red Enamel Spray Paint PDS96-AER i get it from True Value Hardware and its $3.59 per can. I've tried everything and this is the best I've found. In the images below the weight hanger was rattle canned with the Fiesta Red and it matches the hood pretty well.
-
2 pointsNext time she complains about the # of tractors, tell her that would be fine as long as she gets rid of some of her shoes. As for the KT series twins. Leave the oil filter kit on. It will double the life of the oil and will make the engine last longer. I have 2 417A's and a 520 with a repower of a 18hp magnum engine and 2 of them have this kit on them. I have rebuilt 2 KT17's and both of them failed due to junk in the oil pump locking it up and braking the plastic gear. The filter helps to prevent this. If you don't like its location you can make a bracket to fit it further inside. Or in a different spot will work also. If you blow up the pic below you can see mine are further in. And last thing. Put on a Kohler filter avalible at any tsc or small engine shop. From filters are about the cheapest made filters made. If you don't believe me cut one open and cut open a good brand an you will see what I mean.
-
2 pointsYes Ashton, you will need to properly measure the bore to figure out the correct size piston you have . IF and I mean IF you have measured and have the smaller bore k161 compare to the kohler manual. You will need to have the block machined and go to the std. Bore 7hp (the bigger bore 7hp) piston in the link you provided. But do your research and get the motor to a good machine shop and the money will be well spent. Thanks @stevasaurus for the tag and Ashton if you have any questiins PM me.
-
2 pointsWhat caught my attention was that I had a 1966 Chevy Nova back in the early 70's. What a cool car. My curiosity was aroused so I did do a search with no intentions of spilling the beans until somebody got the intended answer. I think it's fair to say that Richard was 100% right because the Chevy II name was dropped and they all were Novas after that. So morph it is! This thread is cool. A mix of Wheel Horse, cars, space, and other fun things. Look at the things we are learning.
-
2 pointsYou are ( for all intents & purposes ) the winner , captain . Now that ^^^^^^^ I did not know . This just proves that I'm not using the Google crutch . Thank you for the info !
-
2 pointsRight thanks for all your help I will try carb or brake cleaner first and let you know whether it solves the problem, just a note, I have not had this engine apart but it has been standing since before it was imported from the USA quite a few years ago, but like Ian says it starts and runs with no smoke if you work the governer by hand
-
2 pointsGive yourself a little credit Jim....I know for a fact you can use a cordless drill , multimeter and a nut driver ... Though some of your employees may disagree !
-
2 pointsChicken eyelids...one upper, one lower, and a membrane that goes vertically. The upper and lower are open most of the day, and the third one keeps the eye moist. The three eyelid question was from Trivial Pursuit. I don't remember what edition, but it's one question and answer that has stuck in my head for decades. My grandmother used to raise chickens. You'd think that she would have taught me that, but no, I spent my time shoveling chicken s**t and gathering eggs.
-
2 pointsCan't speak for the HF engine, but the Honda engine is more economical. Not sure exactly how much, but it seems at least 20% better. Red
-
2 pointsNother stab in the dark here ...Three Hey all this chicken talk I'm getting hungry for some barnyard buzzard! I secretly hope I don't win tho...will prolly kill some brain cells trying to think of a question!
-
2 pointsFinally made it upstate for some good snow. We had 12" Saturday and 5-6" Wednesday. Cold temps till Friday. That being said it was almost perfect.... it was 45-50 degeees when I started blowing. It was getting heavy. Anyway here's old faithful doing her thing. By the time it was over I had about 6 hours blowing. When my plow guy told me he made need a backhoe for the next storm. I said NO... I've got a horse!
-
2 pointsDayton, Ohio had the famous flood of 1913. They built a series of dry dams with no moving parts that were so overbuilt that heavy rains do not get very high at all on the face. They maintain them well, keeping the faces groomed so the trees do not grow into them and [when the trees die and the roots rot] cause voids for the water to enter. The damage and loss of life from that flood will never be forgotten, and that provides a strong incentive to keep things humming along. No federal money was used and the bonds that financed the dam were retired in 1949. Maintenance is funded by tax assessments that assign what you pay for flood protection based on the extent of flooding your property experienced the flood in 1913. This is how you do it right. http://www.journal-news.com/news/miami-conservancy-created-unique-flood-control-plan/CVSjpRqb35txXFBW7kUdoN/ What Dayton did benefits everyone downstream all the way to the Mississippi Delta. Contrast that with how California will probably want taxpayer money from the rest of us to repair their dam. Maybe they will surprise us and do it the way Dayton did. One can only hope.
-
2 pointsToro show transmission model number 3100077 for the 876. Others 1965 model 875 1965 model 1075 1966 model 876 - model in question 1966 model 1076 1966 model 1276 1967 model 877 1967 model 1077 - Toro missed this one but have to assume it was the same 1967 model 1277 Garry
-
2 pointsNot much got done this past weekend....weather was way too nice to be inside and trying to get in some late season ice fishing but did work a little with the overhead open. Fitted a bushing in the steering shaft support. Note the zerk in the lower steering shaft support. Not much wear in this area but what the heck I love drilling & tapping cast. The bushing is going to help slop and also toying with the idea of a spring in the lower shaft to keep the fan gear drawn up again't the upper shaft gear instead of shims.
-
2 pointsGreat story Bryant And welcome to the Wheel Horse nut club!!! I see the addiction has already settled in . You might as well pay up for supporter status $20 and post away with all the photos your heart desires (makes things easier and helps keep the lights on) . Will be waiting for some soon , and we're hoping a video too .
-
2 pointsI mentioned that the steering wheel that was on this tractor when I got it was wrong. Today I had a little time to work on things so I made a new steering wheel. I also wanted to share some of my progress on the transmission. The tranny is one of my biggest challenges on this tractor. There are not many parts that can be purchased for this thing so you will notice that most of the parts are going to be made or altered by me. The first rack that I started on was the input shaft. I had to cut the shaft on both ends to remove it from the tranny. The o.d. required to make the replacement pieces is 1 3/8". After some searching I found that this was a special order size and it was actually more expensive than 1 1/2 at the places I checked. Then when I was removing the axles from my wood hauling trailer (which was a 1 ton GM truck originally) I noticed that they were 1 3/8" o.d. Score!!! It didn't take long for me to figure out exactly how difficult this material was to work with though. I learned that it didn't like to be rubbed, things went much better if you were more aggressive with it. Other wise it wanted to work harden on you. After figuring that out, things went slightly better. The rack of gears at the top of the pic is what I have to replace. Below that is the start of my new pieces. The three smaller pieces will need sprockets welded on to them and will need bushings inserted into the bore of them. The two longer pieces need some time on the mill yet and will need an internal key way cut into them.
-
2 pointsJust a quick update. This motor runs good but smoked more than I liked so I found a nice rebuilt 8 from an 854 from a member here. I tried to surprise my boy on his 10th birthday by doing the engine swap. I got er done. Video link below https://youtu.be/xWcFKjqB1b8
-
1 pointStarted this refresh a couple of months ago and have made a little progress but things are stating to shape up now so thought I would do a thread. 'Sides I need some help & advice! Little history first This is a 1967 1067 with the original K241 10hp. This tractor is somewhat special to me as I bought it as my first wheel horse in 1986. I had just started renting an old farm house which had quite a large lawn that I would be required to mow. I mentioned this to a buddy who told me of a riding lawn mower that he saw for sale. I went and looked at it and paid 350 which in the day was quite a bit of coin, for me at the time anyway as I was making only $5.50 an hour servicing dairy equipment! Wasn't the prettiest but it started right up and cut so I brought it home. Never would have guessed 31 years later I would have this WH monkey on my back! I new absolutely nothing about a Wheel Horse & keep in mid there was no such thing as the internet back then. After about a year I needed parts and someone told me they were no longer made. I contemplated scrapping it but then someone said to check Toro dealers for parts. All I needed was blades and some bearings. The first dealer I went to wasn't much help as they wanted me to cobble other parts on it and I didn't want to cobble any more on it than what had already been done. 2nd dealer I went to wasn't much help as they wanted to sell me a new 3,4 or 500 series! Must admit they did look nice on the showroom floor but given my tax bracket at the time wasn't likely to happen. The idea of scrapping came up again but I persisted and kept it running and mowing. Threw a rod in the 241 about 1994 but went thru the motor and fixed that. about 1997 another buddy had a Toro branded 246h for sale that took over mowing duties. So the old 1067 went into hibernation for 20 years. Every now and then I would throw a battery in it and it would ALWAYS fire right up. Fast forward to about two years ago and I decided I was gonna getting running again and use it. After searching the 'net for parts I stumbled on this thing called Red Square. Well after reading a here about RJ's, Suburbans, 953's, & 857's I quickly caught the bug! Eight or ten horses (OMG I lost count ) later I finally said this old girls time has come. @stevasaurus had mentioned this had a ten pinion 5060 LS transmission in it and might make a good plowing tractor. The axle seals were leaking bad, the hubs were walking on the axles & front end had homemade tie rods not to mention a myriad of other issues.....but thanks to RS, parts I had spied at the BS, and the knowledge of those here I knew this was savable. My intent is not a trailer queen nor a show tractor but a nice working tractor for some light field plowing, having fun at shows, moving boats & trailers around the ranch and perhaps some kids in a tub. I seriously doubt it will ever see mowing duty again. 'Nuff yaking and on to the before pics! After looking at these ..no where near as bad as some I have seen here! Tranny disassembly pics...not too bad 1533 were usable but since now they can be had. Note the water line!
-
1 pointEd I am planning on adding something to put load on the motor. I want to be able to after the 1st hour of run time, to be able to put the motor under load for another 4hrs for break in.
-
1 pointFor the car guys : What did Chevrolet's "Chevy II" morph into for the 1968 model year ? Hint : Also something that may be seen through a powerful telescope .
-
1 pointThings change over time , welding requirements for working on any zinc coating and avoiding fumes is worth your time and expense . Only way to truly avoid the fumes is to use a PAPR hood or just don't weld anything that is coated . Grinding the zinc is almost as dangerous , so keep that in mind . If it's a hot dip coating , don't think that simple grinding will remove all of it - the stuff soaks down deep into the metal and getting it out requires a lot of deep grinding and time . I wear a half-mask respirator when welding unknown coated or galvanized metals and just try to avoid altogether . Getting sick now is one thing , dying from slow poisoning is much worse . Sarge
-
1 pointThanks Pete You were right, repairing the manual clutch was the way to go (and more original that fitting and electric one), A local engineer was able to make me the parts needed to repair the PTO clutch The Beast is back
-
1 pointThis should be the correct chain on the rockshaft to sleeve hitch(and I added the extra holes in the hitch to fine tune to my box blade and root rake), as the one you're picturing looks to be modified for the tiller, also made this front weight hanger to keep the front down when plowing ect, Jeff.
-
1 pointWouldn`t it be common sence, cents, since, not to build a house below a dam, damn, darn ???
-
1 pointi will get you a few one day this week
-
1 pointIf I understand your question the diameter of the rod that locks in mid-mount is 7/8" but the diameter that fits the side plates is 3/4". As for the front tacamatic I have not had a project where I needed to measure those. But what ever it is it should be same diameter in lock and sides since no built up area on either my snow thrower or mule drive.


.thumb.jpg.0c495eaa7ff874c741991d7b1de2f119.jpg)


(800x673).jpg.cc3aefcd170c6bab1f22408014a1eb53.thumb.jpg.37c62115dec7a1fc65b8e86afd6af643.jpg)


.JPG.9f2ecb26065c66527b0730084ab7fc7a.thumb.jpg.7dc8a04d9a53d44ee2b23f26ee94496f.jpg)


This leaderboard is set to New York/GMT-04:00