
Leaderboard


Popular Content
Showing content with the highest reputation on 02/11/2017 in all areas
-
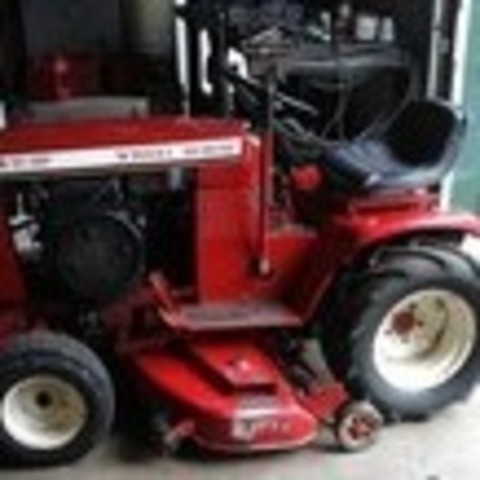
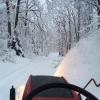
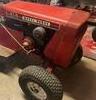
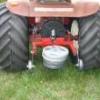
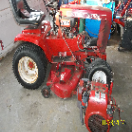
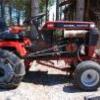
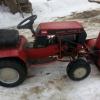
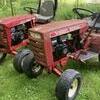
7 pointsI have had roller chain on my primary plow horse for some time. Been pleased but never had the opportunity for an almost direct comparison. Used the primary, Charger 12 yesterday. Took out the backup plow tractor Electro 12 today...what a difference!!!. I knew the back up wouldn't push quite as well as she has regular garden tractor chains on fat turf tires and not as much weight. She did OK pushing but the front end slid sideways way too much as she doesn't have roller chains on the front. I have to see if i have enough in stock and as soon as the snow melts off her she is getting #40 chain. First pic is primary girl...last 3 backup.
-
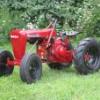
7 pointsOn the way home finally, thought I'd share a pic of my bucket list tractor I picked up today. found a couple strays along the way
-
7 pointsI ahd the same issue a few years back... used 2 pieces of 1/4" x 2 angle iron...no welding required. ps...welding may close the cracks but I think you'll find it also makes the metal brittle and subject to cracking again. With these two corner brackets / braces it should last forever. As soneone else noted, you'll need new bolts to the trans...about 1/4" longer than original, but not too long. Use 3/8" dia bolts on the sides with nylok nuts.
-
7 pointsReally moving on with the RJ rebuild now, the frame has been cleaned up, primered and the underside has been top coated hence why the frame is on it's side Is this strange two part valve arrangement a USA thing? We had never seen it before! Top coat time, Meanwhile I find this old WH rear wheel with bolts welded through from the outside (not by me I should add)... Makes a perfect tool to hole the RJ's front wheel for a clean up. Note the crack in the paint... Well, the crack is actually in filler!! Someone did like the ol bondo in the past! And to bring this build thread up to date, lot's of freshly painted panels and parts
-
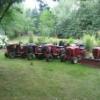
6 pointsYep I went and picked up 2 more tractors, Simplicity this time. A 1964 9 hp Landlord 314 with snow thrower. And a 1967 10 hp Landlord 2010. The gentleman gave me the 10 hp Briggs&Stratton extra engine and the Allis Chalmers mower deck. He made me an offer I couldn't refuse. Not to worry, I have 2 more tractors in my sights.
-
5 pointsI position the blade frame approximately where it needs to be by sliding it under the tractor from the front. I then use a standard rolling floor jack to hold the rear bar in place below the rear axle attachment levers. Then when I have it positioned, I slowly raise the jack until the bar slides into the two slots, close the levers and done! Then I do the same thing in the middle to raise the plow frame to the desired hole in the lift bar, slip in the locking pin to attach it in the middle, using the floor jack to hold it up... Easy to do myself using the floor jack...
-
4 pointsPicked up a tall chute today. It's going to need some TLC to get it looking better. Price was reasonable. Going to go completely over it in the summer so it's ready for next winter. Time to start studying all the snow blower threads on the site. Model is 79-360. Auger doesn't look to bad. Side panels are on wrong and bent inward.
-
4 pointsWent out to visit dad today and he had been going through old pictures. He found this and gave it to me, that's me setting on it when I was about three years old.
-
4 pointsI put down 3 - 4 inches of grass around all my plants. Keeps the weeds down good. In the winter I cover my carrots with about a foot of leaves and then cover with plastic. The ground is just as soft as it is in the summer and when I take the leaves off in the spring the carrots that didn't get picked start growing again. This is the garden I build at the last place. 8' high with rabbit guard around the bottom and electric fence at the top with solar charger. No one got in. I'm going to put up an 8' high fence around the front of the property here - about 3 acres.
-
4 pointsi noticed that i had to keep rpms up on 701 to go up hills or while operating hy-2 pushing dirt. otherwise it would bog down. so today i had hood off. so i figured what the heck ill mess with it a little. Now when i got the 701 i had pulled carb off to clean it and i put the throttle rod back where the PO had it. well upon further investigation today it was in wrong hole. i moved it to the closest hole to the pivot point and readjusted the governor (i pulled the external arm off to change the rod placement rather than pulling carb off). problem is fixed its very strong and no bogging down now.
-
4 pointsi mount mine by sliding it under, lowering the lift handle and connecting that first, when i raise the blade the rear bar slots in and the latches can be closed
-
4 pointsto prevent a weld from cracking again, you have to drill a hole at the end of the current crack - then you can weld the crack...
-
4 pointsSorry to say this guys, but sadly there was no snow or ice to blame this on, just my own stupidity. Nice dry ground. Turns out I'm just a Slew footed clumsy old fat guy. That makes it even harder to take.
-
3 pointsThe limited slip differentials in the GT14 have side plates on the bull gear that are different width than the ones on the standard 8 speeds. They are both different. Meaning both left and right side differ. On the 8 speed these two pieces are same size. On the GT14 Hydro the axles are 5/8" different in length. I would assume same on c160 but I have not yet disassembled one. i sincerely doubt that 5/8" makes much difference. In fact on one of the GT14's the axles were identical in length at just over 14 inches. I am going by memory but I think they were each 14 1/8". as long as the hub key way engages the woodruff key all should operate fine. axles from all models seem to have similar machined end that the drive gear slides over. Just different finished lengths. As such using 8 speed axles in hydros seems acceptable. Edit( as long as you have enough clearance between tire and fender) using limited slip differential in an 8 speed will depend on as Rob indicated whether it will align correctly. With some minor machining you could use the side pieces from 8 speed on the guts of limited slip differential. I just don't have the tooling currently to do that. Not even a drill press at the moment. i did keep both limited slip assemblies as I do plan to modify to run in 8 speed.
-
3 pointsI know chains would help but they tear up the grass in places where it is still not frozen hard under the snow...That is why I was using the 310 with the fat tires. When it is frozen hard i use the L107 with turfs and chains to haul away the ashes. I have several axles so I think some combination would be "close enough" May have to get the differential and try it out...worse case I would have a spare for my snow removal fleet....
-
3 pointsHere's a '78. The seat pan was changed to metal when dad bought it.
-
3 pointsI ahve the same question, but about my 1976 C-160 Auto. It has the Sundstrand 90-1140 hydro in it with an 8-pinion differential... 1 1/8" axles. I ahve a complete 10-pinion diff, with 1 1/8" axles, that I'd like to swap over for the same reason...(one wheel spins with the 8-pinion.) If someone...ANYONE... has the answer... 'Will they swap over.?? " lemme (us) know.
-
3 pointsI left all the air out and made the chain as short as possible and then aired the tires up. You have to keep the air up or they will come off. Sure helps its like the front is glued to the ground.
-
3 pointshttp://hdontap.com/index.php/video/stream/bald-eagle-live-cam http://hdontap.com/index.php/video/stream/pa-bald-eagle-ir-cam
-
3 pointsSo besides a little engine refreshing, I managed to put on wheel weights that I painted and threw on behind the wheels. Also put on the hubcaps finally.
-
3 pointsThanks Jaymon More progress.. Getting the knackered tyre off the front wheel rim was fun, the tube put up more of a fight than the tyre! Does anyone know what the random hole in the wheel rim is for? It doesn't seem to line up with anything on the RJ and I'd of thought it would have two holes for bolting a wheel weight onto! I wondered why the paint off the bottom of the gas tank had been stripped, someone has done a solder repair.. What's Nigel spotted in the tank? Nope, it's not a mini star system but quite a few holes instead! Some detail brought back by cleaning up the pull start casing.. Cleaning up the rear wheels.. Someone at some point had flattened the paint back to a beautiful smooth finish and then for what ever reason gave them a quick (very quick) spray with grey primer.. The odd rusty bit cleans up very easily The other rear wheel decided it wanted to leak water on my bench! 10psi later and water was pouring/bubbling out all over the place! I'm not looking forward to popping the tyre off the bead to clean the water out and see how badly rusted it is inside! I must remember to take a photo of the tyre valve tomorrow as I've never seen one like it! A hint of things to come Not forgetting of course
-
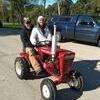
3 pointsWho is the guy on the left? He looks a little familiar... Where are the other half of your bikes? Anything new since I was up a few weeks ago? I'm ready to ride my Christmas present from the wife! (I must have done something right)
-
3 pointsThey roll over like stated above. The #40 seems to stay put. And @857 horse Howard, a 10 Ft piece will work to do both with some leftover. Most good hardware stores sell it in a box with 10 Ft chain and one master link so you'll need to buy a second master link. Normal cost is about $20 +/-
-
2 pointsYoutube video of my 1979 Wheel Horse C-161 throwing some snow!
-
2 pointsHad the 310-8 with the big ag tires out today to haul the ash barrel away. Had to take 2 tries to get up a grade with some packed snow, watching one wheel spinning furiously the other sitting still. The last two days of plowing snow with my Charger and Electro both with the 10 pinion when the snow pile tried to stop them they dug holes with both wheels. You can't beat the 10 pinion for use on snow and ice. So I realize the 10 pinion was never made in a 1" axle (as used in my 310). However I have an 8 speed on the shelf with the 1-1/8th axles, which would be an easy swap into the 310...but can i put a 10 pinion differential in the 8 speed. If the axles are not quite the right length I can live with that. Question is if the bull gear teeth will match up???
-
2 pointsUpdate with another starter, she runs!!! It runs great as well now for the new wiring and some other things and she should be good to go
-
2 pointsInquiring minds want to see more!
-
2 pointsHere are the end caps or whatever you call them for the limited slip differentials I have.
-
2 pointsI guess I feel a little better then. I was afraid that the ignition coil being at the end of the circuit would not explain why there was no power to the starter. Once I replace some parts, I will report back. I forgot to respond to the initial suggestion, but I did check all fuses and they are all still good.
-
2 pointsI had to relocate oil filter because it was in the way of the hood/grill on my Wheel horse 312-8The Kohler M12 K301 broke the rod, So i put a 20 Hp Honda engine in it and had to move the oil filter.Not only was the filter in the way of the grill, it was in the way of the mower deck drive belt.The Wheel horse clutch and drive pulley, and belt guides and belt shield all bolted up nicely to the Honda.I will add more picture later of the final project with the deck installed.Before & after pictureAll done on a drill press 2 x 2 x 4 inch long aluminum.
-
2 pointson one of my tractors(I forget which one the plate has 2 rolls formed in it,i had to use thicker plate and carve out the stiffening rolls so the plate would sit flat on the existing plate,i like daves method,and hes correct that the metal will be brittle and weak if too much heat,and another problem can be getting the hydro lines apert without stripping them,if you use daves method you don't have to separate
-
2 pointsIt appears the bolting flange for the side wing extensions have been bent in straight with the sides of the blower. They should be angled out and the extensions are reversed.
-
2 pointsDo you have the axles to go with the 10 pinion? It sounds like you want to use the 8 pinion axles in a 10 pinion differential. In a #5060 10 pinion, the short axle is 11 1/4"...the long axle is 12". Service Bulletin #252 talks about changing the 10 for an 8 pinion...going the other way may not even be a problem with your bull gear lining up. @Aldon was getting into this, and may still have some trannys open. Maybe he will weigh in here. Did you try chains on the 8 pinion...that might be all you need to do.
-
2 pointsHello Newbie here. Had to come on because Mastiffman Posted My Wheel Horse up here for discussion. I'm Chuck from Cass City Mi.
-
2 pointsToro used to sell a 1/4" pice of steel. It covered the entire trans mount. Easy enough to make. It could just be bolted on OR welded on. It was standard on 520h models. Drain trans before removing 4 mounting bolts. You'll need some 3/8" threaded rod OR some 2.5" bolts w heads cut off. Remove trans mount bolts. Install your 2.5" threaded rods in place of bolts. Now trans is secured. Lay your 1/4" plate over the trans mount.remove threaded rod and replace w new bolts one at a time. Works like a charm!
-
2 pointsHere are mine on the older narrower front tires.
-
2 pointsVery common problems on many model Wheel Horse's.I've actually seem some tractors break in half.I guess a kit used to be available to fix this problem.Some pieces of flat stock can be drilled to match the mounting holes then welded in place.Also,check the tranny bolts ocassionaly to make sure they're tight.When loose,they create stress on the frame that leads to the cracking problem.
-
2 pointsThere are quite a few posts on here describing methods of welding and reinforcing the broken frame plates. Just use the search for broken frame.
-
2 pointsSweet! i pulled a gas tank out of one of those at a salvage yard recently for my project. Simplicity is second to none IMO. I believe Allis-Chalmers put their name on Simplicity to sell back in the day. Those non-refusal offers are tough arent they?
-
2 pointsthat panel goes on left side of a round hood wheel horse.
-
2 points1979 Harley Shovelhead FLH 80 "King of the Highway" Mommas Ride Indian Chief Vintage Ural Patrol 2WD with my Girls and Best Man KenB
-
2 pointsWe have the first egg this evening.
-
2 pointsA little less chain than is used on a snow thrower. When I put a new chain on my snow thrower, I used the old chain on one of the front tires.
-
2 pointsThanks a lot Jimmy...now you got me jonesin! mommas ride
-
2 pointsStop by a motorcycle shop and they might give you some chain. I burn up at least one a year, so think of the possibilities. Maybe ask the mechanic what kind of beverage he enjoys... You know what to do
-
2 pointsCan one of the Admins or Mods jump into this discussion to lend a hand and see if you can get George lined out on becoming a Red Square vendor??? btw, found a pic of George on his FB site........he's on a Wheel Horse, of course!
-
2 pointsI see you just did what I was going to and Howard suggested! . Where were you around Christmas time! You might want to consider becoming a supporter to post This was the mash pole at a gathering of us horse heads. I assume you have seen the old TV show M.A.S.H.? Be willing to bet my bottom dollar you get some of your product to this gathering, if they are anything like your stocking caps, they would clean you out!
-
2 pointsIt is rather nice isn't it Thanks Chris It is indeed Mark.. With the RJ's engine having a good spark the time had come to look at the carb.. An interesting find behind the carb... Me thinks that gasket might be a bit small! Everything moved freely in the carb, so with a new gasket made (your see it in an up and coming video) the carb was bolted back on and a temporary fuel tank lashed up. A few pulls of the cord (steel cable in this case!) and the engine coughed into life and ran for a few seconds before stopping, which was just as well as the carb was leaking fuel from around the float bowl in vast amounts! Off with the carb again, ahhh there's the problem! As luck would have it Nigel had a spare carb which I could borrow to check out how the engine runs.. Thanks mate A few pulls of the cord later and the engine didn't start... One "big" pull later the pull cord came off in my hand but the engine did start, run and sounded very nice until it ran out of petrol and I gave myself a shock from the HT lead! All of which you will see in a video of course I thought I had snapped the steel cable pull cord thingy (I hadn't seen on either) until a saw how long it still was and checked the (not so) snapped end! As it turned out the nut that holds the end of the cable on was loose and the steel cable had simply pulled out! Phew While we have the pull start assembly apart let's turn it over and have a look..... What the??? Pull the cord and the center changes into a hexagonal shape! Which grips on a hexagonal shaft on the flywheel! I've never seen a pull start that works like that before... Me likes Then this happened More of an RJ update for you chaps, let's have a look at the hood/bonnet shall we.. The top had these rather worrying filler bubbles. which when prodded with a screwdriver looked more like this! Interesting, a repainted gas tank with no fuel tap (Neil did mention it leaked ) and lot's of paint cleaned off the bottom! What's going on under (or is that above?) the tank? Soooooo... Someone has ground back the filler smoothing out the underside of the hood/bonnet to weld on new fuel tank straps! I'd guess when the hood was painted no tank straps were fitted.. It so happen that the strap welds are in the same place as the filler cracks above! Who ever did it thought something sucked as that's what it looks like has been written! No idea why when I upload this photo it turns it sideways! Oh, and the top of the tank never got painted! Out with the grinder and a workshop full of filler dust later it was good to see the rust was surface rust only, and only where the filler had cracked... And a random pop rivet! As the bonnet/hood has quite a lot of ripples under the filler, there was no point in taking it all out only to replace it.. So with the surface rust carefully cleaned back to bare metal the first layer of filler went back in.. Easy sand no pin holes filler eh! At least the easy sand bit was right.. No worries, a second skim will sort it. Meanwhile I catch Nigel dancing with some masking tape and a bench full of RJ parts! Some parts like the gear (I'm not sure it should be called that!) lever had never be repainted, so here it is with all the thick surface rust cleaned off awaiting some red oxide primer. Some parts in the "need to to have the paint flattened back to give the primer a good key" Que Some primed parts hanging about the place. The hood now looks good with a fresh coat of red oxide primer, I'm happy with the overall shape of my filler work, there's a just a couple of little spots that are annoying me.. I will sort them tomorrow.
-
1 pointI needed a hitch for my 3/15. I've seen some real nice ones here so I decide to build my own. The angle iron is scrap bed frame, tough stuff and plenty strong. The side pieces are 2"x2"X1/8" square stock, bought an 8' at my local steel supplier cheaper than I thought. I own a wellsaw horizontal band saw (saved from scrap yard) made the job quick and easy. The receiver tube was a 12" cut in half. Came from harbor freight. Welded, primed, 2 coats of toro red and 1 clear coat. Supports 180lbs of cast iron no problem
-
1 pointJust slap one of these on there... and the Pine Bush cops might let it slide.


.thumb.jpg.0c495eaa7ff874c741991d7b1de2f119.jpg)


(800x673).jpg.cc3aefcd170c6bab1f22408014a1eb53.thumb.jpg.37c62115dec7a1fc65b8e86afd6af643.jpg)


This leaderboard is set to New York/GMT-04:00