
Leaderboard


Popular Content
Showing content with the highest reputation on 11/26/2016 in all areas
-
13 pointsPicked this sign up to pin on the stable door, thought it was appropriate
-
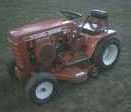
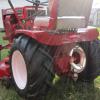
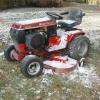
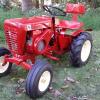
11 pointsSo here she is. From what I gather a 633 should be a yank start but this one is an electric start....a conversion I'm assuming since the engine is absolutely correct for a 633 (model# and spec#). It's not perfect but shows well enough for this redneck. Drove it around the yard a few times and it seems to be fine. Came with a mowing deck that was not "cleaned up" but seems intact. Not sure if it's the correct deck or not....I'm not very well versed in the round hood stuff like I am with the 1970's and newer machines and attachments. Also has a well built but homemade bracket on the front that I assume was for weights. That'll probably be coming off. Pics of course! Mike.....
-
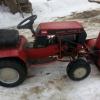
11 pointsI went yesterday to Mueller Motors in Desoto, Missouri. About a 25 mile drive north for me. They always have a few WH in their yard, some are customers, some are for sale, and others appear to be part tractors. There was a C-120 in the pen, but I didn't take any pictures from that side of the carport. The first two pictures I took a couple of years back and are posted in the dealer list. The other few pictures are from yesterday. They are also have another bone yard out back, but there weren't any WHs back there, but carcasses of other brands, tractors, walk behinds, etc.
-
8 points11-26-1968 Air Force helicopter pilot rescues Special Forces team While returning to base from another mission, Air Force 1st Lt. James P. Fleming and four other Bell UH-1F helicopter pilots get an urgent message from an Army Special Forces team pinned down by enemy fire. Although several of the other helicopters had to leave the area because of low fuel, Lieutenant Fleming and another pilot pressed on with the rescue effort. The first attempt failed because of intense ground fire, but refusing to abandon the Army green berets, Fleming managed to land and pick up the team. When he safely arrived at his base near Duc Co, it was discovered that his aircraft was nearly out of fuel. Lieutenant Fleming was later awarded the Medal of Honor for his actions.
-
7 pointsI got two of my horses ready for snow today. My 520HC with the blower and my C120 with a 48 inch blade. I tried to put the 42 inch blade from my 876 on my 1968 Commando 8 but the rear tires are too close together measuring 15 1/2 inches apart from inside of tires at the widest point on the sidewall. I measured the width between the tires on the 876 at the same place on the tires and it measures 19 1/2 inches so it's 4 inches wider than the Commando. I never knew there was a difference. I guess I need to look for a narrow short frame blade for the Commando. The 1955 - 2000 attachment interchange lists the 876 blade as part number BD4267 and the Commando blade as 6-4111.
-
5 pointsPicked up another Partial Lawn Ranger not too far from home . (Thanks to "Eagle Eye" Shynon down in Medford for pointing me in the right direction).... Pretty good shape considering it was sitting outside. I might just add the missing hood and engine, clean it up inside and out , oil it down and call it good.
-
5 pointsSort of a "One Horse Open Sleigh". Actually 14 horses, I guess. I used Christmas decorating as an excuse to get out the 314. It made it much more enjoyable. My wife just shook her head.
-
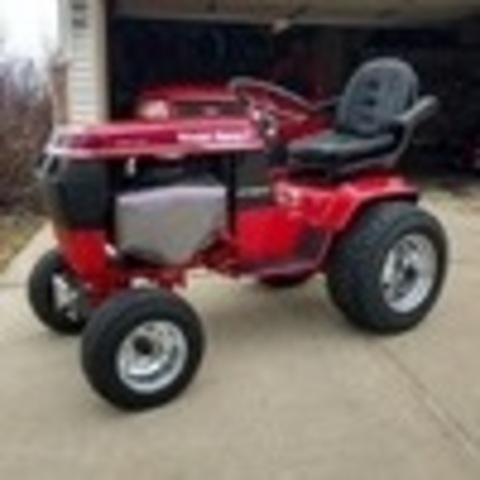
4 pointsHere is my semi-restoration project. I Just cleaned mine up a little and stripped all the sheet metal and repainted it. I used IH red paint color. I purchased this 520H at an auction a year ago for$400 it has a rock solid 62" most deck. I also have a 2 stage blower for it. I am waiting for my new bar tires. Thought I would share it here
-
4 pointsI made a pair of sweeps from angle iron and welded them onto my homebuilt ripper today. What a difference! The C160 auto didn't struggle a bit busting the ground up almost a foot deep. I love this beast!! Problem is the neighbors are asking me to bust plots for them. Thanks for the support and wisdom of all of you here. Mark.
-
4 pointsWith tinted windows, a tool box and the back-rack there is no way to get a rear view mirror shot...so for now a side mirror shot will have to do. Mike.....
-
4 pointsPretty neat idea .
-
3 pointsMore details about parts used and how they fit - Here are the spacers - Oilite bushings , 1" id x 1-1/4" od x 3/4" long . I couldn't find the studs I wanted but McMaster has them , of course.... https://www.mcmaster.com/#94358a330/=157i1xw So , using a piece of hot rolled steel I just broke out the tap and die set - just made my own . Long end is 3/8"-16 x 1" , short end is 3/8"0=-24 x 5/8" . Slotted the ends to install them and added red locktite - you do not want these to be able to back out on their own . Once the studs are installed one additional spacer had to be cut to 3/16" wide for one side - there are always differences in the fabricated parts like this - those spindles are not always the same length due to how they were welded . The spacer was cut from an adapter bushing for Cat1~2 hitch parts from TSC - I always keep some of these around for making spacers and such . Another option is to get a variety of 14 & 18ga machine bushings with a 1" bore and stack them to be able to pre-load the tapered trailer hub bearings . One side accepted 1 - 14ga bushing & 1 - 18ga bushing . The outside washer was made from heavy steel stock on the lathe - 3/16" to prevent deflection and faced parallel . You could also use the standard heavy gauge spindle washers but finding the smaller bore to fit the 3/8" stud isn't easy . Fender washers are too light but (you guessed it) McMaster has special oversize/over thick washers in stock ...(see a pattern?) https://www.mcmaster.com/#92140A118 Just an fyi - the trailer hub kits I chose have around .750 (3/4") clearance inside the dust cap - this is why everything is kept fairly short . That 3/4" depth is measure from the inside of the dust cap to the seating face on the hub - just keep this in mind if you do an upgrade of this type . If you used the somewhat common "shorty" hubs the length of the spindle would become a problem and require a lot more spacing on the inside . This is not ideal for two reasons - The original steering geometry is set for the rim center to fit the spindle in the middle , moving it outward or inward changes that geometry and will affect steering a lot . Further out and the wheels have to swing in a larger arc which would interfere with attachments such as a deck and put a much higher load on the spindle's pivot point in the axle . Moving inward would help lessen axle stress but that would also require a much shorter backspaced wheel to clear the axle's casting at the spindle , not to mention steering arms . Just things to keep in mind when shopping for parts , sometimes you can find better deals but need to know what exactly will work - and what won't .... Here is what I intended to build , simple stud with a 3/8"-24 castle nut , drilled to accept a cotter pin - just like a standard old-school front wheel bearing/spindle setup . 3/8"-24 thread is used to allow for bearing pre-load adjustment in small increments - coarse thread doesn't work unless you change spacer/shim thicknesses . Just keep in mind that whatever you use for shims it must push the outside bearing just slightly past the end of the spindle . This gives you a way to pre-load the tapered roller bearings and obtain a reasonable distance between the wheel and the end of the axle casting/steering parts . Here is the finished setup using a stud and castle nut to adjust the bearing pre-load . This hub setup now makes the wheel bearings easier to service , last far longer than the junk ball bearings in the wheels and can carry a lot more weight and handle side loading stress far better than the original design .... Next , we'll detail rim spacing and hopefully soon this thing can get under the tractor where it belongs... Sarge
-
3 pointsOk guys, completely rebuilt carb, w/new shaft bushing. Filed points to get spark and cleaned plug. Removed tins and cleaned out, plus found TDC and timing mark. Marked both with white out. Removed cylinder head and cleaned. Adjusted valves, exhaust was way to tight. Check and found ACR out of adjustment. Removed cam gear cover, adjust ACR per manual. Set engine timing. Removed fuel tank and cleaned out gum. Replaced tank bushing and fuel shut off. Replaced fuel lines. Started engine, ran great! Warmed up, shut down, changed oil. Checked and found RPM's over 3800, adjusted maximum to 3570 with tachometer, and idle to 1200. Set carb fuel mixtures. Engine sounds and runs perfect. No smoke. Trans seems to be fine, will change oil and filter. Hydraulics work fine. Need to install permanent battery and take outside of garage for full operational inspection.
-
3 points
-
3 pointsI'm not so sure that's ever been proven as being a constant. I do know there were problems with intake manifolds breaking and I believe the Kohler "fix" was to install the standard side draft Carter "N" & matching governor lever & link in place of the updraft Tillotson. Earliest versions did have a Fairbanks-Morse recoil vs. the Kohler recoil found on the later models.
-
2 pointsNo need, the fact that you saved another lawn ranger is good enough for me!
-
2 pointsNo Kidding!! Looks like it could eat a blizzard for breakfast....
-
2 pointsGot one Grandson ready for wet, cold, white stuff!
-
2 pointsMy 441-8 quit running a couple years ago so I parked it and used another one of my Horses to mow with.I decided to see what was wrong with the 414.No spark.Checked all wiring connections.Checked all safety switches.Cleaned spade connectors on the ignition switch.Still no spark.Pulled the fan shroud off last night and found........Head gasket had been leaking at some time and must have blew out some hot air onto the coil wire and just about burned it off.Also burned off the white primary wire on the coil.Ordered a new coil and head gasket .Hope this is all that's wrong.Funny thing is that this tractor ran perfectly until it just up and quit running.
-
2 pointsWelcome to the Red Square Vendors A-Z Tractor. I have added a link to your web site on my links page. So many of my customers are always asking if I have parts so now I know where to send them. http://www.redoyourhorse.com/wheel-horse-links/
-
2 pointsFine lookin piece of machinery and the deck looks correct to me.
-
2 points"the engine now runs but has no power, " When that happened to my C-81 it turned out to be the points. They needed to be cleaned / filed and set the way the engine likes it. Factory setting is .020 which should work. I have had enough issues with points on my Kohler engines that I am starting to believe the materials they use for new points is NG.
-
2 pointsSART and I went down to pool 4 Red Wing Mn. We had a pretty good time, caught alot af fish and 9 keepers from 16 to 20 inches
-
2 pointsThat big Tomahawk chipper would be a nice score.... Sarge
-
2 pointsTalk to your local mechanic shop and see who he uses for his machine shop work. He won't take his work to a machine shop he does not trust to do his work. I have done a dozen or so K series kohler rebuilds with aftermarket engine parts with great success. Besides a quality machining job and a clean assembly will make a quality engine rebuild. And
-
2 pointsThis is my best buddy, Lacey. She's a 9 year old Blue Healer. In her prime, she was really something to watch her work. She's retired to pet duty now. Mark.
-
2 pointsFor the hydraulics alone...... GET IT!!!!!!!! Don't let it be turned into tuna cans. Or even worse.... MTD products. Could you sleep at night knowing that Horse would be ground up and reincarnated as the newest generation "Craftsman"? Mark.
-
2 pointsHere's a couple of photos of our guard dog called Lily, she's a 2008 Patterdale. she likes to be on the look out for visitors but dosnt go much on seagulls
-
2 pointsBad to the bone looking, what a job it does. Glenn
-
2 pointsScrap steel is running slightly less that $5 a 100lb. Do that horse & deck are probable $25-30 scrap. so $60 doubles and $100 triples their money. So go get it!.
-
2 pointsLets see a box store lawnmower do that forty some years out.Mark,that looks great.Nice fab.JAinVA
-
2 pointsHere you go...nice job...that's beautiful hope mine comes out that nice !
-
2 pointsOk guys. I tend to live by the "Instructions are just the manufacturers opinion" theory. That may be because when I do read them I sometimes over complicate things. That's what happened here. I initially thought parts for this starter were no longer available but Craig set me straight on that. Then a few blurbs in the repair manual made me a bit gun shy. There was absolutely no reason to be. Here's how the disassembly went. Reassembly will be a while because I will be stripping and painting the case. This is really a very simple starter. Here's the backside. Simply remove the handle being careful of the spring tension. Pull the rope inside the housing and Hook it in the notch you see at about the 8 o'clock position on the pulley. That will allow you to unwind the spring. It was only wound two turns. Remove the bolt and you will see the pawls. Note the little spring and where it connects. The main spring will be exposed. This is where they say if you remove it you have to install a new one. Nope, not true. You can clamp the coil with some long nose vice grips near the ring on the post and work it out. The pawls lift right out. A good cleaning is in order here. The pulley is split and held together by these four bolts. It clamps and holds the end of the rope. This is where Kohler states to use only an original rope so it holds properly. A quality 7/32" rope will work fine. Don't try one of those cheapies at Walmart. My rope was in good shape until I saw the end. You can see it in the picture. You can also see where the spring connects on the pulley. Here's what a new spring looks like. That green ring holds it together until you install it. Ummmmmm, make sure you flip it over before installing it. Kohler springs as well as Stens and others are available. Even though I don't need one I wend ahead and ordered a Kohler just so I have it. It cost a bit more than a Stens but I just wanted the name. I'm sure you can all see how simple reassembly will be. When you put the pulley back on make sure the spring catch on the backside is a little more clockwise to the spring hook. Then just rotate it counter clockwise and it will catch. Since I unwound mine two turns I'll rewind the same. You just need to make sure the rope retracts all the way.
-
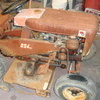
2 pointsCan anyone tell what model this one is? It's been sitting for awhile and appears to sunk in the ground a bit.
-
1 pointI do Wheel Horse salvage and the goal of A-Z Tractor is to provide quality used parts for Wheel Horse tractors. I buy and sell complete tractors as well as NOS parts and attachments for Wheel Horse. If you are looking for a part and have the part number go to http://a-ztractor.com/ and type the part number in the search box and it will tell you if I have the part, how many and the price. I also salvage and have NOS parts for Kohler, Briggs, Onan, Tecumseh engines. So I have what it takes to keep your Wheel Horse tractor going. Also I am a dealer for Stens products and they handle a large selection of OE and aftermarket parts for a large selection of brands and applications.
-
1 pointNo holes jelly. Not going to happen. Maybe rare earth magnet? I want the light to come off at the end of snow season.
-
1 pointX-2 ^^^^^^^^^^
-
1 pointCheck the head and see if its warped. Had a 12 hp do that and the head was warped. Wayne
-
1 pointLiking this one Mike, she's a dandy!
-
1 pointFuel draining from the carb back to the tank due to stuck check valve in fuel pump.
-
1 point
-
1 pointIt could be a customer's. A few months ago they had a 312-8 for sale, on consignment from a customer. Price wasn't bad and it was in decent shape, but I passed on it. Just wasn't the right tractor at that moment sort of thing. The more local Toro dealer doesn't have the bone yards this one does, so I go to this one a bit more even though it's further away. Plus it has that small town mom and pop feel to it while the closer one has that big tractor dealer feel to it, which translate to less friendly.
-
1 pointThe pitted seal diameter on a shaft can in most time be solved with a wear ring (speedi-sleeve). You might have to make your own installer tool out of pipe or tubing. I just saved a $175 main shaft with a $25 speeding-sleeve on my Troybilt Horse tiller. If you have no spare shafts handy, the sleeves are a good alternative. Mark.
-
1 pointLooks great, factory fresh. Some guys sure can paint. Glenn
-
1 pointI grain farm and I think it looks more like a deep ripper! That will break up a compaction problem ! Looks like you got your shanks in line with your rear tires too. Does the WH pull it with no problems?
-
1 pointMcMaster - https://www.mcmaster.com/#standard-rolling-element-thrust-bearings/=156hxbb Bearing - https://www.mcmaster.com/#5909K36 Washer - .032" thick - https://www.mcmaster.com/#5909K49 Washer - .126" thick - https://www.mcmaster.com/#5909K63 Just make note to look at the base of the spindle at the steering arm plate - if it's not dead square you need to use the .126" thick washer to support the bearing , or correct the misalignment in the plate . A good welder could build that up and have it machined square if needed too . Most front axle/spindle sets are not set up long enough to use the thicker .126" washer but the top surface of the axle casting can be ground off to get clearance for the E-clip or side mount retaining ring , E-style / McMaster - https://www.mcmaster.com/#98407a156/=156i0rv Sarge
-
1 pointThinking something similar... maybe, scaled down to dimensions would be some fun in the snow.
-
1 pointMade some reasonable progress yesterday , at least got the bushings fitted and the axle's holes bored out - that really was a battle since this type of cast iron can have some truly hard deposits in it , which this one did . One side is dead-on to original angle , other one ended up 2.3* down , which is going to show...aarrgghhh. Finishing up a tool today for making the counterbore cut in the bottom side for the bearings to sit 90* to the bore - I want them a bit deeper than stock to protect those bearings and retain grease better .No mill here and my buddy that has a nice one hasn't got squat for tooling so it's all hand work , which takes a lot more time and effort . I've shopped around for local machinist shops willing to do what I need for these axles , most are just too busy to tackle a job that will require a lot of setup time or making a jig to properly set the king pin angles (21* x 1.2*) and deal with cutting the cast iron - hence the use of bridge reamers . Wrestling with a 36v Bosch industrial drill and a 1.125" reamer that is 11" long is like mechanized bullfighting , but I got it done . Can't believe I can still type ... Sarge
-
1 pointI've gone both routes, but prefer to have a rebuilt American carburetor verses a new Chinese made carburetor. In the end I have as much or more in the rebuild but to me it's a matter of principle.
-
1 pointGentlemen...just a safety thought...before pounding anything like that into the ground, consider calling JULY or whatever you use to get utility locates. It is a free service and if you hit something (and live to tell about it) you are libel for the fees to fix it. Don't assume electric and phone cables are 2 feet or more deep. Gas services can be shallow also...cable TV is always shallow.

(800x673).jpg.cc3aefcd170c6bab1f22408014a1eb53.thumb.jpg.37c62115dec7a1fc65b8e86afd6af643.jpg)















This leaderboard is set to New York/GMT-04:00