Jump to content
Wheel Horse 3D

Custom 3d printed badges, ornaments etc.

Recommended Posts

Wheel Horse 3D

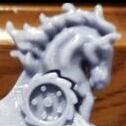
Lookie who i found on Dad's shelf!

SmartSelect_20210228-172246_Gallery.jpg

  • Heart 1

Share this post


Link to post
Share on other sites
 
Wheel Horse 3D

Plenty of flex too.

SmartSelect_20210228-185050_Gallery.jpg

  • Excellent 2

Share this post


Link to post
Share on other sites
 
ebinmaine
1 hour ago, Wheel Horse 3D said:

Lookie who i found on Dad's shelf!

SmartSelect_20210228-172246_Gallery.jpg

Mack!!!

Share this post


Link to post
Share on other sites
 
Wheel Horse 3D
1 minute ago, ebinmaine said:

Mack!!!

Tryin to figure out how im gonna duplicate and modify. Maybe take a marker and divide him into 5mm slices, measure and duplicate each slice and stack em up.

  • Like 1

Share this post


Link to post
Share on other sites
 
Wheel Horse 3D

Maybe i could drop some pics of him on a grid in blender.

Share this post


Link to post
Share on other sites
 
Wheel Horse 3D

Take me piece of plexi, put a grid on it, and put him just behind the grid! Then some pics and I've got something to work with!

Drop the patent pic behind rhe grid too. Should show me the mods needed for the original 30s model. Then just have to get the size correct.

Edited by Wheel Horse 3D
  • Like 1

Share this post


Link to post
Share on other sites
 
Wheel Horse 3D

Heres the previous version of a headlight bezel with thr flat head snd classic wheel. Lugs were too small to take paint correctly.

SmartSelect_20210228-190600_Gallery.jpg

  • Like 1

Share this post


Link to post
Share on other sites
 
Wheel Horse 3D

Or i could just find an app for that!

SmartSelect_20210228-193045_Drawing Grid Maker.jpg

  • Like 1

Share this post


Link to post
Share on other sites
 
Wheel Horse 3D

Uggh stayed up and find i printed the wrong file! Lol printed another hubcap! Starting the classic wheel now! Should be done by morning.

  • Like 1

Share this post


Link to post
Share on other sites
 
Wheel Horse 3D

Glossy? Or plain?

If i put a coat of acetone on there i can make the ABS more shiny. I think the plain looks better.

What do yall think?

SmartSelect_20210301-084240_Gallery.jpg

SmartSelect_20210301-084312_Gallery.jpg

Share this post


Link to post
Share on other sites
 
ebinmaine

Kind of hard to tell from the pictures. The plain one looks like it has more depth and definition and I would prefer that. 

  • Like 1

Share this post


Link to post
Share on other sites
 
Wheel Horse 3D
8 minutes ago, ebinmaine said:

Kind of hard to tell from the pictures. The plain one looks like it has more depth and definition and I would prefer that. 

That's how I see it. The plain adds overall contrast.

  • Like 1

Share this post


Link to post
Share on other sites
 
 
Wheel Horse 3D
9 minutes ago, Jeff-C175 said:

Mine is coming along nicely.  Another coat of white on the wheels and some touchup on the hubs and she'll be ready to mount.  (I use that term loosely!)


image.png.ce28bb6a1ab82dbf8f66f0f3400857bf.png

NICE FINISH!!! Any tips/tricks to share?

  • Excellent 1

Share this post


Link to post
Share on other sites
 
Wheel Horse 3D

I think I did some extra acetone smoothing on that one, dunno if it helped.

Share this post


Link to post
Share on other sites
 
Jeff-C175
1 hour ago, Wheel Horse 3D said:

Any tips/tricks to share?


Nothing special really,  I did a light wet sanding with 400 and then with 2000, but the detail areas I really couldn't get into very well.  Mainly just the base I wanted to get as smooth as possible and remove the center seam stuff in the mane and face.


Used "Testors" model paint, couldn't find the "Model Masters" you mentioned but I believe that's also packaged by Testors.  I went to the hobby shop that was supposed to be open until the end of March, and it was CLOSED! already.  Empty, lights out.


First coat was light, second coat I applied heavier, just short of 'sagging'.


Allow plenty of 'curing' time between coats, these enamels are slow drying.  They 'skin over' quickly, but are not yet dry underneath.  Add a second coat too soon and you'll be 'pulling' the top skin off and make a messuvit.


Use QUALITY! brushes.  That's probably the most important part.


Edited by Jeff-C175
  • Like 1
  • Excellent 3

Share this post


Link to post
Share on other sites
 
Wheel Horse 3D

I went ahead and added the headlight bezel/lens  and the steering wheel inserts to the store. Soon I'll be adding custom options to the inserts as well, just like the ornaments and bezels. So then you can have all your Horses on your Horse match!

https://www.etsy.com/shop/greystone3d

  • Like 1

Share this post


Link to post
Share on other sites
 
Jeff-C175

I might have missed in a previous post...  are you by chance doing horses for the steering wheel center?  My poor C series has been whinnying for a logo there for a long time.  I don't think the C's came with them.  Maybe something that fits the radius of the existing cap that can be siliconed in place on top?


Like this?


image.png.340942ead3cb3d7b876f519bec3e45b6.png

Edited by Jeff-C175

Share this post


Link to post
Share on other sites
 
roadapples
40 minutes ago, Wheel Horse 3D said:

I went ahead and added the headlight bezel/lens  and the steering wheel inserts to the store. Soon I'll be adding custom options to the inserts as well, just like the ornaments and bezels. So then you can have all your Horses on your Horse match!

https://www.etsy.com/shop/greystone3d

Not finding your  store...

  • Like 1
  • Thanks 1

Share this post


Link to post
Share on other sites
 
AMC RULES

Just search Wheel Horse there on Etsy Jay.

  • Like 1

Share this post


Link to post
Share on other sites
 
Wheel Horse 3D
26 minutes ago, roadapples said:

Not finding your  store...

hmm, lets try https://www.etsy.com/shop/greystone3d

Edited by Wheel Horse 3D
  • Excellent 1

Share this post


Link to post
Share on other sites
 
Wheel Horse 3D
2 minutes ago, Wheel Horse 3D said:

"SHOP" not "store"

Share this post


Link to post
Share on other sites
 
Wheel Horse 3D
54 minutes ago, Jeff-C175 said:

I might have missed in a previous post...  are you by chance doing horses for the steering wheel center?  My poor C series has been whinnying for a logo there for a long time.  I don't think the C's came with them.  Maybe something that fits the radius of the existing cap that can be siliconed in place on top?


Like this?


image.png.340942ead3cb3d7b876f519bec3e45b6.png

Just added these (center one is original others I printed), I will be eventually customizing these with the same options as everything else. If you need a specific size or thickness just let me know!

  • Like 1

Share this post


Link to post
Share on other sites
 
Wheel Horse 3D

@Jeff-C175 if need be for a custom application I could add a "cup" on the bottom? Id have to get a closer look at your steering wheel If we need to fine tune a solution.

Share this post


Link to post
Share on other sites
 
Jeff-C175
2 hours ago, Wheel Horse 3D said:

Id have to get a closer look at your steering wheel


As close as you can get without a road trip!


image.png.b0e7ae5aed97f5a01ddd817734d54166.png


What I have no clue how to cipher is the radius of the part.  I guess I could lay a straignt edge across the wheel and measure down to the center, and then the edge.


What are the dimensions of the ones you made already?


I've never had that center piece out.  It looks like there are two 'slots' to fit in a small flat blade and that part would pop out but I'm a-feared to try it for breaking something.


Anyone know if that's how to do it?  Will that piece pop out easily?


If there were slightly MORE curve to it, and only needed to be silly-coned in around the outer edge, that would work.  LESS curve would not work because the edges would be 'floating'.


Coolest solution would be if that part did pop out easily and the logo part pop in it's place.


Edited by Jeff-C175

Share this post


Link to post
Share on other sites
 

Create an account or sign in to comment

You need to be a member in order to leave a comment

Create an account

Sign up for a new account in our community. It's easy!

Register a new account

Sign in

Already have an account? Sign in here.

Sign In Now

  • Similar Content

    • Donavon
      By Donavon
      Need ideas to convert my 1054 A Frame plow into a snow blower
      Any idea's?
    • Wheel Horse 3D
      By Wheel Horse 3D
      Welcome, and thanks for visiting our vendor area.
      We got our start in 3D printing for customers right here on Red Square!
      If you'd like to see how every thing gets developed and the contributions of Red Square members, please visit the thread that started it all and browse through our progress to date.
      We love our clients' input and work closely to turn ideas into reality. If you have an idea, request, or questions, you can post to that thread, message us or tag us here on Red Square, or visit our Etsy store and reach out to us through there.
      Greystone 3D on Etsy
    • Wheel Horse 3D
      By Wheel Horse 3D
      Our customized ornaments have a base identical to our version of the original style ornament, but can be topped with 3 different styles of horse head and 3 different styles of wheel! Each is available unfinished, primed, or fully painted.
      They also include the pictured mounting hardware and the base spacer for a clean finished look. Can be ordred here Custom Wheel Horse hood ornaments..9 different styles


    • Burnerman
      By Burnerman
      I’m building a lowered 300 series wheelhorse. So far it’s a combination of 3 scrap tractors. 
      the frame, trans and tins are from a GT2500 anniversary special given to me by a neighbor with a trashed Briggs. The Kohler M12 is from a junkyard 312 that was roached. The parts tractor I’m using for the build was another older 312. I’ve got the k301 in the garage. The trans was toast. Both axles wallowed out keyways and 1 axle actually broken. 
      Anyway! I needed a project and a toy to putt around the neighborhood. I couldn’t find any other posts on how to do the whole thing. I’m trying to keep it cheap using stuff I have on hand and looking as “stock but cooler” as possible. So here we go. 
      I’ll update this as I go along. 
×
×
  • Create New...