jebbear 386 #151 Posted November 15, 2018 (edited) On 11/13/2018 at 9:08 PM, ebinmaine said: but I can get Rimguard here in Maine Do you do your own work charging tires or is this something that a tire shop has to do? I'm new to this whole process having never done any of this myself and wasn't even sure how it was done. I have since been viewing some YouTube videos on guys that do this work themselves and have varying methods. As I mentioned, I have had tractors with ballasted tires but never had to actually charge one myself. I guess I always assumed that It needed to be performed by a tire shop. I like what I have read on the Rimguard, so I filled out the form on their website to find out if it is available anywhere close in PA, but haven't heard back yet. And since were discussing tires, I still need to get a couple of tubes for my rears. I notice that my existing tires that I want to reuse are 22 x 9.00 -12's, but the only tubes availabe that I find are 23 x 8.50/9.50/10.50 -12's. Am I correct in assuming that these will work OK for my size tire and that the extra 1" inflated height is not an issue? Edit Update: Just received reply from Rimguard. It is available close to me and sounds like an excellent option. They included the following in the reply: "Important Tip: If you are filling tires with liquid ballast, be sure to use air / liquid valve stems (an industry standard) regardless if it is a tubed or tube-less set up. Air only valve stems are prone to failure because they are generally held together with adhesives which typically do not hold up when being submerged in any liquid ballast." What exactly does this mean? If I buy tubes on line, how do I know if the stems are this type? Edited November 15, 2018 by jebbear Share this post Link to post Share on other sites
ebinmaine 79,590 #152 Posted November 15, 2018 I only have one set of tires that is filled. I don't have any particular opposition of doing it myself but here in Maine the price for Rimguard is right around the same price per gallon as RV antifreeze or 20 below washer fluid. As much as we like to try to do everything for ourselves and by ourselves it just doesn't make any sense or dollars and cents to liquid fill my own tires. IMHO, the few dollars more that I pay them for the labor to fill the tires is far outweighed, watch for that pun, because the Rimguard weighs nearly 4 pounds per gallon more than comparable washer fluid. I'll take all the extra weight I can. In a large rear tire that's 28 lb difference on each side. As to the information that you got on the tubes. They are not wrong. The only thing is, they are also not necessarily correct. They're just covering their own butt. I would highly recommend that you buy your tubes directly from the company that is going to fill your tires for you. Keep the receipt. That puts it on their shoulders, not your own. 1 Share this post Link to post Share on other sites
jebbear 386 #153 Posted November 16, 2018 Thanks Eric, great advice as always! Just more stuff for me to think about. Slowly making a little more progress on the reassembly. Got the front axle steering spindles installed along with all of the related new bronze bearings and thrust washers. Ran into a little unforeseen issue that never really even entered my mind when i was concocting all of those crazy ideas about adding all of these retro fitted bronze bearings. When I installed the new tie rods that I fabricated a while back, I noticed that the tractor had a pretty excessive "toe-out" situation. I thought, no big deal, that is why I made the tie rods adjustable in the first place so I'll just crank them out until I can get somewhere near a 0 toe-in. Anyway I cranked on them until I only had a few threads left in the tie rod ends, so few that I was a bit concerned. I wondered how this could be happening since I had patterned and fabricated them on the short adjust end basically the same length as my original fixed tie rods, with plenty (I thought) of outward adjustment. Now it's time and wondered if I mis-measured something, used a rubber ruler, or just what was going on. So I got my old original worn out ones out and temporarily put them back on just to make sure I wasn't going nuts. Same excessive toe-out. Then it hit me, I wondered if that little 1/8" thick thrust washer that I placed on the spindle at the bottom of the axle could somehow be causing this: I thought, surely 1/8" of additional thickness couldn't be causing it, but long story short, it was. I tried a couple of different things just to verify it. First, when I bought these thrust washers from McMaster-Carr, I also bought two others that were only 1/16" thick not knowing at the time which ones I would go with. Pulled off the ones I had on, put on the 1/16" and voila, half of my excessive toe-out went away. Even took them all off altogether (basically back to original factory) and toe-in was perfect. I would have never guessed it, and still can hardly believe it, but after studying what was going on I can only figure that with the combination of the camber angle of the axle spindle compounded with the length of the lever part of the spindle that the tie rod bolts to, it threw it out this much. Must be part of that wizardry called geometry or one of those mathematical things! But anyway, I wasn't going to go without my thrust washers, so I re-installed the 1/8" ones and called an audible. When I built the tie rods, I had intended to only make the outer rod end adjustable, but the inner one basically fixed. But by fixed, I had built it also using a threaded rod on that end to attach the tie rod end, but with no jam nut nor intent of making this end expandable. So it was really a simple fix after all of this, I just separated the inner tie rod end, added a jam nut, gained 1/4"+/- in rod length, and shortened up on the outer tie rod end to gain my threads back. I hope my explanation is as clear as mud, but here's another photo: Note the outer tie rod end where all of the adjustment was intended to be made, and the newly added jam nut on the inner tie rod end (originally intended to be fixed) just to pick up a little additional length. If you notice on the outer tie rod end where the paint stops and bare metal on the threads begin, this is equivalent to the original fixed rod length. There is probably close to an inch of threaded rod inside of the tie rod end, and I pretty much was using almost every thread of it when this problem showed up. The adjustment as you see it (symmetrical both left and right rods) is real close to 0 toe-in at this point. I assume that is about the correct toe adjust that I want in the end, since I don't anticipate surpassing 180 mph on the tri-oval when I'm done with this thing! I know, I guess I'm rambling again, but I wanted to pass along to others this important information for consideration to anyone making this type of alteration with a thrust washer. It is still hard to comprehend how 1/8" of vertical adjustment equated to almost a full inch of lateral difference, but take my word for it, IT DOES, at least on this model tractor. This is a very important consideration with thrust washers and tie rods!! It turned out to be an easy fix for me so I got lucky, but had I not had the inner threaded rod to fall back on, the only recourse that I would have had would have been back to the lathe to make new, longer tie rods. 2 1 Share this post Link to post Share on other sites
Pullstart 70,529 #154 Posted November 16, 2018 Re: filling tires yourself: get a portable air tank, take the gauge off and fill the tank with your liquid, charge it with some air pressure and keep the outlet low, the air pressure will do the work similar to a bladder tank in a plumbing system. As as far as special valve stems for liquid use, once again I went with the cheapie ones in the cheapie tubes. No problems thus far, 2 Share this post Link to post Share on other sites
jebbear 386 #155 Posted November 16, 2018 (edited) Thanks @pullstart, that sounds straight forward enough to attempt. I'm still a long way off from charging tires but just trying to get my ducks in a row when the time comes. I'm still looking at a couple of Carlisle tubes on line, ratings I saw looked pretty good, and they were still only a couple bucks more than the cheapest of the cheapies. I sent the Carlisle company an inquiry form on their website with my valve questions, haven't heard back from them yet. I agree with @ebinmaine that Rimguard is probably just covering their butt and may not even be an issue in most cases. Heck, I wouldn't be afraid to guess that probably most of the ballasted tires out there are probably just in regular ole tubes. I do know for fact on my tractor, the original owner had calcium in the rears from the time when it was near new in the late 60's until probably 20 years ago when the one tire totally let go on me. But that wasn't the valve's fault, just good old fashioned dry rot in the tire rubber. And these were in just plain old inner tubes, no special valves. As a matter of fact, I still have the other tire sitting out in the storage shed, still has the calcium in it, and still has air in it! The tires I have currently been running are used replacements, but I never got around to charging them. Eric, I know what your saying as far as getting tubes from the dealer that installs the beet juice. The only downside is, my local dealer that does this work is also a franchise dealer of the green machines, and could almost imagine what he would charge me for new tubes . Edited November 16, 2018 by jebbear 2 Share this post Link to post Share on other sites
ebinmaine 79,590 #156 Posted November 16, 2018 29 minutes ago, jebbear said: Eric, I know what your saying as far as getting tubes from the dealer that installs the beet juice. The only downside is, my local dealer that does this work is also a franchise dealer of the green machines, and could almost imagine what he would charge me for new tubes . Yeah Ouch Lots of ummm "green"backs. Share this post Link to post Share on other sites
jebbear 386 #157 Posted November 16, 2018 Here are a few more pics of some more progress. Finished tweeking all of my revisions and adjustments in the brake/clutch idler and linkages. The first pic is the clutch rod pivot lever on the idler arm and shaft assembly. I did manage to get a new bronze flange bearing in the hole for the brake rod, but couldn't easily utilize one in the hole for the little stud that integrates the parking brake lever and the main rod linkage from the pedal. This area required a little ingenuity to make it all work because this whole thing was full of slop and play everywhere. What I ended up doing was, I fabricated a brand new stud (upper right of photo & out of focus) on the lathe & threaded the hole for the main pedal linkage. Note the extra step/shoulder that I put in the pin for the parking brake lever to ride on since this lever was all wallowed out and egg shaped. Then I reamed the hole back to round in the lever which was now oversized, hence the little step/shoulder. The lever now rides on the step area of the pin, and is locked between the pivot arm and the main head of the pin. This operation required one more adjustment to the brake lever, I needed to widen out with a file the little half moon area of the lever that originally swung directly against the brake rod link, now swings into the flange of the bronze flange bearing instead of the brake link. Sorry I forgot to take a photo of the parking brake lever by itself before I assembled it, but I hope you all get the picture. Maybe it will show up a litlle better in the lower completed photos. Pay no attention to one of my painting "holidays" on the linkage assembly! After getting it all put together, It made a HUGE difference in tightening things up in all of these linkages. As of now there is not even the slightest amount of play in this whole assembly, which is not the way it was when I started. Time will tell if these modifications will pan out and hope it stays this tight for some time to come, but I'll just have to wait and see. You all may also notice that I got the brake drum mounted on the transmission. I used my idea of the J-B Weld, applied a VERY thin layer (only needed +/- 0.003") with my finger evenly in the hole of the drum. Then just used very fine sandpaper on a dowel rod to dress it up. Took a long time, and a lot of trial and error to get it to where it was snug, but eventually with light taps with a block of wood, it seemed to snug right up. Right now its nice and tight, absolutely no wiggle or play, and should be easily removable if need be. Again, time will tell if it works its way loose again and I still may consider replacing the drum but for now at least I can try it as is. 1 3 1 Share this post Link to post Share on other sites
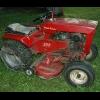
jebbear 386 #158 Posted November 17, 2018 A couple of more new pics. Next on the list was to press in the bronze flange bearing for the lift arm shaft that I had shown an earlier photo of during the reaming process. I had mentioned earlier on that the length of the bearing may have needed trimmed slightly, but decided to just leave it alone as it only sticks through the housing less than 3/32". Kind of like the finished look of the bearing edge anyway, although it does leave the end of the shaft now slightly recessed from the bearing surface and not flush with the outside face. Bearing and flange on the inside... ...and bearing on the outside (notice the slight lip). And a couple from the top after installing the lever assembly, lift cable (thanks @wheelhorseman for a quality cable), and the hoodstand.... I don't remember and don't have a clear "before" photo of the lift cable, so I wasn't sure which hole in the lever that the cable was attached to originally. So for now I just stuck it in the middle hole because that seemed to keep all things aligned the best and figured it might become clearer as things progress and final adjustments are made. If anyone has any insight on this it would be greatly appreciated. This thing is finally starting to slightly resemble a TRACTOR again! ...and one more of my makeshift assembly line in the basement, with a lot of the other parts waiting their turn to get put back on. 1 7 1 Share this post Link to post Share on other sites
ebinmaine 79,590 #159 Posted November 18, 2018 Phenomenal work. Absolutely. Share this post Link to post Share on other sites
Herder 2,356 #160 Posted November 18, 2018 8 hours ago, ebinmaine said: Phenomenal work. Absolutely. Agreed! Share this post Link to post Share on other sites
rjg854 13,168 #161 Posted November 18, 2018 that is eye popping, jaw dropping, B U T FULL 1 Share this post Link to post Share on other sites
jebbear 386 #162 Posted November 18, 2018 Thanks guys for all of the kind words, compliments, and encouragement! Believe me, there are a few flaws that I can see which maybe my photography can camouflage, but overall so far I am happy with the way it is turning out. Like I said a while back, I'm no expert and have been learning as I go (with a LOT of help from all of you ). 2 Share this post Link to post Share on other sites
Pullstart 70,529 #163 Posted November 20, 2018 I’m guessing depending on the weight of the attachment and how high it needs to lift, there are options. The further down the lever you go, the more lift movement you’ll get.... the higher up it is on the lever, the more (easier pull) weight you’ll be able to get off the ground. 1 Share this post Link to post Share on other sites
953 nut 67,328 #164 Posted November 20, 2018 1 hour ago, pullstart said: I’m guessing depending on the weight of the attachment and how high it needs to lift, there are options. The further down the lever you go, the more lift movement you’ll get.... the higher up it is on the lever, the more (easier pull) weight you’ll be able to get off the ground. This drawing illustrates that. 1 Share this post Link to post Share on other sites
jebbear 386 #165 Posted November 20, 2018 1 hour ago, 953 nut said: This drawing illustrates that. Thank-you for that information. The drawing is a slightly different variation than an 856, but I'm sure the hook-up would probably be the same. I never saw that illustration before, is that in a dealer manual or service manual? Very useful information. I may have similar questions when I go to hook up the mower deck on the mid-mount, but haven't even started the deck resto yet. 1 Share this post Link to post Share on other sites
jebbear 386 #166 Posted November 21, 2018 A couple more pics. Slowly making a little more progress. Got the control panel housing attached along with the upper steering shaft through the new bearing. I was very pleased with the outcome and the fit of this, got rid of every bit of that slop in the steering that has plagued me for years. The only steering play that I have now in the whole system, is what I had already anticipated in the mesh of the gear teeth on the fan gear and pinion gear of the shaft. Didn't really have an easy fix for this, but it is very minimal and the whole thing is 1000 times better than when I started. ...and the engine mounted. For now I just stuck the old spark plug cable on, but I would like to replace this eventually. It always seemed to fire OK, but there is a split in the plug boot rubber at the engine. Anyone know if you can get something similar to an OEM cable with the cast rubber 90° boot, or at least the components to make one up similar to this design? Years ago when I was a youngster, I used to always make up my own cables but they were always just a generic cable with nothing more than a little crimp on thingy at the plug and not enclosed in the real nice angled rubber boot. And for one more "question of the day" (I seem to have a lot of these). The clutch spring, where it attaches to the hole in the rear transmission axle casting, does it attach DIRECTLY through the hole, or is mine missing something? Didn't know if it utilized some type of large cotter pin through the hole then attach to the pin (similar to the large spring on the other side for the attachment pedal where it attaches to the frame) or some other method? The reason I ask, for one it is a real pain to get the spring loop directly through the axle casting, and also when attached the spring itself doesn't really clear the brake band and sort of slightly wraps over and rubs against the brake band (destroys my "nice" paint job ). Maybe I'm just hooking something up wrong, but basically putting it back the way I found it. As an FYI, i replaced my old spring which resembled more to an old mangled bent up piece of coat hanger (it was BAD), to what is now supposedly an OEM Toro Wheel Horse #83-2730 spring. Below is a photo of my current setup (spring not attached) and also a blowup from a photo that I found of the tractor from the original manual. The parts breakdown illustration in the manual doesn't clearly illustrate this spring connection, but the b&w photo which is not very clear just doesn't appear to wrap all the way down directly to the axle and APPEARS to have clearance at the brake. Its not very clear in the old pic, but it just seems to have better clearance at the brake band and the spring coils just don't seem to be elongated and spread that far apart. Maybe I'm just reading more into this than there really is, but would appreciate any guidance from those of you that have the same design. If I'm over reading this thing, just tell me to hook the thing up and move on. 1 Share this post Link to post Share on other sites
Ed Kennell 46,510 #167 Posted November 21, 2018 Mine is hooked directly on the holes. I don't know if it is original. It appears the spring would have to have been hooked to the axle first hooking it in from the front . This may give more clearance to the brake band. Then hooked thru the hole in the brake locking lever from the inside. Sorry I don't have pics. I lost my camera. 1 Share this post Link to post Share on other sites
ebinmaine 79,590 #168 Posted November 21, 2018 I have three 1967 tractors at home that I can look at for you. This is not something you can overthink in my opinion. That would be because the brake tension needs to be correct. Share this post Link to post Share on other sites
Stormin 9,988 #169 Posted November 21, 2018 That spring hooks into the little hole you can see on the axle. Loop some string over the end and stretch the spring back, till you an get the hook into the hole. Wear a glove. 1 Share this post Link to post Share on other sites
wallfish 20,186 #170 Posted November 21, 2018 I see your dilemma. My stuff never gets painted that nice so it's never a problem, but scratching up your nice work is an issue. Maybe thread that hole in the trans and add a small piece if metal to hold the spring higher? Share this post Link to post Share on other sites
jebbear 386 #171 Posted November 22, 2018 5 hours ago, Ed Kennell said: It appears the spring would have to have been hooked to the axle first hooking it in from the front I agree, Ed. It would be borderline impossible to start at the brake lever end. I kind of just showed the spring in the lever end for illustration purposes. My old mangled spring was also just hooked directly through the axle hole, and I did ALMOST have the thing hooked up until I noticed the rubbing issue on the brake band. I then decided to temporarily abort this operation until I got some expert advice from everyone here. That may be the way its supposed to mount, but thought I would throw it out there for a general consensus. Thanks. 5 hours ago, ebinmaine said: I have three 1967 tractors at home that I can look at for you That would be greatly appreciated, Eric. Like I said, that may be the correct hookup directly in the hole and if you find yours are all that way, so be it. 3 hours ago, wallfish said: Maybe thread that hole in the trans and add a small piece if metal to hold the spring higher? I may try some reverse engineering on this thing to try for at least a little clearance on the brake band if it indeed is intended to hook directly in the hole. I might even try something like I mentioned above with a heavy cotter pin similar to the attachment pedal spring on the other side. After all, it is a way heavier spring on that pedal linkage than this clutch spring, and it seems to work OK there. everyone for your input. Share this post Link to post Share on other sites
ebinmaine 79,590 #172 Posted November 22, 2018 @jebbear We looked at the 867 and I asked Trina about her 657. Both of those have the spring clipped through the hole on the rear axle and rubbing over the top of the brake drum. Share this post Link to post Share on other sites
jebbear 386 #173 Posted November 22, 2018 2 minutes ago, ebinmaine said: Both of those have the spring clipped through the hole on the rear axle and rubbing over the top of the brake drum. Thanks Eric, that seems to be the consensus for all of the photos I have seen as well as others replies. Might have to live with it or apply a little ingenuity to rectify. I wonder if Wheel Horse recognized this as an issue, because in some of the later models I have seen parts illustrations on some tractors where it appears the brake bands were flipped upside down the other way allowing the gap to be up in the area where the spring crosses possibly providing additional clearance (?). Share this post Link to post Share on other sites
ebinmaine 79,590 #174 Posted November 22, 2018 2 minutes ago, jebbear said: Thanks Eric, that seems to be the consensus for all of the photos I have seen as well as others replies. Might have to live with it or apply a little ingenuity to rectify. I wonder if Wheel Horse recognized this as an issue, because in some of the later models I have seen parts illustrations on some tractors where it appears the brake bands were flipped upside down the other way allowing the gap to be up in the area where the spring crosses possibly providing additional clearance (?). I know there was a point where they moved the brake but I don't know what the reason was. Is there some sort of guard or tube that would be flexible or something that you could lay around the spring and over the top of the brake band? Share this post Link to post Share on other sites
jebbear 386 #175 Posted November 22, 2018 1 minute ago, ebinmaine said: Is there some sort of guard or tube that would be flexible or something that you could lay around the spring and over the top of the brake band? That's a thought. I just don't like the idea of two independent pieces "rubbing" together the way it is now. Share this post Link to post Share on other sites