

753 restore!!
By
zanepetty, in Restorations, Modifications, & Customizations
-
Similar Content
-
By giant_g2
Not sure on specific model. This 8 spd came attached to a plow I bought. It had some water in it for a couple weeks according to the prior owner. I drained it, sloshed some diesel in it, drained that, then filled with fresh oil. Spinning the input shaft by hand, I can see the axels turn. Hasn't leaked any oil. I'm not really interested in shipping, so I'd prefer local sales.
-

-
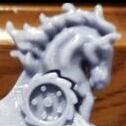 By Wheel Horse 3D
Our customized ornaments have a base identical to our version of the original style ornament, but can be topped with 3 different styles of horse head and 3 different styles of wheel! Each is available unfinished, primed, or fully painted.
They also include the pictured mounting hardware and the base spacer for a clean finished look. Can be ordred here https://greystone-3d.square.site/product/customizable-wheelhorse-hood-ornaments/10
-
By Wheel Horse 3D
Welcome, and thanks for visiting our vendor area.
We got our start in 3D printing for customers right here on Red Square!
If you'd like to see how every thing gets developed and the contributions of Red Square members, please visit the thread that started it all and browse through our progress to date.
We love our clients' input and work closely to turn ideas into reality. If you have an idea, request, or questions, you can post to that thread, message us or tag us here on Red Square, or visit our online store and reach out to us through there.
Https://greystone-3d.square.site
-