
Jump to content
sjoemie himself

Murray to IH 1568

Recommended Posts

sjoemie himself

In this thread I would like to share the current garden tractor i'm working on.

What started life as a 18hp Murray with a 42" deck will end up as a approximately 1/3rd scale IH 1568. Why? I hear you think.. good question! Because I like a challenge I suppose 😁


Here are a few pictures of the base vehicle and the state it was in. Really not too bad except the mower. More pictures to follow as the project continues.


IMG_20190831_165612.jpg

IMG_20190831_104057.jpg

IMG_20190919_181424.jpg

IMG_20200104_102533.jpg

Edited by sjoemie himself
Typo
  • Like 4

Share this post


Link to post
Share on other sites
 
Sparky

So a small version of this? Ambitious project, keep us posted on progress.

72B42A27-FD9D-467E-8C9F-5D8975F95A8D.jpeg

  • Like 9

Share this post


Link to post
Share on other sites
 
Achto

Fun project!! Keep us up to date.


A little fact on the 1468 and 1568, They had cylinder cut out way back then. The tractor would drop down to 4 cylinders when power was not required. Some people believe that 1568 was bigger than the 1468, truth was that they were the same size & horse power. Difference was that the 1568 was a tillage only tractor, it did not come with  a PTO. Same difference applies to their 6 cylinder counter part's the 1466 and 1566.

Edited by Achto
  • Like 6
  • Excellent 1
  • Thanks 1

Share this post


Link to post
Share on other sites
 
ebinmaine

This could be interesting. I'm in!


  • Like 1

Share this post


Link to post
Share on other sites
 
Pullstart

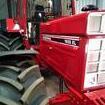
@WHX?? and @Achto have a buddy Al who built this IH from a Cub Low Boy, I think.

49E10A03-47CB-4198-9CFF-19C545FA7D87.jpeg

  • Like 3
  • Excellent 5

Share this post


Link to post
Share on other sites
 
WHX??

Yep this started life as a Cub. I don't remember the exact model.

20170610_100537.jpg

FB_IMG_1594589341779.jpg

  • Like 4
  • Excellent 1

Share this post


Link to post
Share on other sites
 
sjoemie himself

Thanks guys! I will certainly keep you updated.

@Sparky that is exactly what i'm going for. 


@Achto I did know about the cilinder shut off deal but not about the difference between the 14- and 1568 :eusa-doh:


@Pullstart and @WHX?? those are some really good looking examples, thanks for sharing!

I got inspired by the 'the little tractor co'. I can highly recommend taking a look around his website. He has built many half scale tractors from different brands. All very good looking.

  • Like 3

Share this post


Link to post
Share on other sites
 
sjoemie himself

Since the entire tractor needs to be changed it would be only logical to start with the wheels and tires... right? Right! 

Stripping the old paint (powdercoat?) off was a nightmare but hey, got her done in the end and put on some primer. More to come shortly..


I should point out that i've been working on this project for some time. These photos are from the archives so to speak.


IMG_20200104_173925.jpg

IMG_20200204_202210.jpg

IMG_20200205_192833.jpg

  • Like 6
  • Excellent 1

Share this post


Link to post
Share on other sites
 
ebinmaine

Those wheels smoothed out very nicely. 

Any surface prep or fill needed?


  • Like 1

Share this post


Link to post
Share on other sites
 
Handy Don
49 minutes ago, sjoemie himself said:

Stripping the old paint (powdercoat?) off was a nightmare but hey..

IMG_20200104_173925.jpg

How did you remove the powercoat?

  • Like 1

Share this post


Link to post
Share on other sites
 
sjoemie himself

@ebinmaine no filler, just degrease thoroughly. As primer I use zinc spray which leaves a matt base for the paint to adhere to. Also it providers pretty good corrosion protection.


@Handy Don it was a combination of paint stripper (which did basically nothing) angle grinder, die grinder, lots of sanding and elbowgrease.


That being said, i've since found that the Norton blaze rapid strip discs work extremely well for removing powdercoat. 

Most of the well known abrasives manufacturers now have their own variant. Also available for die grinders.

  • Like 3
  • Thanks 2

Share this post


Link to post
Share on other sites
 
 
Handy Don

That is one eye-catching set of wheels. Beautiful work.

  • Like 3

Share this post


Link to post
Share on other sites
 
sjoemie himself

Thank you! Pretty pleased with it myself since it is 'just' a rattlecan paintjob.

  • Like 1

Share this post


Link to post
Share on other sites
 
Handy Don

Yes, a rattle can, but the vision, prep, and execution are all yours.

  • Like 4

Share this post


Link to post
Share on other sites
 
 
Handy Don
3 minutes ago, sjoemie himself said:


Very kind words that are much appreciated! Thank you.


Time for mockup.. i've used cardboard to make fenders and a hood. First was a little long so some trimming was necessary. Also frontwheels are in, aswell as the rear tires. After much debating I decided on Carlisle Tru power in 26x12.00-12 and man are they beefy. I like it 😁

Last picture is of the mower deck. Yes the belts are shredded and yes that one pulley is held together with sheetmetal and woodscrews. Needs some attention.. 🤔


From what I read in the news yesterday, you may have extra time to work on this over the coming weeks.

Best of luck with your country's lockdown and pandemic response--these are very challenging times.

  • Like 2

Share this post


Link to post
Share on other sites
 
sjoemie himself

It seems that way indeed. Not a real problem for me though since I like spending time in my shed better than going out anyway.


  • Like 1
  • Excellent 3

Share this post


Link to post
Share on other sites
 
 
WHX??

Gonna be interesting to see what you do with that rear sheet metal to open it up. 

  • Like 1

Share this post


Link to post
Share on other sites
 
sjoemie himself

Until now I have'nt considered doing anything about that to be honest.

Much of the strength in the rearend of the frame comes from that part. It is sheet metal but pretty thick gauge like 3 or 4mm (a bit over 1/8 of an inch) because that's where you would attach a sleeve hitch.

Since i'm planning to build either a three point hitch or a custom sleeve hitch I might have to reconsider the rear of the frame.


Any suggestions?


1 hour ago, WHX?? said:

Gonna be interesting to see what you do with that rear sheet metal to open it up. 


  • Like 1

Share this post


Link to post
Share on other sites
 
 
sjoemie himself

Added some more details to the framerails which also doubles as extra support.

Next I drew some frontweights and had them cut out from 3 different thicknesses of plate steel to resemble the real life weights as much a possible. Last but not least I fabricated the front weight rack or rail or whatever it's called 😅


Edit: having some trouble posting the last picture

Edited by sjoemie himself
  • Like 2

Share this post


Link to post
Share on other sites
 
sjoemie himself

IMG_20210928_210442_2.jpg

IMG_20210928_210413_0.jpg

  • Like 4
  • Excellent 5

Share this post


Link to post
Share on other sites


Create an account or sign in to comment

You need to be a member in order to leave a comment

Create an account

Sign up for a new account in our community. It's easy!

Register a new account

Sign in

Already have an account? Sign in here.

Sign In Now

  • Similar Content

    • T-Mo
      By T-Mo-(Moderator)
      Sorry for the late notice, but if anyone is near Fredricktown, Missouri, the 17th annual Cubarama is being held this weekend, starting Thursday, the 27th,  (set up day), Friday September 28, and Saturday September 29.  It's held the last weekend of September each year in Fredricktown and is for the Farmball Cub and Cub Cadet, but basically anything IH related.
       
      Fredricktown is about 80 to 90 miles south of St. Louis.
×
×
  • Create New...