Jump to content
sorekiwi

Started on my Lawn Ranger

Recommended Posts

sorekiwi

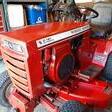
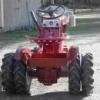
Well, I needed another project like I need a hole in the head, but the 63 Lawn Ranger was so ugly that I had to do something with it.... :banghead: :banghead: :banghead:

IMG_1822.jpg

First of all, ever since I drained the water out of the gearbox (and freed it up so it would roll) it's insisted on dripping 90 wt oil all over my garage floor. That pi$$ed me off enough to decide to put some axle seals in it. Well, I might as well pull it apart and have a look while I'm at it.... OK, the gearbox is done.

PICT0016.jpg

PICT0038.jpg

So now I'm cleaning up a few bits and pieces, there is stuff spread from one end of the shop to the other, and I think "well, I should do the frame, and then as I get some of the small bits done I can bolt them back on the tractor instead of having to find some where to store them" :banghead: :banghead: :banghead:

So I strip down the frame and take it to the sandblaster dude. After a week the sandblaster dude pi$$es me off, so I pick it up and clean it up myself (he wanted too much money anyway!). The battery box is pretty sad, and there's a couple of extra holes drilled in the frame.

PICT0032.jpg

PICT0035.jpg

I ummed and aahed a bit for a while about patching the battery box, but in the end I cut the one off the 753 I'd bought from "Rustyoldjunk" a while back. It turned out OK except the last weld (thats supposed to be the best one right?) when the air compressor kicked in mid-weld and blew the fuse! :banghead:

A couple of plugs in the extra holes, and the frame looks passable now. Actually there's a few spots of heavy pitting, so there'll be a skim cat of bondo going on in places.

PICT0048.jpg

PICT0049.jpg

PICT0045.jpg

Now I need to try and remember how to paint... :scratchead:

To be continued....

Share this post


Link to post
Share on other sites
 
kj4kicks

You've got a nice start on it Mike. Looks pretty good so far ! :whistle:

Share this post


Link to post
Share on other sites
 
WheelHorse_of_course

MIke.

looking good :WRS: :whistle:

Share this post


Link to post
Share on other sites
 
T-Mo

Mike,

Looks like you got a good start on it. Look likes a good project. Looking good. :whistle:

Share this post


Link to post
Share on other sites
 
perry

good start on it. lookin foward to the progress pics :whistle: .

my little 64 ranger is packed away in the shed. who knows if ill ever get around to it LOL .

Share this post


Link to post
Share on other sites
 
Teddy da Bear

With all the trouble and peeing going on....

He should name that tractor "Oil and Water"..

Share this post


Link to post
Share on other sites
 
sorekiwi

Hey Teddy da bear!

I see you have the same tractor. What does your Right Hand footrest look like? Mine just has a "stub" about 1 1/2 inches long on the right side. The parts list for this model shows a tube that looks like it should slip over this stub?

Here's a picture

PICT0041.jpg

Do you have this part on yours? If so, any chance of a picture/measurements?

Share this post


Link to post
Share on other sites
 
Stigian

Nice work Mike, keep them pictures coming :whistle: :WRS:

Share this post


Link to post
Share on other sites
 
Teddy da Bear

Yes, I believe I do. It is the footrest support tube.

But I thought I had footrests on each side.

Wow....you ask difficult questions (measuring & pictures).

It is buried in the back of my barn....so I will try to get

in there and see if I can measure it and photograph it

later today.

Share this post


Link to post
Share on other sites
 
sorekiwi

Wow....you ask difficult questions (measuring & pictures).

It is buried in the back of my barn....so I will try to get

in there and see if I can measure it and photograph it

later today.

You da Bear!!!

Share this post


Link to post
Share on other sites
 
Teddy da Bear

Ok.....here goes some pics.

The support tube sticks out 12 inches on each side. The right side has a bend in it that allows the deck engagement bracket to clear.

I had my right side foot rest off for some reason. So I showed the location by holding it up with my hand.

Attached Image (Click thumbnail to expand)

post-3-1213560036.jpg

Share this post


Link to post
Share on other sites
 
Teddy da Bear

The right side.

Bad news...if you only have 1 1/2 inches left.....you are missing a considerable amount of support tube. (which is actually a solid round bar).

The good news... The right and left foot rests are identical and therefor interchangeable.

Attached Image (Click thumbnail to expand)

post-3-1213560142.jpg

Share this post


Link to post
Share on other sites
 
HorseFixer

Nice Tractor SoreKiwi :whistle: I have a couple Lawn Rangers Myself, a 66 with electric start and and a 68 with a pull. Looks like your doing a great job so far! If the rest of that tractor turns out like that Rear End Ill give you a "10" :WRS:

Cheers Duke

Share this post


Link to post
Share on other sites
 
sorekiwi

Bad news...if you only have 1 1/2 inches left.....you are missing a considerable amount of support tube. (which is actually a solid round bar).

Thanks for your help Mike.

At first I thought someone had just cut off the end of the footrest on the right hand side, but after closer inspection I dont think so. There's no saw marks on it, and the end is dead square (as if it was parted off in a lathe). I think its origional.

Also looking at your picture of the right side, I think my "stub" is still straight at the point that yours starts to bend (if you'll excuse the expression!!) :whistle:

Looking at the parts drawings it looks like yours has a 1964 style frame? The drawing of the 63 model looks like it does have a stub with a tube over it (part 32 in the bottom part of this picture).

63_64.jpg

All a mystery, but thats part of the fun, right??

Thanks everyone for the encouragement!

Share this post


Link to post
Share on other sites
 
Teddy da Bear

My dad did have another lawn ranger at one time when I was little.

I remember seeing parts of the carcass out back of our garage.

Maybe he did a little "combining".....hmmmmmm

Share this post


Link to post
Share on other sites
 
sorekiwi

Got a little more done in the last week. I've been busy at work, but I sometimes have a sleeping problem which finds me screwing around in my garage at indecent hours of the night...

After searching around for all my painting stuff, and replacing the fittings I'd stloen off the water trap, I discovered that there was enough moisture in both of my air hoses that seemed to be impossible to get rid of. After wasting way too much time on that, I finally said screw it and sprayed the frame with some etching primer in a rattlecan. A few days later on went 3 coats of Valspar "Restoration Series", again in a rattlecan. I think it turned out OK, I think the paint goes on pretty nice, but it really does stay soft for a long time.

PICT0003-1.jpg

PICT0006-1.jpg

Also started to bolt on some of the small parts that were lying around the garage (like the transmission!). This tractor was really rusty, and the motor, gearbox and steering were all locked up when I got it, but as it has come apart things really arent in bad shape.

The gearbox was actually really good inside. I had a set of bearings ready to put in, but didnt end up using them. I just cleaned everything up, fitted new seals and put it back together.

The front axle and spindles werent worn hardly at all, just a polish up on the moving parts, coat of paint and reassemble.

The steering shaft between the "fan" gear and the drop link was heavily pitted and worn at both ends, so I made a new one of those. Actually I couldnt find a piece of 3/4 bar anywhere, so I recycled the steering shaft I had replaced on my RJ58 a while ago (thats why its already red in the photo). Simple enough piece, just a straight shaft with a hole in each end.

PICT0021.jpg

Seem to be spending a lot of time right now waiting for paint to dry. Next step is probably the wheels.

One interesting thing about this tractor is that it doesnt have hubs. The wheels are keyed directly onto the axles. Are all the lawn rangers like this?

Share this post


Link to post
Share on other sites
 
Duff

Seem to be spending a lot of time right now waiting for paint to dry.

Boy, Mike, you have my sympathy on the paint drying thing. I rattle canned my 312-8 with Rustoleum (complete frame-off like you are doing) and although the paint job came out pretty darned respectable, parts of it are still a little soft even after a few weeks of drying time. Oh well, I don't have a spray rig, so I guess it's a small price to pay.....

Your tractor looks like it's coming along really good! Nice work!

Deereman :whistle:

(and I thought I was the only weird-o who wanders around in his shop in the middle of the night..... :WRS: )

Share this post


Link to post
Share on other sites
 
Raider

Valspar by the quart cures slowly too. I've got a lot of Raider parts drying in the garage right now. Next batch of parts I spray I think I'll get some hardener and see if it helps.

Share this post


Link to post
Share on other sites
 
sorekiwi

Valspar by the quart cures slowly too. I've got a lot of Raider parts drying in the garage right now. Next batch of parts I spray I think I'll get some hardener and see if it helps.

One of the reasons I was going to spray it with a gun was so I could add hardener. With all these small parts it is much more conveniant to use rattle cans.

Another point worth mentioning is that I painted the gearbox with the cheaper Valspar (green can). Later I found a spot that I'd missed so touched up that side with the "Restoration Series" (white can). The color match was good, but the white can produced a lot more gloss. I ended up putting another coat from the white can on everything that had been painted with the green can.

Share this post


Link to post
Share on other sites
 
sorekiwi

An update...

Not too much time in the last week or so (damn work getting in the way of what I really want to do...), but have managed to finish up a few details.

Here's how she looks today

PICT10036.jpg

The front wheels came out OK in the end, surprisingly as they (like everything else) were fairly heavily pitted. I actually had to cut the old tires off the rims as they were well stuck on the rims. A trip to the bead blaster, a few days in an electrolysis bucket, a couple of thick coats of primer and a couple of top coats.

PICT0018-1.jpg

PICT10035.jpg

Not sure about the ends of the splindles being red, its a bit much, especially since the wheels are so small. The tires are new Carlisles, the tread pattern is exactly the same as the tires that came on it.

Another small project was replacing the shaft on the clutch linkage. It was heavily rusted and worn where it pivots in the frame . The shaft itself is just a length of 3/8 mild steel, welded to the arm that moves the tensioner pulley. The other end has a 1/8 hole for a roll pin.

PICT10037.jpg

Next job is to make a new linkage to go from the clutch pedal back to the pivot.

Overall I'm happy with how stuff is turning out. A few of the parts are showing a bit more of the pitting than I would like, but so far I've been working on bits that wont really show once its all together. I'm going to leave the hood till last!

Before and after shots:

PICT0014.jpg

PICT10033.jpg

Share this post


Link to post
Share on other sites
 
CasualObserver

Mike, that's looking awesome! B) Thanks for the update.

Share this post


Link to post
Share on other sites
 
kpinnc

Looks like a first class job on the restoration Mike! B):whistle:

I think it looks great!

Kevin

Share this post


Link to post
Share on other sites
 
BairleaFarm

Great Job. Keep the pictures comming as you get more done. They help me dream of how shiney my rust bucket may be some day.

Share this post


Link to post
Share on other sites
 
TT

Looking goooooooood, Mike! B)

One of these days I'm going to have to try re-doing a tractor that was already a whole tractor -- instead of a bunch of parts from the TT pile. :whistle:

Share this post


Link to post
Share on other sites
 
FreddieFarmall

Hello All:

I'm curious where you got those tires that match the original tread pattern for the Lawn Ranger. Also, what is the electrolosis tank you have the wheel in for and what sort of chemicals/voltage are you using?

Still coming down of the 'show high'! B)

Fred

Share this post


Link to post
Share on other sites
 

Create an account or sign in to comment

You need to be a member in order to leave a comment

Create an account

Sign up for a new account in our community. It's easy!

Register a new account

Sign in

Already have an account? Sign in here.

Sign In Now

  • Similar Content

    • Matt_8
      By Matt_8
      I was wondering if anyone knew what wheel weights i would use for my lawn ranger on stock wheels three lug pattern

    • Matt_8
      By Matt_8
      I just bought a 1967 WH lawn ranger and i was wondering the best place to find a rear fender pan

    • D_Mac
      By D_Mac
      So.... I just got home with this. I been wanting to fix one up for my 9 yr old nephew. I need to do it in a hurry as I will be going in hospitol soon for my 3rd battle with cancer. You know the story. Was told it ran about a month or so ago. Not running now. I just got home with it so I haven't checked it out yet. Have never owned a Lawn Ranger before, and know nothing about them. Maybe you guys can tell me what I have here and any advice would be helpful as well. Seems to be complete with the exception of the seat. Going to need to pick one up somewhere. 


    • CeeBee
      By CeeBee
      Good shape. Electric Start. Kept in a shed. Need the space now. Includes Manual. Pickup only.


    • jp_vikings
      By jp_vikings
      I have what I believe is a 1964 Lawn Ranger. 
      I'm wondering how rare they are and wondering what it is worth in the original condition it is in now.
      May possibly restore it when I catch up on all my other projects. 
      Thank you!

×
×
  • Create New...