Pullstart 70,426 #101 Posted July 31, 2025 E-tank will clean those wheels up no problem 1 Share this post Link to post Share on other sites
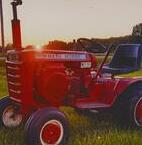
AlexR 3,056 #102 Posted July 31, 2025 Met up with Pullstart briefly today and got him the tires that were on this tractor, he has some much better tractors for those to go on. And got parts from him for this tractor, I will get some pictures and such tomorrow. Very much thanks for his efforts of getting me parts. After I met with him, I got this Brinly plow from FB marketplace that wasn't far away. Used very little and looks like it was probably stored inside. 4 5 Share this post Link to post Share on other sites
AlexR 3,056 #103 Posted August 1, 2025 Parts I got from Pullstart rear fender with seat springs. 14hp carb. And a hydro lift parts frame, so far the front axle seems to be in better shape then the one I have, so will probably use that one. And it also has a mid mount bracket that I needed. 2 2 Share this post Link to post Share on other sites
AlexR 3,056 #104 Posted August 4, 2025 Took the grinder with the wire wheel to the front wheels only one of them was bad it's pretty pitted. Would never hold air as a tubeless but with tubes should be ok. Popped the rear tires off the rims those are awesome on the inside Took the seat off the spare pan and the springs off. Looked like the cross pieces put on to get a different seat, was barely welded on so banged on it with a hammer a couple times. Didn't give, so turned it around. And found this looks like I will have to grind the welds off. New seat pan needs work Old seat pan on the right side new one on the left I think there will be some mix and match + welding to get a good seat pan. 5 1 Share this post Link to post Share on other sites
AlexR 3,056 #105 Posted August 6, 2025 Got some parts in the mail new brake drum as you can tell in the photos the old one is trashed. Interestingly enough the new one is supposedly from a 93 520H same part number. And a sleeve hitch cross piece needs a weld but that's not a problem. 3 2 Share this post Link to post Share on other sites
AlexR 3,056 #106 Posted August 8, 2025 I have been soaking the steering wheel shaft with penetrating oil for a while now I think I am going to try to get the two separated tomorrow. Any tips or tricks for that? Besides cutting the shaft haha, but that may end up happening if nothing else works. Share this post Link to post Share on other sites
ebinmaine 79,497 #107 Posted August 8, 2025 2 hours ago, AlexR said: I have been soaking the steering wheel shaft with penetrating oil for a while now I think I am going to try to get the two separated tomorrow. Any tips or tricks for that? Besides cutting the shaft haha, but that may end up happening if nothing else works. @JCM or @953 nut I believe had mentioned being sure that the shaft was held against a stable surface..... maybe by way of a 2 x 4? 1 Share this post Link to post Share on other sites
JCM 11,247 #108 Posted August 8, 2025 This is a little bit different on a 420. Removing the roll pin to get the aluminum adapter off the shaft. 3 2 Share this post Link to post Share on other sites
ebinmaine 79,497 #109 Posted August 8, 2025 @JCM Perfect. Thanks for posting those pics. I used them to create a brace for one of mine. 2 Share this post Link to post Share on other sites
AlexR 3,056 #110 Posted August 9, 2025 (edited) I did not succeed in getting the steering wheel off today. Letting it soak again. I even took a socket and put it on the steel center part of the steering wheel and hit it a bunch of times with a 2 pound sledge just to try to loosen it up and make it move and it didn't budge. I will probably try one more time later and if that doesn't work I will cut the shaft and take it over to my neighbors pretty sure he has a hydraulic press. What I was doing in this picture was putting that punch on the shaft under the wheel and balancing it while hitting the metal part of the steering wheel down with another punch. I did get the seat springs cut off those cross plates that got welded to them. And cut off the PTO bracket from the steering tower I was thinking about maybe repairing it but might be easier to get one somewhere. And then I repaired the steering tower Left the welds a little high on the bottom just to reinforce it a little more. I will probably have to end up drilling the threads out as well and just using a washer and nut Edited August 9, 2025 by AlexR 6 Share this post Link to post Share on other sites
AlexR 3,056 #111 Posted August 9, 2025 Tried whacking it a couple more times like this just to try to get it to move still hasn't moved.. looking thru the roll pin hole can tell me if it even moved a fraction and it hasn't. I guess I will continue soaking it and whacking it. 3 Share this post Link to post Share on other sites
Pullstart 70,426 #112 Posted August 10, 2025 You can try buying a 1/4” masonry drill, they usually have a carbide tip. Use fluid to keep it cool, go slow, and drill the roll pin out. 3 Share this post Link to post Share on other sites
AlexR 3,056 #113 Posted August 10, 2025 4 minutes ago, Pullstart said: You can try buying a 1/4” masonry drill, they usually have a carbide tip. Use fluid to keep it cool, go slow, and drill the roll pin out. Roll pin is already out that came out easy haha. The steering wheel however is stuck very well to the steering shaft. 2 Share this post Link to post Share on other sites
Pullstart 70,426 #114 Posted August 10, 2025 Oh I gotcha. Twist it? Pipe wrench on the shaft and spin the wheel. 2 Share this post Link to post Share on other sites
AlexR 3,056 #115 Posted August 10, 2025 9 hours ago, Pullstart said: Oh I gotcha. Twist it? Pipe wrench on the shaft and spin the wheel. Yep that was tried as well. It's being stubborn that's for sure. Share this post Link to post Share on other sites
SylvanLakeWH 31,666 #116 Posted August 10, 2025 I used a very thin cut off wheel on the last one I removed... only effective if you aren't trying to save the steering wheel... 2 Share this post Link to post Share on other sites
Pullstart 70,426 #117 Posted August 10, 2025 41 minutes ago, AlexR said: Yep that was tried as well. It's being stubborn that's for sure. Seems Uncle Jim has a modification to his press to ish steering shafts out of wheels. What say you @WHX?? 1 Share this post Link to post Share on other sites
AlexR 3,056 #118 Posted August 10, 2025 10 minutes ago, SylvanLakeWH said: I used a very thin cut off wheel on the last one I removed... only effective if you aren't trying to save the steering wheel... I'm kind of on the opposite end of that. The steering wheel is in nice shape trying to save it. The steering shaft might not get reused as it has a broken tooth. 1 Share this post Link to post Share on other sites
WHX?? 57,273 #119 Posted August 10, 2025 Yep if you have a press Alex ... Might have to do a minor mod on the apron tho. Is the pinion pinned or welded? I have a few shafts if you need. 3 Share this post Link to post Share on other sites
Pullstart 70,426 #120 Posted August 10, 2025 You can also cut the shaft, since it’s got a tooth broken anyway, then set it on the press. 2 Share this post Link to post Share on other sites
WHX?? 57,273 #121 Posted August 10, 2025 How did you get that center cap off the steering wheel? 1 Share this post Link to post Share on other sites
AlexR 3,056 #122 Posted August 10, 2025 4 hours ago, WHX?? said: Is the pinion pinned or welded? I have a few shafts if you need. It's welded Yes I am still in need of a shaft. If you happen to have a PTO bracket as well I believe that is all I need. Share this post Link to post Share on other sites
AlexR 3,056 #123 Posted August 10, 2025 4 hours ago, WHX?? said: How did you get that center cap off the steering wheel? Just popped it off by twisting it. Share this post Link to post Share on other sites
AlexR 3,056 #124 Posted August 10, 2025 Took the sledge to it more today, I think it moved about 1/64 of a inch. But still wasn't making much progress so soaked it again. 1 1 Share this post Link to post Share on other sites
ebinmaine 79,497 #125 Posted August 10, 2025 23 minutes ago, AlexR said: Took the sledge to it more today, I think it moved about 1/64 of a inch. But still wasn't making much progress so soaked it again. ANY progress is good. 1 1 Share this post Link to post Share on other sites