

-
Similar Content
-
 By BrianKoch
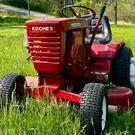
Gentlemen,
According to the hydrogear transmission manual, the tow valve on the ‘69 Charger 12 with the Sunstrand 90-1136 is “malfunctioning” because I am able to roll the tractor while it is closed.
To note, the parking brake pawl also seems to be broken, but I believe these issues are independent of one another.
Have any of you dealt with this issue of a malfunctioning tow valve before and can advise? I’ve got the ATF drained out and would like to address this before refilling.
As of right now, I have removed the tow valve and attached a picture of it. The O ring and nylon washer look fine to me, but maybe you see or know something different.
-
 By RJ Hamner
I noticed that the 876 was leaking trans fluid on the garage floor after i parked it.
Went out the next day and cleaned up the spot and put a can under the hydro.
Checked the next two days and nothing in the can. So that told me it only leaks when its running
Fired it up this afternoon and let it run and cycled the lift a few times
Shut it off and checked all the hoses, filter and anything else I could see from the top
Crawled underneath and found fluid dripping from the area circled in the photo
If I replace the two parts noted on the photo is there a good chance that would fix the problem or are there bigger issues???
-
 By wheelhorse-c-161-1979
Well my old 1973 Auto18 just suffered a problem. And I have a feeling it is not good.
It has been running like a champ past several years since the Sunstrand tranny was rebuilt beautifully.
I have been following the instructions of keeping the oil clean, changing filters/oil every 50hrs etc..
Was using it yesterday and suddenly it stopped moving forward or backward.
It didn't take long to see that tranny oil was pouring out the rear wheel axle. At least a quart or two poured out into that tray.
I jacked up the tractor and now see that there is a good 1 ½" of exposed axle when i tried to remove the wheel. Wheel did not come off as one of the bolts was frozen. So this is what I have.
I'm sitting down.... Can someone tell me how bad this is?? Gulp!
At first I thought it was just an axle seal. But that would be way to simple correct?
Thanks for any help on this matter!
Jack
-
By spindley
I have a D-200 that i changed the oil in the back out of the dipstick a couple weeks ago. It had some water in it. Now i checked again and its the same thing. Any help on this would be appreciated. How much oil goes in these Horses. And is there separate reservoir for hydro pump and transaxle.
-