By
oliver2-44
This one was on Marketplace for quite a while with a hefty price tag. I ask if he was flexible on price, Nope. After a quite a while longer same question before I made the drive. Come on up, maybe we can make a deal. The rest is history, I didn't steal it, but I'm happy with the deal!
Ya I know you want pictures, but there a little more interesting back story. His granddad's business was Nicholson Machine and Equipment and he was a Wheelhorse Dealer in the 50's and 60's in Paris....., Tx that is! He sent me this picture of the glass window from the door to the business that he has framed.
He also wrote me a short note about his Granddad's business. So after his he passed, his dad gave the tractor to him. he's had it for quite a few years and said it's always been garage kept.
So if a Dealer owned this for his own use and never sold it, and then it passed to his Son, and then Grandson, that would technically make me the 1st buyer,
Ok so on to some tractor photo's
beautiful double pulley belt guard front and center. It starts with a spray of gas in the carb, but doesn't stay running.
All there, nice and original, you can see a weld repair on the front of the belt guard,
Here's the serial number @gwest_ca
The plastic dash is intact and not cracked!
My 1st old style split key.
it still has the orignal Silverton Ags. They hold air, but their so hard they probable don't need any. I wonder if their hard because they might still have calcium chloride in them???
The hitch pin isn't frozen and the lift cable even works.
Interesting decal plastered across the front of the hood.
aluminum gas tank is fairly clean.
Hood bottom tab has been repaired.
topless view of the engine, needs a bath. The front tires are original and hold air, but have some splits across the thread.
Homemade choke and throttle cable bracket. The base of the engine has wet oil, so i suspect it needs some gaskets.
Both axle seals are dry, but the input shaft and brake shaft seals leak.
I've learned if the top of the transmission is filthy oily, it probable means theirs water in the transmission that has floated the oil out. This one is clean so hopefully that's a good sign.
Started some maintenance and a beautiful sight, not a drop of water, just black oil. It shifts through the gears nicely so it will be interesting to see how it runs/drives.
I'll gradually go all through it with my checklist. 701 Minor Overhaul Checklist.ods
Then have to decide if I rub it down with linseed oil like it is, or buff with some steel wool or wet sand to bring a little more red out, then oil.
How would ya'll put your finishing touches on it?
I'll update this thread as I do maintenance on it and get it running.
 By oliver2-44
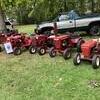 By wh315-8
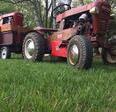 By chompinthebit
 By NJ Tom