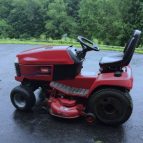
WNYPCRepair 1,924 #1 Posted October 7, 2015 I picked up a tall chute that is very rusty. Wondering if I should strip to bare metal and paint, or just do the worst parts (inside chute) and use it for the winter and strip, rebuild, and repaint in the spring. I will have to replace sprockets, bearings, etc. if needed now, of course. If the consensus is to strip and paint now, what do you guys use? Angle grinder and wire wheel is taking forever, it may be spring before I get it stripped at this rate. Also, can anyone tell me the model number from appearance? All that was left of the tag were the last 2 numbers - 66 Share this post Link to post Share on other sites
mikekot3 93 #2 Posted October 7, 2015 Take it to your local industrial sandblaster place.mike 2 Share this post Link to post Share on other sites
oldredrider 2,553 #3 Posted October 7, 2015 Sand blast and powder coat. You won't regret it. 1 Share this post Link to post Share on other sites
Ed Kennell 46,609 #4 Posted October 7, 2015 My model No. looks like 7G366 ? 1 Share this post Link to post Share on other sites
squonk 47,421 #5 Posted October 7, 2015 That looks just like my 79360 1 Share this post Link to post Share on other sites
WNYPCRepair 1,924 #6 Posted October 7, 2015 Anyone know if the auger is interchangeable between a tall chute and a regular snowblower? Actually, I would like to just take the chute and gear mechanism (for turning the chute) off the tall chute and put it on the regular blower. It is in much better shape. After looking at the auger in the tall chute, it will be a lot of work to straighten the auger, and some I may not be able to straighten, some welding is needed, etc. Share this post Link to post Share on other sites
gwest_ca-(File Mod) 12,370 #7 Posted October 7, 2015 (edited) This is what I think I know about the snowthrowers for the long frame tractors1983 model 06-42ST03 was the first to use skids1984-1987 model 06-42ST041987-1989 model 06-42ST05 was the first to use a 7/8" diameter drive shaft1990 model 06-42ST061991-1993 model 06-42ST07 was the first to use the tall chute1993-1998 and 2000-2001 was model 793601995 model 79360 was the first to use the 8" high shield in the front of the chute2002-2007 was model 79362Garry Edited October 7, 2015 by gwest_ca 2 Share this post Link to post Share on other sites
cheesegrader 436 #8 Posted October 8, 2015 snowthrowers take such abuse.It would be a shame to spend days grinding it, just to have it rust again in a few years.I vote sandblast and powdercoat or POR 15.That's what I plan to do after one more season.It will cost, but it should last for decades. 1 Share this post Link to post Share on other sites
Robert of Lake Michigan 13 #9 Posted October 8, 2015 Do you want to use it or show it?Do you want to spend much money?Taking it to a sandblaster service will cost you time & money, time you could spend sanding it off yourself.I used a 80 grit 4.5 in. flapper disc on my 4.5 in angle grinder. A grinding wheel will leave scratches to show in your paint.I used Petro Flo paint conditioner as a primer and Rustoleum Sunrise Red spray cans, covers great and dries fast.The petro flo goes on with a brush and takes a day to dry.I made a new bottom scrapper blade , cut the old one out and welded in the one I made , the previous owner ran into something and bent the whole unit back over one inch.. My blower should have gone into the garbage but I saw it as mocking challenge. 1 Share this post Link to post Share on other sites
Robert of Lake Michigan 13 #10 Posted October 8, 2015 Concerning the sprockets and bearings. Those OEM bearings are not made anymore for those bearing plates. The 3/4 in . shaft bearings are available with new style plates that have two holes instead of three, wink. To remove the sprocket off the auger you will have to use a torch to cut the welds. The new 30 T # 40 chain sprocket is available at bearing suppliers but with a 3/4 hole, wink. The auger tube is 1 7/8 O.D. . My buddy bored the hole out to 1 7/8 on a lathe. The auger bearings are available as is the # 40 chain. Getting the auger bearings removed can be daunting, at least the first one. 1 Share this post Link to post Share on other sites
PaulC 342 #11 Posted October 8, 2015 Augers can be tough to straighten but I straightened 2 last year with a good sized rose bud torch we have here at work with the blower assembled and on my tractor. It was nice that way because after it cooled I could turn the blower on to check how it ran.My suggestion would be to move the tall chute to the good blower housing with good auger. I picked up a tall chute blower last year without the chute so I ended up making myself 2 different chutes. Once I had the extra chute I decided to cut off my short chute and replace it. With a cutoff wheel on my grinder I cut the chute off and left about 1 inch on the bottom rotating piece, lined up the taller chute and marked the holes, drilled them out and mounted it. You might even be able to change over the gear rotation assembly but there is no need to if the original wire rotation is working properly.Here is a pic of the giant chute I made and used all year last year. Surprisingly I never took a photo of the short chute that I made a tall chute. I did pick up an actual tall chute at the end of this summer so I will probably do some chute rearranging again this year. 2 Share this post Link to post Share on other sites
DennisThornton 4,773 #12 Posted October 8, 2015 Augers can be tough to straighten but I straightened 2 last year with a good sized rose bud torch we have here at work with the blower assembled and on my tractor. It was nice that way because after it cooled I could turn the blower on to check how it ran.My suggestion would be to move the tall chute to the good blower housing with good auger. I picked up a tall chute blower last year without the chute so I ended up making myself 2 different chutes. Once I had the extra chute I decided to cut off my short chute and replace it. With a cutoff wheel on my grinder I cut the chute off and left about 1 inch on the bottom rotating piece, lined up the taller chute and marked the holes, drilled them out and mounted it. You might even be able to change over the gear rotation assembly but there is no need to if the original wire rotation is working properly.Here is a pic of the giant chute I made and used all year last year. Surprisingly I never took a photo of the short chute that I made a tall chute. I did pick up an actual tall chute at the end of this summer so I will probably do some chute rearranging again this year. I do read that the "tall chute" is somehow better but would you recommend your "giant chute" to everyone (you certainly did a great job!)? I think there are others that are more concerned about "how far" they blow than I am. I just want it out of the drive and spread out enough that it doesn't create snow banks. 8-10 feet is usually ok with me, but there are times when further is better and times when precise control is better. Share this post Link to post Share on other sites
DennisThornton 4,773 #13 Posted October 8, 2015 Augers can be tough to straighten but I straightened 2 last year with a good sized rose bud torch we have here at work with the blower assembled and on my tractor. It was nice that way because after it cooled I could turn the blower on to check how it ran.My suggestion would be to move the tall chute to the good blower housing with good auger. I picked up a tall chute blower last year without the chute so I ended up making myself 2 different chutes. Once I had the extra chute I decided to cut off my short chute and replace it. With a cutoff wheel on my grinder I cut the chute off and left about 1 inch on the bottom rotating piece, lined up the taller chute and marked the holes, drilled them out and mounted it. You might even be able to change over the gear rotation assembly but there is no need to if the original wire rotation is working properly.Here is a pic of the giant chute I made and used all year last year. Surprisingly I never took a photo of the short chute that I made a tall chute. I did pick up an actual tall chute at the end of this summer so I will probably do some chute rearranging again this year. I do read that the "tall chute" is somehow better but would you recommend your "giant chute" to everyone (you certainly did a great job!)? I think there are others that are more concerned about "how far" they blow than I am. I just want it out of the drive and spread out enough that it doesn't create snow banks. 8-10 feet is usually ok with me, but there are times when further is better and times when precise control is better. Share this post Link to post Share on other sites
PaulC 342 #14 Posted October 8, 2015 I do read that the "tall chute" is somehow better but would you recommend your "giant chute" to everyone (you certainly did a great job!)? I think there are others that are more concerned about "how far" they blow than I am. I just want it out of the drive and spread out enough that it doesn't create snow banks. 8-10 feet is usually ok with me, but there are times when further is better and times when precise control is better. Ill start by saying some people are very concerned about how far they can throw snow, must be a man thing. ill admit I did enjoy when the snow was just right a few times last year to where it was cranking a good 20-30 feet out of that monster chute! unfortunately I have not been able to compare my giant chute to the actual wheel horse tall chute because I never owned a tall chute before up until a month or two ago. I went from a short chute right to the giant chute I made and I will say I think it performs much better then the short chute I previously used. The biggest difference I think is when you have the nasty wet stuff at the end of the driveway, I feel the taller chute kept the velocity better to keep that slush moving. I also did have a smooth fresh paint job on it with some graphite spray made for chutes so that could have played a roll also.Now that I have an actual tall chute I hope to be able to test my "giant" chute vs the chute this coming winter. I also added more tractors since last year so I will have 5 more horses behind the snowblower as well! Who says clearing the driveway of snow isn't fun! Share this post Link to post Share on other sites
Ed Kennell 46,609 #15 Posted October 8, 2015 (edited) Hey Paul, It appears your side extensions are not installed correctly. The leading short bend should be parallel to the sides of the blower housing. If you reverse them, the blower should cut through and feed the snow to the auger much more efficiently. Edited October 8, 2015 by ekennell 2 Share this post Link to post Share on other sites
PaulC 342 #16 Posted October 8, 2015 Hey Paul, It appears your side extensions are not installed correctly. The leading short bend should be parallel to the sides of the blower housing. If you reverse them, the blower should cut through and feed the snow to the auger much more efficiently. Thanks Ed and good eye. I don't have my blowers home currently but I'll remember to check that and make sure it's right. 1 Share this post Link to post Share on other sites
WNYPCRepair 1,924 #17 Posted October 8, 2015 Augers can be tough to straighten but I straightened 2 last year with a good sized rose bud torch we have here at work with the blower assembled and on my tractor. It was nice that way because after it cooled I could turn the blower on to check how it ran.My suggestion would be to move the tall chute to the good blower housing with good auger. I picked up a tall chute blower last year without the chute so I ended up making myself 2 different chutes. Once I had the extra chute I decided to cut off my short chute and replace it. With a cutoff wheel on my grinder I cut the chute off and left about 1 inch on the bottom rotating piece, lined up the taller chute and marked the holes, drilled them out and mounted it. You might even be able to change over the gear rotation assembly but there is no need to if the original wire rotation is working properly.Here is a pic of the giant chute I made and used all year last year. Surprisingly I never took a photo of the short chute that I made a tall chute. I did pick up an actual tall chute at the end of this summer so I will probably do some chute rearranging again this year. This is exactly what I ended up doing. I will still have a lot of rust to remove from the chute, I'm not sure it is worth it. I used a 36 grit flap wheel and it didn't touch it, finally put a grinding wheel in and it took off a lot, but if I ground it down till no pits and rust were left, I will have some extremely thin metal. I'll search for a sand blasting place, but it will probably be cheaper to buy my own blast cabinet. 1 Share this post Link to post Share on other sites
DennisThornton 4,773 #18 Posted October 8, 2015 These little things will surprise you!http://www.harborfreight.com/gravity-feed-blaster-gun-93221.htmlThey can consume some CFMs but if you have a large tank even a small compressor will power it enough to be of some help. Now I'm not suggesting that this is the right tool to blast a whole blower but for small spots you can't get to or those pits you mentioned they can be a godsend. 1 Share this post Link to post Share on other sites
Forest Road 595 #19 Posted October 9, 2015 I had my 2 stage sandblasted, primed, and painted with industrial coatings. Sandblasting alone was worth every penny. He even offered to prime it while it was hanging. Don't waste you're time trying to sand that down. If you have an older single stage I don't see why you couldn't mount the tall shoot and hearing on there. Good luck Sent from my iPhone using Tapatalk Share this post Link to post Share on other sites
mikekot3 93 #20 Posted October 9, 2015 I have a single stage wheel horse snow blower which was attached to my old c-120. Does the single stage snow blower blow snow well?Back in the day it seemed to plug up a lot with snow. Perhaps with a 12 hp kohler, it did not have enough horse power to run it well?Also if I were to buy a two stage snow blower attachment do I really need to have a hydro lift setup? My tractor has a manual lift deck mechanism for the mower deck and manual transmission.Thank you for the advise in advance.mike Share this post Link to post Share on other sites
PaulC 342 #21 Posted October 9, 2015 This is exactly what I ended up doing. I will still have a lot of rust to remove from the chute, I'm not sure it is worth it. I used a 36 grit flap wheel and it didn't touch it, finally put a grinding wheel in and it took off a lot, but if I ground it down till no pits and rust were left, I will have some extremely thin metal. I'll search for a sand blasting place, but it will probably be cheaper to buy my own blast cabinet. Brian I personally wouldn't be to concerned about every last little pit otherwise like you say you will have nothing left after the endless hours removing them all. Having it sandblasted would be your best bet and we do have some places local. We use a place here at work called secondary services they are located downtown just off of Niagara street. Then if you really wanted you could try to fill in the pits with JB weld? Myself I probably wouldn't bother and just get a good coat of rust inhibiting primer and paint on it and you should be good. One thing I have learned with the tractors and attachments we have full intentions of using is to just fix them up as best as possible without going to far overboard. I redid a 42" RD deck and once it was reassembled it looked beautiful, but after just 1 single use I was so disappointed and how much abuse it took. Now to this day it still looks good for a deck and my work was worth it but still nothing like it was after initial reassembly.Just to throw it out there I use rustoleum products on my tractors and implements. The primer that's made for rusty metal is great stuff and the farm and implement in IH Red is a great paint and good color match. Its amazingly tough paint out of a rattle can(does take long to dry) and both the primer and paint also come in quarts that can be brushed on or thinned and sprayed. I recommend adding hardener if you go the quart route even if brushing it. I have a single stage wheel horse snow blower which was attached to my old c-120. Does the single stage snow blower blow snow well?Back in the day it seemed to plug up a lot with snow. Perhaps with a 12 hp kohler, it did not have enough horse power to run it well?Also if I were to buy a two stage snow blower attachment do I really need to have a hydro lift setup? My tractor has a manual lift deck mechanism for the mower deck and manual transmission.Thank you for the advise in advance.mike Mike I have ran the single stages for the last 3 years at my place with a 12hp magnum on a 312 hydro and I personally think they do great, a lot of guys on here actually prefer to run the single stages over the 2 stages. I cleared many feet of snow with it last year considering I live just outside of buffalo and we had some impressive snowfalls last year.I don't have experience with 2 stages but I know they are really heavy and you need horsepower behind them. Maybe if you installed lift assist springs you could be okay with manual lift but I do wonder and I think a 16hp machine would be the smallest anyone would recommend for a 2 stage. This is just what ive gathered from reading on here so hopefully some 2 stage guys can chime in for ya. 1 Share this post Link to post Share on other sites
WNYPCRepair 1,924 #22 Posted October 9, 2015 I do plan to use it. I just don't want it to rust away to nothing. Does the rust inhibiting primer work? I had a boss once who claimed rust converter worked. Turns the rust black and supposedly stops it from rusting further. I am not as concerned with looks. Share this post Link to post Share on other sites
PaulC 342 #23 Posted October 9, 2015 I do plan to use it. I just don't want it to rust away to nothing. Does the rust inhibiting primer work? I had a boss once who claimed rust converter worked. Turns the rust black and supposedly stops it from rusting further. I am not as concerned with looks. The rusto stuff ive used is specifically designed for it and I have been happy with the results of everything ive used it on so far. It shouldn't shock you when I say everything I have painted with it so far has been rusty lol. The side covers of my 312 were very rusted and I had everything blasted and I painted it with a gun using the rusty metal primer thinned and with hardener then followed up with the F&I thinned and with hardener and its held up very well. The side covers were the worst part and were pitted badly like you describe and the pits do show through but its not that noticeable and everything has held up really good. Its no showroom paint job but as you see in the pics I posted above it does look good and at around $12 bucks a quart its hard to beat. I have also redone a deck and my sweeper without having them blasted and actually just brushed and rolled on this combo right out of the can and those are also holding up to my satisfaction. 1 Share this post Link to post Share on other sites
WNYPCRepair 1,924 #24 Posted October 9, 2015 I used a wheel that looked like a thick scotchbrite pad in the angle grinder, then naval jelly. Unfortunately the wheel only lasted for two pieces, I'll have to pick up another. Another coat of naval jelly afterwards, and I may be good to go. Then I got a quart of rustoleum heavy rust primer. Unfortunately, I won't get it done before vacation. Share this post Link to post Share on other sites
DennisThornton 4,773 #25 Posted October 9, 2015 I've had great luck with Rust Oleum 769 Red Damp Proof Rust Primer It's been around for decades and I suppose there are better primers, certainly newer and more advanced but the 769 has proven itself to me. Pretty sure I have examples of it lasting for nearly 20 years! I wire brushed a heavy metal wheel barrow that was pretty badly rusted. Never did top coat it over 15 years later it is still in good shape!The augers would be a pita even to sandblast. Might be a candidate for a large electro-tank! I've considered a large hot caustic tank to remove paint and then DC power it to electrolytically get the rust off. 1 Share this post Link to post Share on other sites