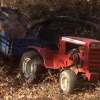
Ol'Red 7 #1 Posted December 10, 2013 Hi all, I have a 42" snow/dozer blade (64112) for my recently acquired C-101 8 speed. I finally had a little snow (maybe an inch and very powdery) to try it out, and it doesn't clean the snow off all the way across the blade. I then noticed that the wear bar was wearing at an angle across the blade instead of straight down. I also noticed that the blade was not sitting all the way flat on the ground. Upon further inspection once I removed the blade from the tractor and put it on sawhorses the frame has a slight twist in it. With this being said, There is some "slop" in the holes for the blade to attach to the frame. I would think that the blade would sit down all the way on the ground even with all the things I mentioned above. I was wondering if anyone else has had this problem and how they fixed it? I'm thinking also that if the wear bar continues to wear at an angle across the blade, it should eventually sit flush on the ground. It also could be that with the minimal amount of snow, there was not enough down pressure on the blade to keep it tight on the ground. I will try to post pictures soon. Share this post Link to post Share on other sites
Lane Ranger 12,031 #2 Posted December 10, 2013 (edited) It sounds like one of the holes in the pin that goes thru the trip springs on the backside of the plow may be worn on one side more than the other (or the plow front or frame is bent one direction more than the other) The pin going thru the springs can be adjusted up or down into four (as seen in last photo below) sets of holes . Doing so may change the angle of the blade on the cutting bar. The cutting par has five 3/4 inch carriage bolts and can be taken off easily and the cutter blade can be checked for rust etc. I usually change the bolts and nylok nuts when I get a plow and clean off all the rust and gunk that has build up between the plow and cutter bar. It should be painted . I use black rustoleum paint. You can also change the position of the cutter bar to wear the opposite way it is now doing. This is a photo of plow with springs from the backside view: More Plow Shots: Edited December 10, 2013 by Lane Ranger Share this post Link to post Share on other sites
bowtieguy 334 #3 Posted December 11, 2013 Hey central Missouri....should I know you?....holler if you need help with the snow blade.. Oh, and it looks like you are a new guy here...welcome aboard the Square! Share this post Link to post Share on other sites
Ol'Red 7 #4 Posted December 11, 2013 Lane Ranger: Thanks for the advice. Pictures are worth a 1000 words. Once I get some uploaded my description of the problem will make more sense. Where do you get your wear bars? I work for a Steel Bridge fabricator, and made mine out of some scrap for about $3. I might not have used hard enough steel (I used grade 36 instead of 50), as it is wearing very fast. But I'm just curious what other bars are made of. Bowtieguy: I'm located 15 miles outside Jefferson City 1 Share this post Link to post Share on other sites
stevasaurus 23,748 #5 Posted December 11, 2013 A neat trick that works, put in or take out a little air from the back tires to level out the blade...have to do it to the back tires. You can turn that scrapper bar over to use what is the top edge, if it has not been done already. I also set my blade height a touch off the concrete, with the star wheel, this saves some wear on that edge by taking the weight off the blade. BTW Welcome to Red Square... 3 Share this post Link to post Share on other sites
slammer302 2,157 #6 Posted December 14, 2013 How wide is the wear bar supposed to be I just made new one from 3/16 stainless steel I went 2 1/2 wide Share this post Link to post Share on other sites
Lane Ranger 12,031 #7 Posted December 14, 2013 Ol'Red: Most of my wear bars are still originals. I have an original replacement I bought on the wall for future application AND I bought two replacement ones from one of the Red Square members who makes replacement cutter bars (42 inch size) and sold on Ebay for less than $40. Not sure of his name thought or contact info. You need a good grade of steel for sure. The square holes for the 3/4 inch carriage bolts is very helpful too. I have seen a lot of blades that have replacement bars welded on or fabricated in some other way to the old blade too. Share this post Link to post Share on other sites
Lane Ranger 12,031 #8 Posted December 14, 2013 (edited) Regarding the downward pressure, there is a solid link that Wheel Horse made for the Snowplow/Dozer blade that places more pressure on the plow -mostly from the weight of the plow and frame but you can use the lift handle to exert more downward pressure as you are moving forward. The Part No is #7706. There are a couple postings on Red Square on this and you can do a search in the search box for the 7706 solid link and read up on this. Here are a few pictures for you: Personally, I don't think the solid link is that great an idea when pushing snow. You just can't see all the obstructions out there when plowing. It is good or better applied when moving soil, snad or gravel! Edited December 14, 2013 by Lane Ranger 1 Share this post Link to post Share on other sites
slammer302 2,157 #9 Posted December 14, 2013 I never realized that blades used chains mine blade already had the soild link I used for dirt all the time just have to be persistent 1 Share this post Link to post Share on other sites
stevasaurus 23,748 #10 Posted December 14, 2013 The width of the wear bar really makes no difference, if you are making your own. I would say...at least 2" to maybe even 3" or 4"...because you can adjust the height of the blade off the surface with the star wheel. A 3" or 4" width...I would drill the holes in a way that I could flip the blade over as it wears. Not positive, but I think the originals were either 2" or 2 1/2" width drilled down the center. I just made a bar to replace a worn out one. Used 2" x 1/4" x length of blade regular steel...drilled round holes and used 3/4" Phillips head stove blots with the nylon hex nuts on the back. You end up either snapping the old carriage bolts or grinding them off to change out or flip the blade anyway...so no need to cut square holes in the wear bar. 1 Share this post Link to post Share on other sites
dennisdrier 0 #11 Posted December 15, 2013 My snow blade wont go up, I beleive the hydraulic fluid is low, not sure what kind of fluid to use, theres a dipstick under the seat... is this where the fluid goes,,, its a 417a model Share this post Link to post Share on other sites
gwest_ca-(File Mod) 12,371 #12 Posted December 15, 2013 Here is the 1986 operator manual Lubrication chart Never had a hydro model so must rely on manuals. Garry Share this post Link to post Share on other sites
Ol'Red 7 #13 Posted December 17, 2013 Well we got some snow this past weekend, and the blade worked much better. We had around 2 or 3 inches of extremely wet/heavy snow. I moved the pin that adjusts the tilt of the blade to the second hole so it sits straighter up and down. The wear bar didn't seem to wear at all this past time, and I bladed twice as much snow. I am going to keep playing with the blade to see if I can get it to work just a little better, it works better blading to the right than the left. But overall I'm happy with it Lane Ranger: Thanks for the help, my blade actually came with the long lift link but I was afraid it would tear something up since there was no give between the blade and the lift. I might have to try it putting that piece on to see if it helps. I think I'm also going to put just a little weight on the blade. I tried that this weekend, and it seemed to help some. 1 Share this post Link to post Share on other sites
oaktown1987 82 #14 Posted December 18, 2013 The one on my 875 doesn't sit level either I think the frame is twisted someone ran the plow down past the wear blade on the plow and the square holes now only have 3 sides people these days Share this post Link to post Share on other sites
dmoore 1,036 #15 Posted December 31, 2013 (edited) Hey guy's, I have a question pertaining somewhat to this topic so I thought I'd post it here....I just picked up a 42" snow/dozer blade for my 78 C-101 8-speed, I already have the rear attach for my 36" tiller installed...I rolled the tractor over the frame to hook it up and noticed the rear frame of blade will not get past the push pin to lock it into the throats....it looks like it would work if the rear attach was removed then turned around with the throat's facing forward but, I should not have to do this...right? Also the blade angle handle looks mighty close to the right side foot rest. The round stock you see welded to the top was removed..guess it was done to fit a different quick attach..This blade should fit my tractor..I just need a lil guidance on fitment..: ) Thanks in advance! Dave in Virginia Edited December 31, 2013 by dmoore Share this post Link to post Share on other sites
TT-(Moderator) 1,170 #16 Posted December 31, 2013 The notches on the OEM rear hitch should be on the bottom: Share this post Link to post Share on other sites
dmoore 1,036 #17 Posted December 31, 2013 So my tiller hitch will not work? Or can I reposition it? Share this post Link to post Share on other sites
TT-(Moderator) 1,170 #18 Posted December 31, 2013 You can try flipping it to the front. Curious...... Did you buy one of those "homemade" hitches off eBay or is it the old style OEM tiller hitch? Share this post Link to post Share on other sites
dmoore 1,036 #19 Posted December 31, 2013 (edited) [] Edited December 31, 2013 by dmoore Share this post Link to post Share on other sites
dmoore 1,036 #20 Posted December 31, 2013 Did not buy from ebay..it is an original Wheel Horse/ Toro attach... Share this post Link to post Share on other sites
TT-(Moderator) 1,170 #21 Posted December 31, 2013 That appears to be a factory 5xi series rear hitch. You would have to modify the back of the plow frame to enable it to snap into that hitch when mounted on an "early" tractor. Share this post Link to post Share on other sites
dmoore 1,036 #22 Posted December 31, 2013 Oh no! I just cut that round stock off! Share this post Link to post Share on other sites
TT-(Moderator) 1,170 #23 Posted December 31, 2013 Oh no! I just cut that round stock off! That might be the missing link. Share this post Link to post Share on other sites
TT-(Moderator) 1,170 #24 Posted December 31, 2013 Another option is to install spacer blocks between the hitch and the axle housings to lower the entire hitch. Share this post Link to post Share on other sites
dmoore 1,036 #25 Posted December 31, 2013 (edited) Oh no! I just cut that round stock off! That might be the missing link. It appears this hitch will accept both front and rear entry implements......this sheet is dated 1999 Edited December 31, 2013 by dmoore Share this post Link to post Share on other sites