Tom. 70 #26 Posted December 24, 2013 Good to hear your back on on it! Mike.......... I'm glad to be back on it, really enjoying it!! Tom Thats the beauty of redoing these. You can take as long as you want. They dont eat much just sittin there. That's too true, I really would like to press on with the now though as I'm fed up of seeing that green paint haha! Tom Hey tom, Glad to see you are back Merry xmas Hi Mark, Thanks very much, I'm sure I'll be in contact with you soon regarding decals haha! Tom Share this post Link to post Share on other sites
Stigian 1,234 #27 Posted December 26, 2013 Good to see you back at it Tom, I have been wondering how you have been getting on with the 856. Don't give up on the E-tank, even though I have a sandblasting cabinet now I still E-tank bits first before blasting them. It makes blasting soo much easier which also means your compressor will have to run less.. Share this post Link to post Share on other sites
Tom. 70 #28 Posted December 26, 2013 Hi Ian, I will still be using the e-tank but will be sandblasting parts after e-tanking them to get the best results hopefully like you said. I am nearly ready to start tearing into the engine however I am having trouble finding piston rings in the UK, I'm thinking I may have to get some over from the USA? Any advice? Tom Share this post Link to post Share on other sites
meadowfield 2,545 #29 Posted December 26, 2013 Tom, What size rings do you need? Pretty sure I've got a few NOS piston and ring sets for a k181 in stock.... Mark Share this post Link to post Share on other sites
Tom. 70 #30 Posted December 26, 2013 Hi Mark, I was after a set of standard size piston rings please.. Tom Share this post Link to post Share on other sites
neil 2,398 #31 Posted December 28, 2013 Hi Tom Good too have you back on Redsquare. I have had Joe Papke emailing trying to get hold of you & i have emailed you a few times about the pulley sheild that you wanted for your suburban Not sure he still has it now but if you still need it get in touch & i will find out if he still has it .. Share this post Link to post Share on other sites
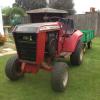
Tom. 70 #32 Posted January 18, 2014 Hi all, Sorry I've been lacking with updates, mainly due to me going abroad for week and returning to a shed load of school work! Anyway I am back on track and things with the 856 are starting to move along, slowly but steadily.. This morning I started off by moving the 856 from a storage shed to my workshop, I had been delaying this as my workshop was a tip! After finally getting it cleaned up I transported it using a much bigger version of a wheel horse!! I wanted to start on the frame and transmission first as I'm aiming to get a rolling chassis to start off with. I decided I was going to split the transmission for a few reason, one being I wanted to check everything was as it should be and two, I want to learn about them and get hands on experience with wheel horses so I decided by splitting it I'm sure I will learn a lot. I got the hubs, brake drum and pulley removed, all not too hard however I knew I had to face the dreaded hitch pin. So I started drilling it, I still need to drill more as I'm not all the way through yet but I am getting there. However just as I was finishing up I noticed a crack on the axle around the keyway, and I touched it and a small ish piece of the axle fell out. The length of the keyway and probably about 1/4 thick. It fits back perfectly and when the hub is on and the key is in the hub feels fine and there is no play. I am stuck at what to do? Whether to replace the axle, which will be hard to source one I imagine, find another transmission, may also be hard although I do have a 706 with the same tranny I could swap, weld or "fix" it back, or just place it back in as it was and put the hub back, hmmm. Just a few pics of the tranny and 856 in bits. I have also started making my own sandblasting cabinet, very early stages at the moment but it will come together soon I hope.. Have a good day, Tom Share this post Link to post Share on other sites
Olratlr 25 #33 Posted January 19, 2014 Good Luck with your restoration Tom. Share this post Link to post Share on other sites
Stigian 1,234 #34 Posted January 19, 2014 Good to see a bit more progress Tom, sorry your having a few unexpected problems with it.. I'm not sure quite what the best way to sort the axle out would be. If it were me I would have a go at welding it up and then turning it in a lathe to get the welds nice and smooth again.. But that's just me. I'm sure some of the guy's will chip in with some thoughts on it. Share this post Link to post Share on other sites
Tom. 70 #35 Posted January 19, 2014 Thanks guys for the positive comments! After some thinking I decided to swap the transmission from the 706 because it seemed in better condition, the axles weren't broken, the axle seals don't leak and the slot hitch should be easier to remove! This is the 706 with the donor transmission. I successfully removed the hubs and brake drum and the hitch pin is getting there. At the minute the hitch is removed because I cut it both sides on the pin and I still have the remove the remains of the pin in the transmission. Hopefully this shouldn't be too hard, I can then split it and check all the gears, bearings and seals are as they should be! Thanks for reading, Tom Share this post Link to post Share on other sites
Tom. 70 #36 Posted January 22, 2014 Hi all, Things are coming along slowly, the hitch pin has now been fully removed from both the slot hitch and and transmission which is a result! It took a lot of drilling, WD40 and a beating with the air chisel but it finally came free. Another bit of good news is that I have bought a proper sand blaster, it isn't because I've given up on the homemade one, mainly because this one came up at a reasonable price, it's obviously going to be a lot better and if I did ever want to resell it I would most likely get my money back. I'm picking it up Saturday so hopefully I'll get blasting Sunday!! Thanks, Tom Share this post Link to post Share on other sites
Anglo Traction 759 #37 Posted January 22, 2014 Good news on the Blaster Tom. Clean up that original K181 as well, re-sell the Blaster and get your Engine re-bored and built with the proceeds Share this post Link to post Share on other sites
neil 2,398 #38 Posted January 22, 2014 Good luck with the new Blaster Tom , Its really refreshing to see a youngster tackleing some of these mechanical projects , its a shame more youngsters dont have the same enthusiasm as you . Rest assured it will stand you in good stead later on . Good luck Tom Share this post Link to post Share on other sites
wheeledhorseman 573 #39 Posted January 22, 2014 Great to see the progress you're making there Tom but you're right to put school work first and don't let the project make your school work suffer. I have to say that having been a teacher for more years then I care to remember. Be useful to see a photo of the damage on that axle. Hard to believe you're a junior member, you talk about things and tackle them like a seasoned pro. Andy Share this post Link to post Share on other sites
Tom. 70 #40 Posted January 22, 2014 (edited) Good news on the Blaster Tom. Clean up that original K181 as well, re-sell the Blaster and get your Engine re-bored and built with the proceeds Hi Richard, I'm definitely going to go with the K181 now, that may be an idea but if I like the sandblaster I may keep if for any future projects, I'm still looking at getting my engine rebored though regardless if I resell the sandblasting cabinet. The hardest thing is finding someone who will do it!! I will keep looking though there must be someone local.. Tom Good luck with the new Blaster Tom , Its really refreshing to see a youngster tackleing some of these mechanical projects , its a shame more youngsters dont have the same enthusiasm as you . Rest assured it will stand you in good stead later on . Good luck Tom Hi Neil, Thanks for the reply, I'm really looking forward to using this new blaster! I have to admit I really do enjoy working on the horses or anything mechanical really, I have grown up around machinery and I think that's what had started it, I really like a challenge and especially the feeling after you complete it is great!! Tom Great to see the progress you're making there Tom but you're right to put school work first and don't let the project make your school work suffer. I have to say that having been a teacher for more years then I care to remember. Be useful to see a photo of the damage on that axle. Hard to believe you're a junior member, you talk about things and tackle them like a seasoned pro. Andy Hi Andy, I am definitely making sure school work is done first because it's what decides my future potentially. I find working on the horse a great escape though when I need a break from school work and it takes my mind off of everything because I focus on the job in hand. I will try and get some pictures of the axle for you tomorrow, it looks as if there has been so much pressure on the key is sort of cracked the surrounding metal. And thanks very much Andy, I'm far from a pro yet but with the help of you guys and my parents it helps me complete all these tasks. Tom Edited January 22, 2014 by Tom. Share this post Link to post Share on other sites
Tom. 70 #41 Posted January 26, 2014 Hi all, Slow progress but hopefully it should start to pick up now as I have got the sandblaster set-up. I only had around half an hour to play with it, I'm still getting use to it but my sandblasting skills seem to be improving! Tomorrow hopefully I should make some more blasting progress, it will continue to be pretty slow because I can only blast in the evenings because of school but it'll get there! Tom Share this post Link to post Share on other sites
Anglo Traction 759 #42 Posted January 26, 2014 No stopping you now Tom. Real handy piece of Kit , Can you actually get the whole Hood in that Blasting Cabinet ?. Share this post Link to post Share on other sites
meadowfield 2,545 #43 Posted January 26, 2014 looking good Tom Share this post Link to post Share on other sites
Tom. 70 #44 Posted January 27, 2014 No stopping you now Tom. Real handy piece of Kit , Can you actually get the whole Hood in that Blasting Cabinet ?. Hi Richard, It's a great bit of kit, really happy with it so far! I can, it's tight but it will fit in there luckily! Tom looking good Tom Hi Mark, Thanks very much, it's coming along slowly.. I did get a few more bits done tonight, I realise there is still a few bits of paint left I will go back and get these but i'm still getting use to it! I am using agriline paint and will be using their grey primer and their case IH red but I'm unsure on what I should use on the rims? Any ideas? Tom Share this post Link to post Share on other sites
Tom. 70 #45 Posted February 2, 2014 (edited) Hi all, I have completed a bit more blasting: Most of this is done, a few parts still need going over but the blasting is going well. I am going to get the wheels done next, I just need to remove the tires. These are the wheels that I will be using: I also found a seat, it's an old bostrom seat off of a roller, it's a good size and is in good condition. I am going to order the paint tonight, I will be ordering IH red, IH off white and grey primer. They are all from a company called agriline. I can hopefully start priming and painting within the next week or two, I'm aiming to get a rolling chassis to start off with and go from there. Another piece of good news is that I have found a local machine shop that will hopefully rebore my engine for me! I was also wondering if I could sandblast the transmission? I didn't know if it would harm the seals or anything, has anyone ever done this? Tom Edited February 2, 2014 by Tom. Share this post Link to post Share on other sites
Jparkes43 329 #46 Posted February 2, 2014 I'm likening the progress and it looks lovely can't wait to see it all done James Share this post Link to post Share on other sites
meadowfield 2,545 #47 Posted February 2, 2014 We used agriline on all ours, used IH white for the wheels too... Project C4 used it too Share this post Link to post Share on other sites
Tom. 70 #48 Posted February 3, 2014 Hi, Thanks for the positive comments! I didn't know you used it Mark, that makes me a lot more satisfied with my purchase, your tractors are a work of art! Tom 1 Share this post Link to post Share on other sites
Anglo Traction 759 #49 Posted February 3, 2014 Hi Tom, Good to hear you may have a Machinist for the Engine. Seat is good, they were originally fitted on many Belgium assembled Models (on both my Tractors). Blasting the Tranny can be rather iffy. As you say, the Seals and the Shaft surfaces they run on are at risk of damage, unless the Seals need replacing anyway?. If you do blast it, use plastic tubing to protect the Shafts and Seals. Plug the apertures (Hitch pin Bore and Gear Lever) really well. If any grit gets in, it will make short work of damaging it. The Axles need to be smooth and polished where the seals contact, as I'm sure your aware. You probably also know that parts which have been blasted can start showing rust formation after 10 minutes, so they benefit from another quick blast or Prime straight after blasting. Look forward to seeing the Chassis Rolling. . Share this post Link to post Share on other sites
Tom. 70 #50 Posted February 3, 2014 Hi Tom, Good to hear you may have a Machinist for the Engine. Seat is good, they were originally fitted on many Belgium assembled Models (on both my Tractors). Blasting the Tranny can be rather iffy. As you say, the Seals and the Shaft surfaces they run on are at risk of damage, unless the Seals need replacing anyway?. If you do blast it, use plastic tubing to protect the Shafts and Seals. Plug the apertures (Hitch pin Bore and Gear Lever) really well. If any grit gets in, it will make short work of damaging it. The Axles need to be smooth and polished where the seals contact, as I'm sure your aware. You probably also know that parts which have been blasted can start showing rust formation after 10 minutes, so they benefit from another quick blast or Prime straight after blasting. Look forward to seeing the Chassis Rolling. . Hi Richard, Yes I am very happy, I will contact them on wednesday, hopefully it shouldn't be too expensive. I also need to find out whether they want me to remove everything and just give them the block or how far they will go, I have never got someone to rebore an engine before so this is all knew to me. To be honest I don't think I'm even going to risk sandblasting it, I'd rather be safe than sorry. I will just stick to the old way with a good old wire wheel and some sandpaper, it works just as well anyway just a bit more time consuming. I have try to keep the blasted parts in dry conditions but I am going to give them a quick blast over again before I prime them like you said just to be on the safe side and to try and get the best finish. Hopefully it shouldn't be too long till you see a rolling chassis, I have ordered the paint tonight so hopefully it should arrive later this week. Furthermore Richard, I don't suppose you know of any manual that shows the nut and bolt sizes? I was planning on replacing most of the hardware, did you? It would just be very handy to have some sort of page that tells me all of the sizes, I'm presuming they will be imperial too which may make it harder to source hardware.. Tom Share this post Link to post Share on other sites