Jump to content
Sign in to follow this  
can whlvr

mid mount grader build

Recommended Posts

can whlvr

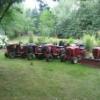
had some time today and thought about a thread here latly where a member built his own grader,as i have the material laying around,and a blade from a paper shear,its been ground too small for them,so i grabbed it,its not as tall as a normal one,like the one stolen from me a few years ago,but **** wide and thats what i wanted,usually i dont take pics during a build but did this time,ill get more as i finish

DSC00060.jpg

DSC00061.jpg

DSC00063.jpg

DSC00064.jpg

Share this post


Link to post
Share on other sites
 
Trouty56

Looks mighty fine...you're pretty handy there Don!!

Share this post


Link to post
Share on other sites
 
AMC RULES

Looks like you built it pretty stout Don, I can definitely appreciate that. :thumbs:

Share this post


Link to post
Share on other sites
 
Hydro

No reason why that shouldn't work Don. I like your "solid" link! :handgestures-thumbupright:

Share this post


Link to post
Share on other sites
 
can whlvr

thanks guys,ya i made the link gary so she can go on one of the hydros for down pressure,this blade has threaded holes all along the top so im going to make a ripper that can bolt on,this blade is not tall so ill have the room to add removable tines,that will be the second stage

Share this post


Link to post
Share on other sites
 
kpinnc

thanks guys,ya i made the link gary so she can go on one of the hydros for down pressure,this blade has threaded holes all along the top so im going to make a ripper that can bolt on,this blade is not tall so ill have the room to add removable tines,that will be the second stage

Sounds interesting. Nice fab work!

Share this post


Link to post
Share on other sites
 
Terry M

Looks really nice! Nice Design!! Would like to see some demo pics when its all done

Share this post


Link to post
Share on other sites
 
can whlvr

took it for a test run today,i had too much play in the locking devise :banghead: it started hitting the rear tires when angled,i spent all day making a lever that was spring loaded,worked good except the excess play,so for now i drilled holes and will use pins,yes ill have to get off the tractor to adjust,the next one will be done right,but i ran it with the pins and it works great,i dont have chains or weights on the test machine,id like to make the next one move side to side hydrolically,like smoreau,s snow blade,but thats down the road,i want this for ripping more than grading,so it wont get angled too much,and the 414# 2 has a very worn hitch also as the member who also just did a grader blade,but so far it worked well,i scraped some ice off of some cement and the road and it will grade a nice wide area,maybe too wide for a small tractor,its 56 inches,nothing the quick cut wont fix

Share this post


Link to post
Share on other sites
 
Don1977

Looks good! As for the mid tack-a matic I tighten mine up by welding up and ground down the back of the latch. I left around an 1/8" more, this tighten the left side. Found the right side still loose, it must have bent the connecting rod so I put in the vice and put the 15" adjuctable on it and fixed that. It still has some play but not a lot. I haven't tried my blade as it seem to rain every other day. The angling the blade I haven't tried, I have mine bolted with two 1/2" bolts and have the holes to angle it , Though a bout grinding out between the hole for a latch but will just use the bolts.

I put some paint on mine. Here is a picture.

SAM_0096.jpg

Share this post


Link to post
Share on other sites
 
can whlvr

thats a nice blade don,i think it was your post that inspired me,i made a very nice system to angle the blade but as i said it hit the back tires because i didnt get the slots tight enough,i drilled holes and im using grade 5 bolts,didnt have any 8,s or id use them,i have to paint it,i spent alot of time on the angle lever,im disappoited at myself,its fun to build these projects but wasting time kinda sucks,oh well i learned a few things so its not all a wash

Share this post


Link to post
Share on other sites
 
can whlvr

heres a few pics of the first stage,i was in tsc today and they have a sale on harrow teeth,2 bucks each,the only thing im not sure about is can hardened steel be welded,they have threads ontop so they could be bolted,but thats ALOT of drilling,and i like welding,anyone please chime in and let me know,if i can weld it im going to get these as they are exactly what i want,other wise ive priced square stock and will make my own

DSC00066.jpg

DSC00065.jpg

Share this post


Link to post
Share on other sites
 
Forest Road

Looks good! My 50" grader is my most loved attachment. Driveway grading is now a pleasure as opposed to a challenge. Looks like you'll be a happy man for years to come.

Share this post


Link to post
Share on other sites
 
can whlvr

so i decided to use cold rolled 3/4 square bar,it was 40 bucks for 12 feet,and that would have been 60 bucks to buy the harrows,so i made my own ripper bar that will bolt to the blade,the blade is 1/2 plate,and its a knife so im sure its got to be good steel,so it should be strong enough,and because this blade isnt too tall i think ill have just enough room for the ripper,but it wont be far off the ground when lifted,i might alter the lift bar and put 2 bolts at the top so ill have more lift when the ripper is on and when the blade only ill use the top bolt,yes ill have to undo the lift bar and adjust but ill see tomorow when i fit her on the blade,ive got the ripper welded up,need to drill holes and then i can fit her,pics tomorow

  • Like 1

Share this post


Link to post
Share on other sites
 
Hydro

so i decided to use cold rolled 3/4 square bar,it was 40 bucks for 12 feet,and that would have been 60 bucks to buy the harrows,so i made my own ripper bar that will bolt to the blade,the blade is 1/2 plate,and its a knife so im sure its got to be good steel,so it should be strong enough,and because this blade isnt too tall i think ill have just enough room for the ripper,but it wont be far off the ground when lifted,i might alter the lift bar and put 2 bolts at the top so ill have more lift when the ripper is on and when the blade only ill use the top bolt,yes ill have to undo the lift bar and adjust but ill see tomorow when i fit her on the blade,ive got the ripper welded up,need to drill holes and then i can fit her,pics tomorow

:wwp:

Share this post


Link to post
Share on other sites
 
can whlvr

as requested here are the pics of the ripper,shes getting heavy which is what i want incase she goes on a non hydro,but im going to put it on the c160 auto,its bell crank is very easy to get to,no taking off the panel in front like on the 414 or 312,plus the 160 isnt a machine that i want to use all the time so a grader is the perfect match and it has the factory wheelhorse weights and v bar chains,enough babling,i made it so it can be flipped down the road,should last many years,i tried to drill the blade to attach it differently,haha,its so hard a coulnt even scratch it with a cobalt drill,luckey it was allready pre drilled and threaded to attach to the cutter it came from,dontthink i will paint the spikes,wont be on there long,here it is

DSC00074.jpg

DSC00073.jpg i

Share this post


Link to post
Share on other sites
 
Paul D.

That looks nice. What did you end up making the spikes out of. I have been considering making one of these myself so I have my brother in law watching for some old railroad ties to make mine out of(he works for the railroad). Just don't know how long they will last. Guess I could put some hard weld (A2 or 4140)in the edges if I needed to.

Share this post


Link to post
Share on other sites
 
massey

Looks good, it ought to be nice and heavy for you. :laughing-rofl:

Share this post


Link to post
Share on other sites
 
kpinnc

That's awesome! It THAT won't rip the ground up, you need to get off the pavement! :ychain:

Very nice work!

Share this post


Link to post
Share on other sites
 
can whlvr

well she works great,did a test on the skating rink(aka driveway)and it tears real good,im thinking that i might try a chain instead of the solid link and attach a few cement blocks and try that,you have to be on the hydro constantly due to grade changes,when you go over a bump it digs too much and stops you dead,i need a foot control like matt sells,one day and then it would be perfect,@paul,i used cold rolled 3/4 inch square stock,its pretty hard but will wear,so then ill flip it and use the other side,should get ten years i hope,but it only cost me 50 bucks total,so if it wears i dont mind(i had almost all the metal,bought the 3/4 square)

Share this post


Link to post
Share on other sites
 
Don1977

That ought to loosen up the high spots. I had to make a new lift link for mine I bent the first one. I have some crusher run stone on my drive , some of it large enough that when I tried to back up with the blade down it lifted the rear wheels.

Share this post


Link to post
Share on other sites
 
KC9KAS

That looks nice. What did you end up making the spikes out of. I have been considering making one of these myself so I have my brother in law watching for some old railroad ties to make mine out of(he works for the railroad). Just don't know how long they will last. Guess I could put some hard weld (A2 or 4140)in the edges if I needed to.

Aren't railroad ties made out of wood?

The RR spikes would work good for a ripper!

Share this post


Link to post
Share on other sites
 
Hydro

I really like his idea of wearing the one side and then turning it over for a second go round. I think some of the testing experience is great in that he wants to let it float with weight. Once the ground is broken it will be easier to grade.

Share this post


Link to post
Share on other sites
 
can whlvr

where i live im in red hard clay,even my bobcat cant dig it,unless i put the forks on and chew it up,so this is a must to loosen the ground first,it works great on the ice pack today,got most of ripped up so it could melt before sunday when it turns real cold

Share this post


Link to post
Share on other sites
 

Create an account or sign in to comment

You need to be a member in order to leave a comment

Create an account

Sign up for a new account in our community. It's easy!

Register a new account

Sign in

Already have an account? Sign in here.

Sign In Now
Sign in to follow this  

×
×
  • Create New...