Jump to content
Sign in to follow this  
JamesBe1

K482S

Recommended Posts

JamesBe1

Ahhhhhh. Now I get it. Either the rods will have to be built up to match a -20 cut of the crank, or the crank built up and cut back down to match the -10 rods.

Did I get that right?

Share this post


Link to post
Share on other sites
 
Trouty56

Yes.... It's confusing....lol

No -20 rods from Kohler....????

Share this post


Link to post
Share on other sites
 
JamesBe1

Yes.... It's confusing....lol

No -20 rods from Kohler....????

No, Kohler only has -10 rods. I doublechecked this afternoon. Soooo, my only option is to have the crank built back up. I wonder what that costs.

Share this post


Link to post
Share on other sites
 
Callen

Maybe contact Brian Miller. He can rework rods for smaller journals on the singles as well as add inserts. He may be able to do these rods too.

Chester

Share this post


Link to post
Share on other sites
 
JamesBe1

Good idea. I hear that Brian is very good. It's nice to have such an expert around here.

Share this post


Link to post
Share on other sites
 
JamesBe1

I finally installed the donor engine onto my D-180. Everything is going pretty smoothly. Had to make a gasket for the carb elbow. I chose use a pair of scissors and a scalpel instead if the ball peen hammer method. I used the ball peen hammer method to lightly indent the gasket paper, but I didn't want to hit it hard enough to cut through the paper. I really don't want to break the carb elbow. I tore the first gasket while making bolt holes with a pen nib (my borers weren't small enough) Started from scratch, and got it made nicely.

Got most everything pretty well hooked up except for the PTO which is waiting for some paint to dry and a coat of paint on the other side.

I am wondering where the battery ground is normally hooked to the frame on these? Both my D's have the engine off of them, so I can't use the other as a reference. The battery ground cable doesn't seem to have enough reach to make it to the engine frame bolt where I would normally expect it to go.

I was wondering if any of the D owners would be kind enough to take a gander at theirs and let me know.

Thanx,

James

Share this post


Link to post
Share on other sites
 
pfrederi

Not sure it is factory original but it works on mine.

75e1a4186890551.jpg

Share this post


Link to post
Share on other sites
 
Hodge71

Mine is mounted to a stud that is under the battery tray James. Youre making great progress my friend. It should be running soon!! :dance:

Share this post


Link to post
Share on other sites
 
JamesBe1

I was wrong about my other D. The battery cable was still hooked up to the frame, and it is hooked up to a hole on the battery tray support. Close enough to Jeff's. Sooooooo, I scraped off a bit of paint from my battery tray support, and hooked it there. I always wondered what those two holes in the tray supports were for. Now it makes sense.

I had everything hooked up, and battery installed. I tried to start it earlier only to notice that I didn't have the coil wire connected. Fixed that.

Tried to start it again, and noticed that I didn't have the regulator installed or connected. Hunted that down, installed and connected it.

Tried to start it again, and used a little starting fluid. It fired several times, and the oil pressure went up to 40.

At least now I know that the electrical system fires. Checked the gas filter, and it was dry. Checked the tank, and it was dry. Checked the gas cans, and every one of them was dry.

Had to go out and get gas.

Oh yeah, my battery charger is dead. 7VDC, and 4VAC (I changed the diodes, but still the same). Anybody have any suggestions?

Right now it is on a trickle charger. I had the battery in the corner of the shed on a trickle charger for several weeks, and it was reading about 12.7V when I started.

I ran jumper cables from my C-120 (great machine), and it drew about 10A for a while. I had to turn it off to take care of something else, so it's back on the trickle charger.

After I got back with the gas, I put in about a gallon. Turned the key and the the pump filled the gas filter. Checked the carb, and nothing was leaking outside, but it was leaking inside.

I took the carb off and will double check the float setting (I rebuilt it yesterday morning).

So, that is where I am at now. As soon as I can get the carb straightened out, it should run.

P.S. Jeff, thanx for that grass screen. It wasn't the correct one, but close enough. The center hole was too small to attach the hydro coupler through. I found the original, and used that as a template to cut a larger hole. Now it fits perfectly.

Share this post


Link to post
Share on other sites
 
otrelwood

there is a guy on evilbay that has .020 rods for the 1 lungers maybe he has or can get them for the twins .he is in waseon oh

Share this post


Link to post
Share on other sites
 
JamesBe1

there is a guy on evilbay that has .020 rods for the 1 lungers maybe he has or can get them for the twins .he is in waseon oh

Thanx otrelwood. Too bad I already told my machinist to send the crank out to have it welded. I picked up a set of .010 rods on ebay a few weeks ago for about $35 each. I couldn't pass up the price and gambled that the crank would be able to be turned down to .010 under. Guess it wasn't in the cards as it was out of round by too much.

Oh well, I'll have to save that seller in case I need them.

Share this post


Link to post
Share on other sites
 
JamesBe1

Picked up again this afternoon with the carb already off the tractor. I took it apart and cleaned everything. I adjusted the float height so that it shouldn't overflow anymore. It really wasn't off by much at all. Maybe the inlet was sticking open? Cleaned that with carb cleaner. Put it back together and mounted it on the engine.

This time I had a can of starting fluid. Sprayed some in the carb and turned it over. It started to fire, but not for long. Checked the carb, and it wasn't overflowing anymore. Pulled the spark plugs. Dirty, but not wet at all. I checked the gap. Way too big, so I closed them down to .025. Tried to start it again, and it only fired a few times when I used starting fluid.

I decided to check the points. I pulled the points cover and spun it by hand till it was at it's widest. It was well over 1/8". Wow. Also, they were pretty dirty. No wonder nothing was happening. I wonder how Jeff and I managed to get it to run the other week. I cleaned the points, and reset the gap to .020 Tried to start it again. Had the points cover off, and could see a spark. It still would only fire sometimes when I used some starting fluid. I didn't use a lot of starting fluid as i have see pics of what can happen when you overdo it.

Maybe I set the float too low? Took it off. While it was off, I checked the fuel flow from the pump. A squirt of dirty gas came out, but not much. The rest was clean gas. I have two fuel pumps on this tractor. The impulse pump that is mounted to the engine, and the electric one on the frame. Either way, gas was getting through both of them at least to the carb inlet port.

Cleaned the carb again. Not much different. Made sure that the needles were not clogged. Reset the float hight. Not much else to do. Installed it, and turned it over, and it won't start. It wants to fire when I hit it with starting fluid. I figured that I would take the carb off again, and see if I could get liquid to flow through the inlet into the bowl. Took it off, and sprayed carb cleaner in the fuel inlet, and it went through to the bowl. Found out that carb cleaner and the square cut oring don't get along. The oring swelled such that it was too big to fit any more. Dug up the old one and installed it. Cleaned the needles and all the passages again, and put it back together.

Went to put it back on the tractor, and that was when I saw It!

It was proof that the room temperature and my IQ are numerically equivalent (which is really bad when I go to Europe).

It was laughing at me the whole time.

It was one of those thing that make you look over your should to see if anybody saw how stupid you are.

It was the cap that I had stuck in the manifold intake when I pressure washed and painted the engine.

It was completely blocking everything except for a few ether fumes.

It at least got me to check and set the plug and points gap correctly.

I pulled the cap out of the manifold, and installed the carb. Turned the switch, and watched the carb for leaks and overflow from the bowl. Perfectly dry. I turned the switch the rest of the way, and it fired up immediately! I had the throttle set at idle from trying various combinations of throttle and choke while trying to get it to start before. I inched the throttle open wider, and it stumbled a little bit (probably because the choke was open), but it came up in RPM's. I worked my way up to full throttle, and it ran perfectly. Not one miss. The oil pressure went up to about 50, and slowly started to come down as the engine got warm. It settled down at about 40.

I tried it a different RPM settings, and it ran perfectly. I adjusted the carb by ear, and couldn't really detect any change when I backed out the needle. After 4 turns I could tell it was getting close to the end of the threads, so I called it quits and turned it half way back to the spot where it ran rough.

Repeated the same thing at idle, and still couldn't detect a change when backing the needle out. Took my best guess and turned it half way back.

The engine runs great with no smoke or knocking. Now I have to see about mufflers.

Well, that was my day (or a part of it). I feel stupid and happy at the same time. Thought I'd share that with you guys.

Share this post


Link to post
Share on other sites
 
Martin

glad it worked out for you. i think everybody is guilty of this sort of thing at some time. when i get into a frustrating situation like this anymore, just need to take a step back and check every single thing, like its the first time youve come across this engine. and if that doesnt work, then i ask myself, 'what did you mess with or "put in the intake" :ROTF: to stop this thing from running.......'

Share this post


Link to post
Share on other sites
 
JamesBe1

More progress today. It starts right up and runs perfectly. Not one miss. I think it may be running on the rich side as I don't need any choke to start it.

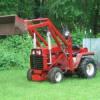
Here are a couple of pics of the result. I am sure it doesn't look anything at all like what Jeff helped me get running the other month.

Oh yeah, after I got done tightening the bolts for the shroud, it occured to me that I have have to remove the front cover to install the pto pulley. As soon as the paint dries on that, it will be installed.

Share this post


Link to post
Share on other sites
 
otrelwood

if you dont like to use starting fluid use wd 40 its very flammable but it lubricates the cylinders to prevent a dry start

Share this post


Link to post
Share on other sites
 

Create an account or sign in to comment

You need to be a member in order to leave a comment

Create an account

Sign up for a new account in our community. It's easy!

Register a new account

Sign in

Already have an account? Sign in here.

Sign In Now
Sign in to follow this  

  • Similar Content

    • Gcw804
      By Gcw804
      I have a WH 300 series with a Kohler Magnum 10 engine and I cannot for the life of me figure out how to get the choke cable and linkage set so it will work. The numbers on the engine label  are worn off the, so I cannot give anyone that information. Does anyone have a picture or can you head me in the right direction.
       
      My arm for the linkage assembly is set at 3 o'clock and 9 o'clock if that helps. There seems to be several different linkage rods for this engine.
       
      Thanks
       
      Gary Williams

    • tractorboy79
      By tractorboy79
      I was looking around on ebay and noticed that hydraulic actuators from John Deere 312, 317, etc models appear to be Identical to a Gt14 or d series lift cylinder. My question is would a new cylinder from ebay be able to replace one that is on a gt14 or d series?
       
      Images below of cylinders to show similaritys.


    • BuffaloD200
      By BuffaloD200
      '74 D-180
       
      My friction disc in gone on my clutch.  I saw the old post about making a new friction disc, so I'm not concerned about that.
      I managed to remove the front clutch plate and double v-belt pulley.  But I can't separate the two.  When I took the assembly off the spiraloc washer popped off on its own.  I HAVE READ THE MANUALS.
      So I should be able to just remove the pulley from the front clutch and continue with step 4.  The v-belt pulley is loose as all hell and flops around like a dead fish.  It seems to be hung up on a ring or bearing race.  
      So my thoughts are grab a BFH or sparky the blue tip wrench.
      Is there an unpublished step 3.5, or some trick?
    • BuffaloD200
      By BuffaloD200
      Hey all, 
       
      My '74 D180 has a lot of trouble pushing snow.  Weighted tires, but nothing else at this time.  I've found it gets stuck frequently and only one wheel spins.  Do these tractors not have a limited slip/locker arrangement?  How does everyone manage with the infamous one wheel peel?
    • BuffaloD200
      By BuffaloD200
      Hey all, I need to install a drive belt on my 75 D180 for my snowblower.  I've looked through a bunch of D-series owner's manuals, and none seem to mention replacement procedure.  The PTO pulley is fixed, save for engaging the PTO and there is minimal movement at the snowthrower pulley. There's no idler or tensioner as far as I can tell.  Do I have to remove the PTO pulley?  That seems to be a required service item.
      Same question for my 80 D200 as well really.  
       
      Using the recommended 4L490W belt.
       
      Thanks 
×
×
  • Create New...