-
Similar Content
-
 By BuffaloD200
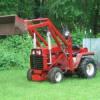
'74 D-180
My friction disc in gone on my clutch. I saw the old post about making a new friction disc, so I'm not concerned about that.
I managed to remove the front clutch plate and double v-belt pulley. But I can't separate the two. When I took the assembly off the spiraloc washer popped off on its own. I HAVE READ THE MANUALS.
So I should be able to just remove the pulley from the front clutch and continue with step 4. The v-belt pulley is loose as all hell and flops around like a dead fish. It seems to be hung up on a ring or bearing race.
So my thoughts are grab a BFH or sparky the blue tip wrench.
Is there an unpublished step 3.5, or some trick?
-
 By Redtickuleez
Hello gentlemen!!! I recently bought a d180 with loader and backhoe. Im looking for serial number.. there is a plate under the steering wheel but its been pajnted over and i can make it out. Can y'all tell me another location and was this tractor pruchased originally with these attachments and any info would be greatly appreciated... Thanks fellow Wheel Horse enthusiasts !!! !! !!!
-
.thumb.jpg.bc8e484711dfd580d76688cb5d3c5d7d.jpg) By Southern_Secret
By Southern_Secret
Hello fellow Horse Heads long time no post for me, life gets crazy & a lot of things change sometimes but anyhoo. So back a few years ago when I first got my 1994 314-H I had it at my shop going threw it. One of my customers walk past as im working and said, you know I think Iv got a Wheel Horse & im thinking "no you dont buddy". I give him my # to send pics thinking it was a big waste of time & after getting the pics I realized he did have a Wheel Horse! I hand shake bought it right there, asked him to bring it to my store & he said no problem. Well after almost 2 years it is finally in my orbit. I know very little about it other than his father-inlaw got it new and used it around his house moving snow and stuff. His father inlaw moved down south here when his daughter got married and gave the tractor to my customer because he had a farm & his the inlaw had no use for it anymore. Same with every barn find, "it was running when parked" 8 years ago, said one of the axel seal is leaking. Im happy and hope I can get it back in running order soon cause it is going to be handy around the truck farm!!
I will post Pics as soon as I reinstate my membership
-
 By Swemill
Hi everyone!
Long time since i was here and my old pics is gone from the forum.
I just uploaded a movie with pics on youtube, and thought i could share it for you guys.
I would love to get some comments on my Youtube channel, from you true Wheel Horse fans!
Thanks and Best Regards
-
By Brandon Byers
I know I'm half a year ahead of schedule!
I picked this 1974 D-180 up early last year. It had a pretty hard life, and the previous owner gave his best attempt at keeping it alive. Hydro was strong so I serviced it and put it to work mowing all year. I decided if it would make it through the season then it would get some TLC. By fall it was burning about a quart of oil an hour but it made it. I have no clue how many hours are on it, every hole, bushing, bearing on this tractor is pooched. If you look closely, somebody used two 1" NPT Pipe Flanges to rebuild the mounting points for the upper 3 point cylinder. Hey it works!
I rebuilt the steering gearbox and re-bushed the front axle along with making new spindles.
I had the 482 Kohler bored .20 over (it was .10 over already) and gave it a rebuild with the intention of putting it back to work on snow duty.
I then dawned on me that this tractor will be 50 years old next year - and these old D's are becoming harder and harder to find anymore. So I decided to customize it a bit and go for what a maybe a dealership would offer for a 50th anniversary model if Wheel Horse was still in business today (In another universe, maybe!)
As D's aren't known for their looks - and I can't leave anything alone. I took approximately 2 Inches out of the grille and bezel.
I updated most of the wiring and lights. Gave it a new set of Carlisle Ags along with Vredestein front ribs. It got a new seat and I painted all the accents aluminum.
I patched, rebuilt the 48" deck and put new blades, wheels, and hardware on it. The Blade & 3 point scoop somebody adapted to it also got some attention.
Lastly I stripped it most of the way down and painted it with IH red acrylic urethane enamel.
I always forget to take pictures during my projects but here's a few:
Before:
After:
Thanks for reading!!
-
