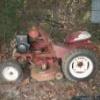
faster 11 #1 Posted November 14, 2011 Heres a few pictures of my 654 thats looking more like a 704 ( 6 1/2 hp kohler )restoration with no hood. If you have and old hood let me know I`ll buy it. How I found it. Now with some primer new axle seals and some tractor supply paint. Still need a hood if you have one let me know . 1 Share this post Link to post Share on other sites
rmaynard 17,409 #2 Posted November 14, 2011 Great job on the Wheel Horse, but I love the VW Kombi. What year is it? Probably older than the 654. My dad had a '62. And, you've got to be single. My wife won't let me have a horse in the house, much less use it for a coffee table. Share this post Link to post Share on other sites
faster 11 #3 Posted November 14, 2011 Its a 65 and runs like a top. I think the two are made for each other. Its in the basement man cave. Share this post Link to post Share on other sites
HorseFixer 2,015 #4 Posted November 14, 2011 Yer my Hero! Workin on the Tractor in the Front Room. Nice Job Yer Doing. :wh: Share this post Link to post Share on other sites
Coadster32 793 #5 Posted November 14, 2011 Looks great indeed. You're doing fine work there. :dunno: Share this post Link to post Share on other sites
Kelly 1,038 #6 Posted November 14, 2011 Very nice job, looks like you started with a pretty clean machine, I have a hood but it needs work, they are getting very hard to find in good shspe and the prices are going skyhigh. Share this post Link to post Share on other sites
AMC RULES 37,259 #7 Posted November 14, 2011 Finished to that level, I expect that lil' guy is gonna stay in the house from now on.:dunno: Share this post Link to post Share on other sites
massey 119 #8 Posted November 14, 2011 looks great so far, nice attention to detail. :dunno: Share this post Link to post Share on other sites
chazm 413 #9 Posted November 15, 2011 Nice Tractor & VW to boot Chas :wh: Share this post Link to post Share on other sites
VinsRJ 723 #10 Posted November 15, 2011 Very nice! :dunno: Share this post Link to post Share on other sites
Zeek 2,299 #11 Posted November 15, 2011 Boy, you're the second cleanest person I know besides me :dunno: Share this post Link to post Share on other sites
faster 11 #12 Posted November 15, 2011 Thanks for all the great comments it will push me to finish it. Well the 654 got it first battle scar and never left the basement last night. I believe this was my own fail I didnt have the grip or the rubber nipple on the handle and I guess the locking shoe dropped to low and made contact. I`m sure there will be others before it over. Share this post Link to post Share on other sites
faster 11 #13 Posted November 17, 2011 A little update on the 654. To night I set the brakes got the steering in mounted the fenders and gas tank (not sure if I keep the foam under the clamp) but all and all it`s looking good. One thing that I have been trying to do is use as many of the orginal bolts as I can but without paint most have cleaned up like new must of had a good plating on them to start with. The seat after removing the cushion and the bolts holding it together took a lot of welding just to call it a seat again but I think it will be fine. So heres some pictures (some are alittle bright but you get the idea) and I still need a hood. Some of the paint runs that I work on later. Share this post Link to post Share on other sites
whfan74 2,073 #14 Posted November 17, 2011 It is really turning out nice. Keep up the great work and see it through to the finish. This is going to be one sharp 654!!!!! :dunno: Share this post Link to post Share on other sites
faster 11 #15 Posted November 17, 2011 It is really turning out nice. Keep up the great work and see it through to the finish. This is going to be one sharp 654!!!!! Thanks. I just wished the wheels would fit in my blast cabinet not sure how I`m going to clean them yet. :help: Share this post Link to post Share on other sites
COMMANDO6 20 #16 Posted November 17, 2011 Very nice. That's terrible about the battle scar. That'll be the one thing that bugs you forever. And I like the Coke cooler :dunno: Share this post Link to post Share on other sites
faster 11 #17 Posted November 20, 2011 Got alittle more work done today made a spacer to lift up the seat from the fenders don`t need anymore scatches. Took the deck apart in really good sharp shouldn`t take much to finish it some sanding primer and paint . But did find one problem with the belt guard with the kohler k161 the front bolt has no where to go. I guess the tecumseh engine bolt pattern layout wasn`t the same as a kohler so I may have to trade this engine for a tecumseh or find one. One thing for sure I don`t want to cut and weld a good guard it`s just to straight. Heres a few more pictures. PS. thanks for the search here on redsquare I would be lost without it. The seat lift. Heres the deck And the big problem with the guard Share this post Link to post Share on other sites
KC9KAS 4,746 #18 Posted November 20, 2011 Thanks. I just wished the wheels would fit in my blast cabinet not sure how I`m going to clean them yet. Try cleaning them up in an E-tank. Share this post Link to post Share on other sites
TT-(Moderator) 1,170 #19 Posted November 20, 2011 This might give you an idea for the belt guard: viewtopic.php?p=66806#p66806 Share this post Link to post Share on other sites
sorekiwi 761 #20 Posted November 20, 2011 My last Tecumseh guard to Kohler adapter wasnt as overengineered as my first one: Just a bit of 1" flat bar with a 1/4" stud welded to it that bolts to the hole in the Kohler engine that is at about 7 Oclock. Hope you can see what I've done in the pic. Share this post Link to post Share on other sites
faster 11 #21 Posted November 20, 2011 Thanks for all the pictures of adapters. That looks like the way to go and without screwing up the guard. As far as blasting the wheels the front will fit in my blaster with the tires on and if I remove the tires from the back they to will fit also. I was hoping to leave the tires on for fear the a tire machine could damage them they are old but still in great shape. Thanks again for all the help. Rob Share this post Link to post Share on other sites
Scrumpy 5 #22 Posted November 23, 2011 Faster, I know you are worried about damaging the tires taking them off and I have no advice for that but when you put them back on to avoid scratching the paint on the rims you can do the following. Prime the rims and also paint the inside of the rim the color you want. Mount the tires but don't inflate. Then take some cardboard and cut a circle smaller than the rim and insert them between the tire bead and the rim making sure they are big enough to cover the complete tire to avoid over spray getting on them. Then do the final paint on the rims and when you are done and they are dry just lube the beads and inflate. No scratches in your new paint trying to mount them afterwards. -Scrump Share this post Link to post Share on other sites
faster 11 #23 Posted November 23, 2011 Faster, I know you are worried about damaging the tires taking them off and I have no advice for that but when you put them back on to avoid scratching the paint on the rims you can do the following. Prime the rims and also paint the inside of the rim the color you want. Mount the tires but don't inflate. Then take some cardboard and cut a circle smaller than the rim and insert them between the tire bead and the rim making sure they are big enough to cover the complete tire to avoid over spray getting on them. Then do the final paint on the rims and when you are done and they are dry just lube the beads and inflate. No scratches in your new paint trying to mount them afterwards. -Scrump Thanks Scrumpy sounds like a great idea I`ll do just that. I just got back from having the back taken off $5.00 each not bad and they still look good. The front I removed myself so now I can start on the rims. I also traded rydogg for a good tecumseh engine that has everything I need so everything is moving right along. Thanks again Share this post Link to post Share on other sites
Scrumpy 5 #24 Posted November 23, 2011 Sounds like you are on track. It is going to look real nice when you are done. Is the Techy an HH60? I have been watching this because I have a 656 that I will be doing the same to, more of a refurbish than a restore though. Been fixing the mechanical items and what not on it in the meantime. Currently it has the wrong seat and air cleaner but it runs nice and drives well. I have a mower deck and a plow so it will be a good little worker to go with my C160 -Scrump Share this post Link to post Share on other sites
faster 11 #25 Posted November 24, 2011 Sounds like you are on track. It is going to look real nice when you are done. Is the Techy an HH60? I have been watching this because I have a 656 that I will be doing the same to, more of a refurbish than a restore though. Been fixing the mechanical items and what not on it in the meantime. Currently it has the wrong seat and air cleaner but it runs nice and drives well. I have a mower deck and a plow so it will be a good little worker to go with my C160 -Scrump Scrumpy, Its a H60 not the cast iron engine its off a 65 ranger with electric start I believe its the same as the 654. Its funny when you say you have the wrong air cleaner and seat I`m missing some sheet metal bolts 1/4" but with a 7/16" head and can`t find them anywhere I guess they where made for wheel horse only LOL. The nice thing about restoring a WH its really not that expensive its fun but I do still have along way to go. PS. post some pictures of your 656 Share this post Link to post Share on other sites