Jump to content
Sign in to follow this  
Fun Engineer

Commando 8 Restoration

Recommended Posts

Fun Engineer

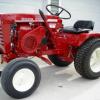
I finally got around to downloading some photos of my latest restoration project. This tractor was owned by my parents and is the one my sister and I used since 1968 to mow their lawn with. It was sold to a neighbor in 84 when my mother moved into town. I tracked it down in 2002 and purchased it from it's 3rd owner. I retired the tractor in 2009 after using it to plow snow and put in my new lawn and driveway. My restoration is twofold. First I wanted to restore it to like new condition. Second I need a backup tractor and snowblower for our long snowy northern Michigan winters.

This is the tractor when I first started.

IMGP3803.jpg

IMGP3799.jpg

Here's a photo of the engine before it's total rebuild. Bored 20 over, crank ground and polished, new valves and guides.

IMGP3805.jpg

Here are a few with it nearly done.

IMGP4236.jpg

IMGP4235.jpg

IMGP4238.jpg

I only have one or two weekends a month to work on it so its taking a while to get it done. I'll post more pictures as i move ahead.

  • Like 1

Share this post


Link to post
Share on other sites
 
rmaynard

Looking good so far. Keep up the good work. :thumbs2:

Share this post


Link to post
Share on other sites
 
Duff

Nice work you're doing there!

Duff :thumbs2: :banghead:

Share this post


Link to post
Share on other sites
 
massey

Looks good so far and it's great that you got it back.

Share this post


Link to post
Share on other sites
 
fabricator2009

Keep up the good work. Looking good.

Share this post


Link to post
Share on other sites
 
AMC RULES

Looks great, but it's going to be too clean that tractor. :thumbs2:

Share this post


Link to post
Share on other sites
 
dclarke

Very nice work! Keep the pics coming. :thumbs2:

Share this post


Link to post
Share on other sites
 
wingrider

Nice details I really like how the carb looks, is it new,rebuilt or how did you get it looking that sharp? Keep up the restore and the pics.

Wingrider

Share this post


Link to post
Share on other sites
 
Fun Engineer

I realize its been a couple of months since I posted any progress pictures so here are a few more. I'm at the stage where I can start to put things back together.

Here's what I started with.

The tractor was starting to really show its age. I suppose it didn't help that for the past 10 years that I've had it back it plowed snow that had a lot of salt in it that really caused a lot of surface rust. This engine was rebult once when my family owned it. Don't know what the last owner did to it.

I'm having trouble posting pictures so I'll have to add them in another post.

  • Like 1

Share this post


Link to post
Share on other sites
 
Fun Engineer

Here are some painted wheels.

Share this post


Link to post
Share on other sites
 
Fun Engineer

And some painted tins.

I have more pictures of the assembly that I'll post when I retrieve my camera.

Share this post


Link to post
Share on other sites
 
Jake Kuhn

Looks great :handgestures-thumbup:

Share this post


Link to post
Share on other sites
 
AMC RULES

You went with white on the wheels? :eusa-think:

Share this post


Link to post
Share on other sites
 
Fun Engineer

Craig

Yes, not too happy with it either. I normally use rattle can Krylon Ivory but decided since I was using an automotive urethane on everything else I'd take a stab at using a urethane automotive listed in the painting section. I should have done more reserch. It is more like the International Harvester white. So when the weather warms up I'll go down to the paint store and have them mix the right color. I PM'd the moderator about labeling the paint code better but no response.

Share this post


Link to post
Share on other sites
 
Fun Engineer

Here are some updated pictures. Slow but sure.

IMGP4359.jpg

IMGP4364.jpg

IMGP4361.jpg

IMGP4362.jpg

IMGP4365.jpg

Here's my new problem/project. The keyway is worn on the axle as was the hub. I have a spare transmission that I'm using for parts. Without the transmission, assembly is at a standstill.

IMGP4355.jpgIMGP4354.jpg

Share this post


Link to post
Share on other sites
 
speedyleedy

Look's great keep up the good work ! :)

Share this post


Link to post
Share on other sites
 
Jake Kuhn

Looks great :handgestures-thumbup: Love the look of the commandos,Jake

Share this post


Link to post
Share on other sites
 
Wheel-N-It

Great restoration project. I know working on it brings back alot of good memories for you.

Share this post


Link to post
Share on other sites
 
stevebo

This is when it really gets fun and you feel good about all the hard work you did. Any chance you bringing it to the show this year?

Share this post


Link to post
Share on other sites
 
Fun Engineer

Thanks everyone for the nice comments. Yes I hope to have it done in time for the show. I'm waiting for my decals from Terry.

Share this post


Link to post
Share on other sites
 
AMC RULES

Gorgeous work so far. :handgestures-thumbup:

Share this post


Link to post
Share on other sites
 
Fun Engineer

Its been awhile so here's an update. (sorry, no pictures) Just to be on the safe side, I split the transmission case to check out the gears and replace worn seals and bearings Well when I get the case open I find the inside of one of the axle housings rusted. Same for a section of one axle and another part of the case. I also found some gears that looked like they had not been treated very well over the past 44 years. One axle keyway is shot so I gave it to a friend that cut a new keyway on the opposite side of the axle. Good thing I bought a spare Commando as a parts tractor if I needed it. To bad both of it's axles are bad.

So now I needed to open the spare transmission to see if there are any good gears I can swap out knowing that at the very least I'm going to have to derust the inside of the case to my original tractor. So I start with the hitch pin. Isn't that were we all start. Now I've been using PB Blaser on this thing for the last 2 months. Long story short I resorted to cutting the pin after it wouldn't come loose from the hitch. What was left of the pin slid right out.

While I'm working on the the pin I stand the transmission on it's side to work on it and a river of water flows out the axle seal. I'm thinking this thing is going to be shot and I'll have to junk it. Well after spliting it apart I find absolutely no rust and gears that are in great condition. So now I've got at least one good case and one great set of gears. I'll spend the next night or two cleaning the two good halves and getting the old bearings out. Hopefully I can install the new bearings and seals in two weeks when I'm back to the house. Once the transmission is done I can resume putting things back together. I sure hope I can get this done before June.

Share this post


Link to post
Share on other sites
 
kpinnc

Well, you're being very thorough on the job at hand. Looks like you'll have a NEW Commando when you're finished.

The first time you drive it afterward will make all the work you've done seem worth it. Plus you have a family history with this machine? You just can't beat that!

Share this post


Link to post
Share on other sites
 
AMC RULES

I can't wait to see it, I know it's gonna be awesome. :icecream:

Share this post


Link to post
Share on other sites
 
wh414

That is Beautiful paint work!

Share this post


Link to post
Share on other sites
 

Create an account or sign in to comment

You need to be a member in order to leave a comment

Create an account

Sign up for a new account in our community. It's easy!

Register a new account

Sign in

Already have an account? Sign in here.

Sign In Now
Sign in to follow this  

×
×
  • Create New...