whlpny 203 #1 Posted June 8, 2011 Mid winter I acquired a D-200 with loader and Backhoe from Ken. With the snow we had and since spring came I have used it even more than what I thought I would on projects around here. I absolutely love the Hoe and now would be lost without it. I haven't been overly fond of the tractor itself as without powersteering it is a bear to manuever. What kept going through my mind was how nice it would be to have that set-up on a new XI series. BUT- I sold my LXI when I recieved Kens tractor. I pursued a Craigslist 520xi and my initial thought was to possibly do a conversion- BUT after mowing with the Xi - I realized right away that I wanted to keep it as my new lawnmower. Last week an oportunity presented itself for me to get back into a C-195 for a very reasonable price. I did the transaction for the tractor with the thoughts that the Backhoe should be a fairly easy swap. The rear mounts are all interchangeable. My issue will be up at the front Hoe/loader subframe mount. It looks to be an easy revamp. The other issue that needed to be addressed was the No-PS. I recieved a call from Kelly several weeks back and we discussed some options on PS set-ups. I like how he built his new set-up on his diesel project. My thoughts kept working back to how can I do a PS conversion and keep it close to a factory appearance as my mind would percieve it. Now note- this has nothing to do with Kellys version- his has been designed to be a user the way he sees fit and I like it.My idea was to be able to keep the mid-lift , factory front axle, with the possiblities of someday it could have a deck or mid attachment added if I ever take off the loader/hoe. Where i went with this was a weekend PS conversion that I never left the garage to buy a single item for. The donor PS components came from a 318 JD chassis which was to be an upcoming articulated 4x4 build- oh well! I pulled off the valve, slave cyl,vien lines and all fittings from the lift valve . Next is a pic of the C-195 onto the lift preparing for the operation. First job was build a new tierod that would clear the front axle pivot pin. Acouple bends were added until proper clearance was achieved between it and also the mule/mower drive tensioner pulley/bracket. The tierod ends were new on the 195 and the heavier ones so I decided to use them and stay with the zero cost factor. If they become an issue-I will replace them with some tough stuff from work . Next is the pic of the slave cyl mounting brackets-first on the tierod end On the fixed end I decided to use the pulley tensioner mount and add some gusseting. Once this was done, The JD slave cyl needed to be shortened up. Each end was cut and the eyelets rewelded to make it short as possible. I would have converted a stock WH hyd lift cyl- but was unsure if it could handle the stress of the loader on a full weight turn. The 318 cyl is a beefy unit and should be fine. Another view of tierod and gusseted bracket. Now we move onto mounting the slave cyl. With the front end work all done its time to modify the steering column/dashstand/steering valve . First was to hack out a portion of the valve mounting bracket from the deere-seen here bolted back onto the valve. Next upon looking at the dash stand/battery tray- the hole was actually the same size as the JD column- so out comes the sawsall to make a slide-in fit. Along through the process I removed the old steering. Also note the hackjob on the steering shaft! Next is chopping the JD column down to size Then the end bushing was crimped back into place and a connector tube was cut to join the two shafts. Next is the final cut on the steering shaft Next is a set of column mount supports.- Remember the issue here is being able to get into the lines- being able to pull the valve for service, and clearance for the midlift rockshaft- its all tight man!!! Here is the brakcet all welded in with frame mounts- yeah I didn't clean the paint off and got nasty lookin welds- I was in a rush! Finish cut/mating of shaft Coupler drilled and pinned Abottom view of valve in place So here we go onto the plumbing! Heres what the valve looks like from bottom- all labeled for us. Sorry- heres another view of the valve mounting plate welded in Now plumbing 101! Heres where we start- remove the Main line from the pump to the lift valve and install a #6 jic adapter Then remove line from the hyd valve and do the same on that end Now note- heres where it got a little ugglier- Some of these line bends aren't beautiful- but remeber the goal- zeroe purchases!! Charge line to steering valve Return to lift valve Second photo of same Sorry I need to be clearer here I think: You run from the charge pump to the Input on the steer valve. Then from The Aux port on the steer valve to the Hyd lift inlet. The left and right ports on steer valve to the slave cyl on tierod. And lastly the Out port on steer valve back to the return line to oil filter. I will also be adding a cooler in here but am waitng to make sure it will fit in between the loader girdle and the flywheel screen so I skipped around it. It will be placed from the Out port and tied back to the oil filter. The out port of the original hyd lift valve will also "T" into it. Heres the left right lines to the slave cyl The return line to the filter pic 1 Return line to filter pic 2 All buttoned up- optical illusion- the lines DO NOT touch the kick panel- no fear of getting cut its just the poor picture taking ability on my part! Remember I said it was tight- heres all the lines installed onto valve. I don't find my pic of the rockshaft clearance, but it misses the steer valve by about 1/8 in at full lift. A rest in the shade after a good hour test drive Happy day- not a single leak in the system and it works great!!! Now we move on to phase 2 here in the next few weeks- Loader /Hoe adaption!!! 1 Share this post Link to post Share on other sites
Cody 285 #2 Posted June 8, 2011 What a cool build, Im looking forward to seeing more progress. Will be one sweet tractor :hide: Share this post Link to post Share on other sites
corn53 4 #3 Posted June 8, 2011 Wow my brother will be amazed as hes looking to do one himself.. That is nice work!!! :hide: Share this post Link to post Share on other sites
Gene_S 93 #4 Posted June 8, 2011 Bob- That is/was one of the best step by step builds I've read in a long time... You do fantastic work... I think we need to contact the Discovery Channel and start a tv show... Keep the great pictures coming... :WRS: Share this post Link to post Share on other sites
Kelly 1,038 #5 Posted June 8, 2011 Yup it looks good Bob, wish I had time to work on mine, I can't believe you stuffed it in there and didn't tear the tractor apart. Share this post Link to post Share on other sites
smoreau 658 #6 Posted June 8, 2011 Very Nice! Well thought out and applied to the tractor! You should be very proud of your self for making this work. My hats of to you on this one!! and I cant wait to see it finished. great fab work! :hide: Share this post Link to post Share on other sites
buckrancher 2,696 #7 Posted June 8, 2011 this is cool your doing a great job :hide: Share this post Link to post Share on other sites
Operator 7 #8 Posted June 10, 2011 Excellent work as usual Bob! I'm going to try thrust bearings on my spindles to ease my steering on my C-195. Share this post Link to post Share on other sites
coldone 35 #9 Posted June 10, 2011 Thanks for the tutorial. Its the best post I have seen about adding PS. I want to do this to two of my GTs and I have not found a good source that explained the ports and plumbing. Now I have. Share this post Link to post Share on other sites
whlpny 203 #10 Posted June 11, 2011 Thanks guys- Its hard for me to stop and take pics while I'm hard at a project. I am working on mounting the Loader and Hoe this weekend and making good progress- pretty uneventful actually. Wife has some projects for the 4th week of June so I guess it needs to get done sooner than I thought! Share this post Link to post Share on other sites
mavfreak 11 #11 Posted June 11, 2011 Thanks guys- Its hard for me to stop and take pics while I'm hard at a project. I am working on mounting the Loader and Hoe this weekend and making good progress- pretty uneventful actually. Wife has some projects for the 4th week of June so I guess it needs to get done sooner than I thought! I do that all the time once I start something and get it finished I stand back and think crap i should have taken some pics! Great build you have started! Share this post Link to post Share on other sites
312Hydro 474 #12 Posted June 12, 2011 I was wondering how PS could be added until I saw yours and Kelly's builds. I didn't know other tractors already had it(JD).I really like both approaches to the problem. Hats off to both of you! I REALLY like those articulated .Keep 'em coming! :hide: Share this post Link to post Share on other sites
whlpny 203 #13 Posted June 16, 2011 Heres the latest update on the project. The D-200 was moved into position to remove the loader and the Hoe. Its surprizing how much area one needs to pull an operation of this size off. Glad I had the space inside to keep it undercover. What was really helpful was the Hoes ability to stand alone Robert got to turn the first bolt in the job Heres what the subframe to trans area looks like on the D-200 Loader off to one end of barn then tractor backed to opposite end for hoe removal. Once the D-200 was out of the way, The C-195 was moved into position over the hoe subframe. Heres the stock D-200 Loader subframe- it wasn't too hard to make the swap. I slid the subframe forwards about 6 in and added a 3/4 bar through the front mounting tabs to make a mid-hitch mount. Then I redrilled the the loader mount 6in rearward to put it back into position. At the rear I added a couple new tabs to bolt into the 3 point mounts. Moving everything forward made for easy hooking to the tachmatic and also allowed me to keep the trans filter in is original location. Heres the altered subframe Share this post Link to post Share on other sites
whlpny 203 #14 Posted June 16, 2011 Heres the new rear tab of the loader subframe in postion with the hoe subframe in position. The hoe frame on the C-195 axle Hoe in position Front Hoe frame mount onto loader subframe Loader slid back onto subframe. Next phase was to get the hyd pump mounted. The idea was to add an extra pulley to the rear trans pump drive then belt back to the Hoe pump. I used a WH front mule drive idler pulley and cut the bearing out. The center was an exact overfit for the center hub on the trans pulley. I welded the two pulleys together The pulleys were reinstalled and the cooling fan shimmed out for belt clearance.Next is to make a pump mount. I hated to do it- but I had to cut the rear upright for belt clearance. Heres a shot of the bracket readyto weld Next I had to make a pocket for belt clearance- and also welded in the adjuster bracket Share this post Link to post Share on other sites
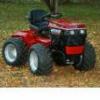
whlpny 203 #15 Posted June 16, 2011 Heres the adjuster bracket A view from the rear A working pump! Now onto the front pump for the loader. What I would have liked to done was run one Dual pump- but I couldn't see forking out $200 for one when I had everything I needed to do the job by running the two original pumps. Kinda messy yet it works and there was no added expense to the conversion. Next what you see is a front pump mount aded to the frame crossbar where the loader girdles are attached. And thats it- everything is installed and working. The power steering with the loader is a dream! I added some industrial skidsteer tires to the rear, and am waiting for my Firestone tri-ribs to show up for the front. The only other thing I need to do is build a seat mount for the operation of the Hoe. A swivel seat isn't going to be possible with the fender depth on the 195's plastic fenders. I will add a flip back seat to cover that issue. Heres a couple finished shots of the tractor. 1 Share this post Link to post Share on other sites
Nick 13 #16 Posted June 16, 2011 Very nice work as always and the Super C looks more than impressive. :hide: Share this post Link to post Share on other sites
SgtBob 27 #17 Posted June 16, 2011 :hide: WOW !!! Your talents never cease to amaze me. Share this post Link to post Share on other sites
c175inMA 8 #18 Posted June 17, 2011 WOW that thing is awesome!!!! What was the hoe originally from?? Share this post Link to post Share on other sites
massey 119 #19 Posted June 17, 2011 Very nice fabricating skills there Bob. Looks great. Ed Share this post Link to post Share on other sites
whlpny 203 #20 Posted June 18, 2011 Thanks again guys! I am really happy with the way it looks- It seems to "Fit " the tractor well. Got the Firestone Tri-ribs today- can't wait to get them on the tractor. Paul- the loader and hoe are OE from a D-200 Share this post Link to post Share on other sites
jusjeepn 59 #21 Posted June 18, 2011 That's some transformation Bob! It doesn't even look like the tractor that sat in my barn half the winter...........OH!....it's not...... Pretty sweet! I was expecting an articulated C195..... :hide: Share this post Link to post Share on other sites
Brrly1 1,146 #22 Posted June 18, 2011 That,s what I am waiting for to Pat. Kind of a Twister style loader. If anybody can, I have to believe it would be Bob! Maybe a new nickname like Dr. Fab sounds good. Share this post Link to post Share on other sites
whlpny 203 #23 Posted June 19, 2011 Thanks Pat. Yeah not quite the same - just bits and pieces and the one you had is scattered all over my barn right now! Got some swapping of pcs to do so it can make the trip to the Portland summer show/swap market. Well I will say that since the beginning of building the 4x4's I have wanted one done as a Blackhood. I couldn't find one when I built the D-200, the Blackhood was my first choice but I settled for what I could find. Right now I have lotsa extra Blackhood pcs around so one never knows what may start growing here I have been visiting the Twister info spots John - the gears are turning :WRS: Share this post Link to post Share on other sites
Stigian 1,235 #24 Posted June 19, 2011 Great work as always Bob :hide: Share this post Link to post Share on other sites
Nick 13 #25 Posted June 19, 2011 Bob you might have seen them already but Steiner and Ventrac have loaders that might give you some ideas. I always thought the slip scoops they build looked like a good compromise between a blade and loader. Their sites have some pictures and videos of them in operation. Steiner loader. http://www.steinerturf.com/attachments.asp?c=1&p=2 Steiner slip scoop. http://www.steinerturf.com/attachments.asp?c=All&p=6 Ventrac loader. http://ventrac.com/products/attachments/KH500/ Ventrac slip scoop. http://ventrac.com/products/attachments/HE/ Share this post Link to post Share on other sites