ebinmaine 63,533 #126 Posted December 2, 2023 18 minutes ago, lynnmor said: I believe that those wires are laying there just waiting for tail lights or a seat switch. 17 minutes ago, cleat said: That is for the tail lights and will be secured better when the fender is installed. I figured there was something I wasn't aware of there. I noticed the sleeve a bit further down. Share this post Link to post Share on other sites
Pullstart 60,185 #127 Posted December 2, 2023 We gonna see a test run today @cleat? That thing is looking so dang good! @Bow_Extreme have you been following this? I know you like your 520 projects… 2 Share this post Link to post Share on other sites
peter lena 8,133 #128 Posted December 2, 2023 @cleat usual terrific work ! changed out that clutch idler pulley on my units , with same size pulley but bigger re greased bearing , also bronze bushed to original 3/8 bolt size . went from a chronic , noisy failure to bombproof . also like a black tye wrap on shifter shaft , above inner greased boot , stops wear , stays in place . my units are clean , but not showroom like yours . Pete Share this post Link to post Share on other sites
cleat 5,059 #129 Posted December 4, 2023 (edited) Removed TORO center cap from steering wheel and gave the steering wheel a quick cleaning. New horse head logo steering wheel center cap from Wheel Horse Parts and More. Center cap installed using clear silicone. Edited December 4, 2023 by cleat 3 1 Share this post Link to post Share on other sites
Bow_Extreme 538 #130 Posted December 5, 2023 On 12/2/2023 at 8:54 AM, Pullstart said: We gonna see a test run today @cleat? That thing is looking so dang good! @Bow_Extreme have you been following this? I know you like your 520 projects… I suppose I have some reading to do. Thank You, for the mention. 1 Share this post Link to post Share on other sites
Bow_Extreme 538 #131 Posted December 5, 2023 Very nice build! Well done! Interestingly enough, the emblem on the center cap of the steering wheel is one of the items I’m working on printing. Although, it will be a 3D profiled emblem. Also working on the 3D caps for the Onan flywheel screen. Keep up the fantastic work! I look forward to seeing a finished tractor! 2 Share this post Link to post Share on other sites
Pullstart 60,185 #132 Posted December 5, 2023 Bah Humbug! 3 Share this post Link to post Share on other sites
jonw440 186 #133 Posted December 5, 2023 (edited) Thats a great idea attaching the steering wheel cap on with silicone. (I need to attach mine). But how are you going to attach the wheel to the tractor? Edited December 5, 2023 by jonw440 Share this post Link to post Share on other sites
cleat 5,059 #134 Posted December 5, 2023 1 hour ago, jonw440 said: Thats a great idea attaching the steering wheel cap on with silicone. (I need to attach mine). But how are you going to attach the wheel to the tractor? Steering wheel mounts with a spring pin through a hole near the bottom 2 Share this post Link to post Share on other sites
cleat 5,059 #135 Posted December 5, 2023 Horse head center cap installed and silicone has now set. Bottom of steering wheel has been cleaned up as well. Closeup of mounting area. Steering wheel will not get installed just yet as I want to be sure the dash does not need to come apart for any reason first. 2 Share this post Link to post Share on other sites
Handy Don 10,757 #136 Posted December 5, 2023 1 hour ago, cleat said: Steering wheel will not get installed just yet as I want to be sure the dash does not need to come apart for any reason first. Yeah, don’t you hate taking apart things you just finished putting together?! 😁 1 1 Share this post Link to post Share on other sites
cleat 5,059 #137 Posted December 5, 2023 42 minutes ago, Handy Don said: Yeah, don’t you hate taking apart things you just finished putting together?! 😁 Especially the steering wheel just because of the hammering required to install and remove the pin. I figure the gauges likely don't need any more shock in their life. Share this post Link to post Share on other sites
cleat 5,059 #138 Posted December 5, 2023 Steering wheel polished and ready to install. Share this post Link to post Share on other sites
davem1111 1,943 #139 Posted December 5, 2023 8 hours ago, Pullstart said: Bah Humbug! Yeah, I saw that too - love it! Build is looking great, cleat! 1 Share this post Link to post Share on other sites
cleat 5,059 #140 Posted December 6, 2023 Brother in law bought me this bottle of beer for Christmas several years ago. Beer wasn't that great but the bottle is funny so I kept it. Somehow I have not broke it in the shop. 2 Share this post Link to post Share on other sites
cleat 5,059 #141 Posted December 7, 2023 Got 2 sets of LED tail lights set up for the Wheel Horses Proper bullet connectors on the + wire and a ring connector to fit the #10 mounting screw for grounding the - wire. 3 Share this post Link to post Share on other sites
Handy Don 10,757 #142 Posted December 7, 2023 32 minutes ago, cleat said: Proper bullet connectors on the + wire and a ring connector to fit the #10 mounting screw for grounding the - wire. I'm not one to trust “frame grounds” so I took advantage of the 520’s fuel sender having a wired ground and added more connectors to it for the tail lights. 2 Share this post Link to post Share on other sites
cleat 5,059 #143 Posted December 7, 2023 None of my wheel horses have had an issue with the tail lights grounding in the rear fender. Likely because the rear fender has several ground points. With these lights being LED I would think they would function with almost any grounding at all due to the low current. 2 Share this post Link to post Share on other sites
cleat 5,059 #144 Posted December 9, 2023 (edited) Finally it lives. Started and ran engine to verify all gauges work (they do), and for proper operation of clutch and PTO safety switches. Installed PTO assembly. PTO clevis pin installed. PTO clevis pin removed and swing away clevis in open position. Shift and hood stand plates painted. Steering wheel fully installed. Overview as per today. Edited December 9, 2023 by cleat 1 5 1 Share this post Link to post Share on other sites
cleat 5,059 #145 Posted December 9, 2023 Hood stripped of all accessories and decals ready to go to my painter. 3 Share this post Link to post Share on other sites
ebinmaine 63,533 #146 Posted December 9, 2023 11 minutes ago, cleat said: ready to go to my painter. You'll have a pro painter apply an automotive grade? 1 Share this post Link to post Share on other sites
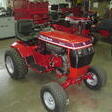
cleat 5,059 #147 Posted December 9, 2023 Sort of, my neighbor does them. He did my Ford Sierra. And also the first 3 520's in this picture he painted the hoods and fenders. He also painted the hood and fender for my 312H I buy the implement paint, thinner, and hardener at Peavey mart (our local tractor parts location) and he preps and sprays them for me. 1 6 Share this post Link to post Share on other sites
cleat 5,059 #148 Posted December 19, 2023 Installed two decals on the hood stand plate and loosely installed (screws are not tight to allow paint more time to cure). Loosely installed the shift plate with a printed out laminated shift pattern until the decals get ordered. Overview of tractor as of today and likely the last update until the hood and fender get painted sometime this winter. 1 6 Share this post Link to post Share on other sites
HorseFixer 2,012 #149 Posted December 19, 2023 On 11/10/2023 at 9:48 AM, cleat said: Here is the steering unit assembled Lower steering shaft set into position. Steering unit bolted to frame. Lower steering shaft bolted to steering unit for trial fit. Had to unbolt it and file lower block where it mounts to the steering support block several times until I got to near zero gear lash ( needs a bit in the middle or it binds at the full turn positions). Tie rods installed. Tractor as it sits today. You need to deliver that to NILES, MICHIGAN 49120 I Will put it to work with the Ultimate Snow Chucker!mm 2 2 Share this post Link to post Share on other sites
cleat 5,059 #150 Posted December 20, 2023 Snow chucker looks great. How well do the rib tires work in the snow ? 1 Share this post Link to post Share on other sites