
Leaderboard


Popular Content
Showing content with the highest reputation on 08/01/2026 in all areas
-
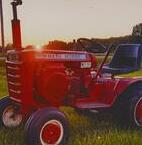
11 pointsI was on you tube a few weeks ago, and I found this page that had a case dealership in Connecticut I believe.. He had this new tool that I’ve never heard about how to safely clean the top end of the engine and the head. It’s nylon attached to steel that you can put in your drill or whatever. You spray it down with like fantastic or some kind of household cleaner, but let it sit for about 10 minutes. These nylon attachments made the whole head and top of the engine clean within a 10 minutes. I was truly impressed on that. The other bonus it doesn’t leave any scratches or gouging of the material which according to this video it’s the first place where carbon will build up. So here’s a couple pics before and after this was about 10 minutes worth of work. The orange is course this kit came with two others gray, which is a medium grit and I believe the blue is a fine grit. I’m sold on this so far much easier. I used to use steel but at left a lot of scratches.
-
4 pointsWhy can’t our tractor hobbies have schedules like these remodel jobs So my middle son and family went to his in-laws in New Jersey. They stay at the family beach house 2 blocks from the “shore”. In Texas we call it beach, but north it’s the shore. He rents this house from me that I added on to\remodeled 5 years ago. At the time I didn’t replace the cultured marble shower in the original bathroom, but added a new master bath. So the day after they leave my wife says NOW sure would be a good time to replace that shower with a tub for the grandkids. As some of you know when grandma says it’s for the grandkids kids there is NO negotiating. I knew getting a 60” long tub in a 60” wide room was going to be fun. So here’s the old to be removed. the shower pan came up and slid over the old drain pipe Chiseling the concrete out of that original box out was a 1/2 day job, but I was done for the day. No pictures but the original drain needed to move 1” right and roughly 5” forward. It was a pain to get perfect for the new tub to fit. Pex B and valves roughed in Hardied Backer installed ready for Redcote to seal it and seams. I love the new style tile spacers that level the face of the tile. I need a 1/2” by 2 chrome nipple for a hand shower and final cleaning.
-
4 pointsThank you! I didn’t realize this thread existed. I may have just gotten lucky. Looking at a 1991 312-8 tomorrow with a deck and 500 hours for $750. Won’t need a trailer since it’s closer and there’s no snow thrower. Wish me luck!
-
4 pointsSounds like lots of room! I’m pulling for ya!
-
3 pointsI had one. Mine was a 2013 Passat TDI. In the 85000 miles I had the car I averaged an honest 44 mpg. Because I am a weirdo, I keep a spreadsheet on my cars to track costs and maintenance, so this isn’t an approximation. On a long interstate trip, the car would get better than 50 mpg. It had an 18 gallon tank so had a range of 900 miles. I drove it from St Louis to Charlotte, NC on one tank. On another trip it went from STL to northern MN before filling. The car was a bladder buster. it was a largish car but only 140 hp which explains the great fuel economy. But it never felt underpowered. It had a lot of low RPM grunt so got off the line quick which made it feel a lot faster than it really was, but the acceleration really dropped off once the car hit 25 mph. Again, only 140 hp… VW got caught with wildly excessive tailpipe emissions by some researchers at the University of West Virginia who were comparing diesel autos for mpg and emissions. The VW results were so off the charts bad that they assumed their gross data had to be in error so they re-tested and got the same result. Assuming it was a fluke they got another TDI and tested it. Same results. uh oh. They reported to VW who ignored them and blamed their test methods. Others took note and started checking too and all found that VW diesels were clean when tested at the stationary test stations, but incredibly dirty when tested while on the road. Eventually the California Air Resources Board pressed VW on it and were also ignored. Federal EPA too. VW continued to break the emission laws for multiple years despite regulatory scrutiny. Eventually they finally agreed that something was amiss after the EPA notified them they couldn’t sell ANY cars - gas or diesel - in the US if they didn’t cooperate. Talk about motivation. The issue was that VW programmed the car to only operate the exhaust catalyst system when the car was on a treadmill being tested. Steering wheel inputs were used to deduce the car was actually being driven on the road and the emissions system was then shut down. In hindsight, that’s why that little tank of urea in the trunk rarely needed a refill. the net result was VW had to deal with the 385000 (in the US alone) law breaking gross polluters on the road. They applied two software flashes and gave owners some money as bandaids but still were thumbing nose at EPA. Eventually after their initial fixes were little more than window dressing they were forced to offer buybacks or cash payments and real fixes to owners who wanted to keep the car. I don’t remember the warranty terms, but I’m pretty sure the emissions system warranty were actually lengthened for those who kept them. At the time though, VW didn’t have a fix, didn’t know if they would have a fix, and nobody was telling what the trade offs would be. My assumption - given what I know about the complexity of a catalytic cleanup system - was that VW probably knew the chemistry set in the tailpipe was a reliability disaster so they elected to shut it down whenever the car was driving. I didn’t want to deal with that. I sold mine back to them. I seem to remember them not giving back the full purchase price but I think it was pretty close overall when factoring in the payment for the car, the two small payments that came with the intermediate (failed) software flashes, and the payment from Robert Bosch (software company who programmed the cheat in the ECU). In four years and 85000 miles the car cost me just the cost of fuel, insurance, a set of tires, and maintenance. Turned out to be a great deal overall financially, but infuriating when thinking about 85000 miles worth of emissions times 385000 other cars on the road. and there were fines. I think it totaled around $3 billion. Much of the fines were distributed through all 50 states and designated for emissions reductions. School systems upgrades busses, states used it for remediation, etc. VW also had to fund the Electrify America EV charging network. Exacerbating things, the software used to cheat also was applied in other manufacturers’ products across all of Europe and North America. Daimler Benz and Chrysler to name two. They complied much more readily when discovered and at least have plausible deniability. I’ll never purchase another product from VW. I didn’t buy that car to make a statement or be an environmentalist, but I did buy it expecting that it meet specifications or at least made a good faith effort to meet them. It didn’t because they made the decision to be criminals, likely in the name of durability or drivability. None of what they did was subject to interpretation or judgement, it was clearly wrong. I was sad to see my car go. I’m doubly mad that in one deliberate action VW doomed the future for light diesel vehicles in the western world. Diesel emissions are dirty, no doubt, but treatable. The take rate for diesel autos in the US was already low and VW killed the golden goose. On the upside, with diesel currently running $5/gallon and RUG at $4, the break even gas mpg compared to my 44mpg TDi is 36 mpg. That’s somewhat attainable in a similar sedan, so the advantage of diesel has pretty much evaporated. anyway, here endeth the sermon. Steve
-
3 pointsA 5X9 U-Haul trailer with ramp is about $30/ day.
-
3 pointsTractor will fit in the bed without issue--it’s a bit over 5’ long and, depending on tires, about 36” wide (getting it up and in might be a trick). Deck probably cannot stay on since it won’t fit between the wheel wells (48” is the cutting width) I’d consider mounting the blower and loading the tractor with the blower over the open tailgate and then loading the mower alongside the tractor. That mower weighs a lot and getting it into and out of the cab without damage to the cab or seats would be tricky. Suitable padding and plenty of strong tiedowns, of course. And if needed, make two trips?
-
2 pointsRetired today - 41 years... Great run. My boss and colleagues know me well... simple but appropriate gifts...
-
2 pointsThats what I'm doing. Watertight heat shrink connectors for each individual wire.
-
2 pointsAlready working hard! I did a second story water heater install yesterday, and we are heading to a car show today!
-
2 pointsIf this one looks as good as the 314=8, this is a much better deal. The 312-8 can spin a 42 or 48 inch deck easily. And snow plows and single stage blowers are available often for $200. The plow or single stage blower will be much easier to install and store than the two stage. I have had several single stage and two stage blowers and have sold all of them. I find the plows are much more useful for removing the small wet snows we normally get here in Pa.
-
2 pointsD you have a link to the video or the product?
-
2 pointsWorked on the wife's Dodge Dart. Installed new headlight connectors and bulbs, and changed out the oil and oil filter.
-
2 pointsI’ve thought of using threaded rod cut to the proper length and then put a nut on either side of the square hole in rim, tightening up to make like a stud. Then sliding the weight on the rod, and tightening a nut on it. Maybe some 1/2” acorn nuts? That would look pretty cool!
-
2 pointsCongrats. Jim and Mike. Best wishes for health and happiness. Enjoy every day, you earned it.
-
2 pointsCan you meet me in Nj and load this for me!? 😂
-
2 pointsOne of my conditions for home renovation tasks is that I no longer do demolition. I hire and direct. Too much bodily wear and tear.
-
2 pointsDarn those bobcats taking selfies! 🤣
-
2 pointsFrame unbolted from the rear end. Lots of small parts have been bead blasted and painted. I have not got to big parts yet (actually still need to finish the hood from the 416 project I mostly completed last winter), Need the weather to co-operate and not rain or be at 1000% humidity. Also the bugs are very bad right now and would undoubtedly be stuck in the paint.
-
1 pointI was traveling by car a lot during the 90's. I used to listen to Rush while I drove. Early in his career, it seemed that he would engage and discuss with his call in listeners more so than later in his career where it seemed he spent more time preaching on his views than discussing them. I enjoyed the early Rush much more than the later Rush......
-
1 pointGotta say, retirement is the best job I have ever had. As many of you are aware we get to do nothing and if it isn't finished we pick tomorrow right were we left off.
-
1 pointSeems that nowadays few enough people use wallpaper that the tool supplies are limited. I found that a 24" windowsill planter box is readily available from home depot for about $14 delivered. Some planter boxes have drain holes so I'll line it with shop cleaning cloths. When it arrives I'll set it on 2 or 3 long pegboard pegs.
-
1 pointLooks like this gives excellent results. Remember to hand plane the cylinder head for flatness too.
-
1 pointHappy Birthday @JimmyJam, we are all glad you were born.
-
1 pointJust like UFOs. They never existed until people put up pictures of what they might look like down in Roswell, NM. Next thing you know the tourist crowd from outer space shows up to see the photos and then we are overrun with UFOs. Sounds like if Connecticut hadn't posted those pictures the bobcats would have stayed away.
-
1 point@953 nut , my last years , were split between my actual home shop and the powerhouse , maintenance staff , adapted to anything , needed , what a concept ! most dreaded work area / zone ? FAN LEVEL , ANYTHING ? entire unit was vertically drawn thru s/s floor gratings , foundation to open top discharge , initial walk in impact , 4 floor heat pull, 140 degrees ! had to lay out / plan every related , move / step . before going for breathing / cooling air . did my time , pete
-
1 pointI have 25 years to go, and I think about it every day.
-
1 pointI can tell you exactly where I was when I tuned him in for the first time in 1988. 33 years later, I was sitting in my car waiting for my second Covid shot, not 1/2 mile from where I was in 1988, when his wife announced his death in 2021.
-
1 pointOnly thing I would change from Don's suggestion would be to take along some ramps, place the deck at the front of the truck bed standing up against the front of the bed and then back the 314 up the ramps with the blower mounted. The rear tires of the tractor will secure the deck in place and you won't have to man-handle it over the side of the truck bed. If it has been dry enough to do so the rear wheels of the truck could be backed into the swail along the road (if one exists) to place the tailgate a bit lower. There will be a bit of extra weight at the rear of the truck so be prepared for poor handling and slow down for the return trip.
-
1 pointVery nice so far Jim. Keep going.
-
1 pointRichard: Thanks you for this info. This will come in handy.
-
1 pointyep. SS in the jungle for under $1 each. Threaded rod with any slack pulled into the back side would work fine IMO but I do like the way carriage bolts sit in the rims.
-
1 pointI just picked up 9" carriage bolts today $3.18 each, plus nuts and washers (almost $40 out the door). Threaded rod is a relatively cheap product to trial and get the correct measurements so you only do that once.
-
1 pointThat 9 pin doesn't look to healthy.
-
1 pointI used one of the above vendors to get a replacement bowl (and since acquired a spare on the shelf) Cut my own bowl gasket. For me, the sediment bowl and screen did not get the finest debris so some still got through and clog the carb jet. Added a second filter like @Achto and all is good. The packing surrounds the outlet needle valve’s shaft. Tighten that nut as noted above until the fuel is no longer seeping out when the engine is not running. On mine, the seep was undetectable visually, but I could smell fuel.
-
1 pointAh, another @cleat special. Looking forward to seeing the build thread.
-
1 pointMy 520-H has had a slow engine leak, I though it was buring a little oil. I would have to add a little each time I used it. Notice oil on the deck when I finished mowing. Check the oil down to add, so may not be using any oil. Clean it up and put it away. Day or so later notice oil on the deck and a large puddle on the floor. Got the covers off, need to finish clean it up and add more oil st see where it comming from.
-
1 pointI have 1. 1969 GT-14 Hydro 1. 1977 C-120 manual 1 1958 David Bradley Never non e gas however the C120 now runs choked. I have a carb kit and a drawer full of wh parts Gt-14 runs but needs carb adjustment. I cannot seem to get it just so. Tank has been e welded. still cracked. I did put a 45 and a grommet tank. David Bradley has been sitting under cover however outside for the first time (April) Need to reestablish spark. likely corroded coil/magneto ? old tires but tubed and fluid filled. Life is happening and I am closing my chapter in this hobby for the time.
-
1 pointCongrats to both of you! any big plans Jim @SylvanLakeWH or Mike @squonk ? I’m creeping up on mine. Hard to think I’m getting old enough that it’s even on the radar. Two years ago I felt like I’d never want to retire as I enjoy working way too much. But about that time my company went to a four day workweek and now the taste of freedom beckons. I still put in a ton of hours every week but condensing it into four really long days feels great when the three day weekend comes. CONGRATS Steve
-
1 pointCongratulations!!! More time for family and Wheelhorse's!
-
1 pointCongratulations. I retired 3 years ago. I was a commercial hvac service tech for over 40 years. Don't miss the work, just the income.
-
1 pointThe key is to stay busy & have a sense of purpose in your life... Besides, you can only watch so many episodes of Gilligan's Island in one sitting.....
-
1 pointHA! Today was my last day too. Brought the last of my tools home. Took a gauge off our defunct steam fired Absorption chiller as a souvenir. We had a fire in 2015 and when we went to put the chiller on line the water in the pipes flashed to steam and the needle spun around in circles like in the cartoons. Got well wishes from a Trane Tech who happens to be a Bears fan!
-
1 pointUrban planner. Worked both as a consultant and for several municipalities...
-
1 pointNo lack of tie downs! I need to finish the PVC trim. Then clean it up inside!
-
1 pointTonight I finished up the C-141 headlight project. Sometimes it pays to have different hobbies as I had a bunch of 1/4 20 bolts to mount the bucket back in after a spruce up with some semi reflective silver paint. This was a test to see if everything was hooked up right. I scuffed up,where the bulbs mounted to give them a good ground. It still needed tweaking. . The final product. I put some of the fuzzy side of some stick on Velcro to act as a cushion. Now, the paint I spent a significant amount of time on shouldn't get rubbed off the lens. Don’t mind the stuff in the background 😁 This is the paint I used. It’s reflective but not overkill. The overall end result was definitely an improvement.
-
1 point@WHX?? Jim from a thread you posted about ridiculous shipping costs but this is for everyone else too . I came across an envelope in the barn and tI’m 98.641% sure that I made an order from them for flanged bronze bushing . If this is the place . I called the number , talked to someone who knew what I was wanting and I understood what he was saying for one . Two , they were cheap. Three , he just threw the four brushing into a snail mail envelope for whatever the actual cost was . I just asked nicely if he would put them into a small envelope and send them through snail mail for me . No Bs outrageous price for shipping . They have way more than just bearings too . Try them out on your next purchase and let everyone else know if they still do this . I don’t see myself buying anything soon https://www.eurekabearing.com
-
1 pointCaught a few minutes and installed led tail light on C -160 to match the new LED headlights I installed yesterday. I got these from the jungle site and like them because they have a black base and the lens closely matches the old WH lens.
-
1 pointCleat: many years ago when I had a mind. I had a c141 it was in need of wiring. Now I am no electrician. But I took my time and I figured it out one wire at a time some need to be replaced, but I got through it..
-
1 pointThis machine is weird in that some little bits are badly corroded but most is good. Even the hood was easy to buff to a decent shine. I do agree that it likely spent a bit of time outside in it's previous life and likely rarely if ever got cleaned. The rear axle was a terrible mess of greasy mucky goop, likely enough to fill a good sized pail. I don't know where it came from as I have not found a leak anywhere.


This leaderboard is set to New York/GMT-04:00