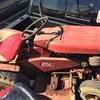
bellevillerod 834 #1 Posted April 2, 2019 Well here goes, going to start a "refresh" on my new to me 68 Horse. Had been looking for a Commando for some time, wanted one that was a blank slate so to speak. Not one that someone else had already done work on other than to keep it working. Found one from a member here down in Ohio. WheelHorse2004 had this tractor for sale, belonged to someone that he had know. It showed signs of decent maintenance and no signs of a restoration. Perfect for me to get and bring back as close to factory as I can. The purpose of this is not to make a show tractor, but to make a nice working tractor. Something that we can enjoy and not be afraid to put to work on our property. I wish that I had the organization and writing skills of some here but sadly that is not the case. But bear with me as I go through this and please speak up and direct me in the proper direction when needed. I will try and take all the pics needed and list the parts that I purchase along the way. Here is the tractor when I got it home and as it sits right now. 5 1 Share this post Link to post Share on other sites
ebinmaine 63,152 #2 Posted April 2, 2019 AWESOME I'm in!!! 1 Share this post Link to post Share on other sites
Achto 26,566 #3 Posted April 2, 2019 Gonna chime in so that I can follow along. Looks like you have a good platform to start from. 1 Share this post Link to post Share on other sites
bellevillerod 834 #4 Posted April 2, 2019 The first thing that I did was to see if the tractor would run. When I went to pick it up the battery was dead so no joy in getting to hear it. I was told that indeed it did run, and as far as he knew it made no strange noises. In being a trusting sort of guy I took his word for it. So as soon as it was out of the truck it went to the shed to see if it would fire. Checked oil....good..cables on battery an... 20190108_181429.mp4 1 6 Share this post Link to post Share on other sites
oliver2-44 8,852 #5 Posted April 2, 2019 Nice project. I'n in for the ride. Since it runs, whats your plans for the engine? it would be a great time for a maintenance decarbon head and piston, pull and lap valves and reset clearance. Share this post Link to post Share on other sites
bellevillerod 834 #6 Posted April 2, 2019 The next was the seat pan an seat. The pan was bent up pretty bad, the rear where it hit the tires was really bent up. And if you look at the vid you can see where the metal is missing where the chains had caught and tore the pan. The underside of the pan was broken in the area that rests on the toolbox. This made the pan ride lower and hit the chains. It also had a dozen or so holes drilled in it. So strip, fill, straighten an paint was in order. 5 2 Share this post Link to post Share on other sites
bellevillerod 834 #7 Posted April 2, 2019 3 minutes ago, oliver2-44 said: Nice project. I'n in for the ride. Since it runs, whats your plans for the engine? it would be a great time for a maintenance decarbon head and piston, pull and lap valves and reset clearance. That is on the list to be done, as a kid that was something my dad an I did every couple of years to his equipment. He claimed it was the best thing you could do to keep you engines running at their peak. So it kind of became a habit for me to do. I am thinking shes going to be in good shape, first start an no smoke at all. Fingers crossed....LOL 2 Share this post Link to post Share on other sites
bellevillerod 834 #8 Posted April 2, 2019 I welded the supports back on the the underside of the pan as the welds had failed. The bracket that rides on the toolbox had bent up and cracked so I bent another piece of 1/8 stock and welded under it to support it. Because of this I ended up covering the holes for the rubber bumpers so I added some heavy felt. I then got the proper bumpers from Mouser for the side's. 4 Share this post Link to post Share on other sites
Tractor boy 238 #9 Posted April 2, 2019 I gotta chime in...... Share this post Link to post Share on other sites
bellevillerod 834 #10 Posted April 2, 2019 Well I pulled the head, valve seats look clean can't see any bad spots. But what can you motor heads tell by the pics? Looks like it's needing a good cleaning but other than that it looks to be running right. 3 Share this post Link to post Share on other sites
ebinmaine 63,152 #11 Posted April 2, 2019 I'm only on a screen that's about 2.5 by 5 inches but that looks pretty good from Maine! Colors look good. No excessive carbon. Share this post Link to post Share on other sites
Achto 26,566 #12 Posted April 2, 2019 19 minutes ago, bellevillerod said: But what can you motor heads tell by the pics? Good carbon cover on the piston, no piston wash going on. So I would say the rings are in real good shape. I would say clean the head up & slap it back together. 1 Share this post Link to post Share on other sites
bellevillerod 834 #13 Posted April 2, 2019 Ok 60 min in sonic cleaner for one scotch brite and WD40 for the other. Do we have a preferred vendor for head gaskets here? 2 Share this post Link to post Share on other sites
ebinmaine 63,152 #14 Posted April 2, 2019 4 hours ago, bellevillerod said: we have a preferred vendor for head gaskets here? Multiple sources. Not really a preferred one. Really want to try to get one that has the compression ring if you can. Not just a flat gasket. Share this post Link to post Share on other sites
bellevillerod 834 #15 Posted April 2, 2019 6 minutes ago, ebinmaine said: Multiple sources. Not really a preferred one. Really want to try to get one that has the compression ring if you can. Not just a flat gasket. I got ya there, I just ordered one from JThomas parts near me. I got the OEM metal gasket. I have always either used those or made one out of sheet copper to raise compression a bit. On this tractor I'm leaning toward keeping it as close to Factory as I can. Share this post Link to post Share on other sites
bellevillerod 834 #16 Posted April 2, 2019 Was able to address the worn key-way on the tractor today. It's not perfect but I had to use my stick welder, out of gas on the tig. It will do the job for years to come. Also installed the axle seals so on to the next concern. 3 2 Share this post Link to post Share on other sites
bellevillerod 834 #17 Posted April 2, 2019 The steering slop I think was coming from the tie-rod's and the wheel bearings. The pivot pin hole and the ends of the front axle are in real good condition. Their is some play in the steering shaft and the fan gear. I will bore those out an bush them. I'm thinking that I may install pin bearing in the ends of the axle or use thrust bearings there. Still up in the air on what direction I'm gonna go. I do have to make a new pivot pin and make a bronze washer to take up the extra space in there. I received my new stainless steel tie rod ends today so the list continues to grow. LOL 3 Share this post Link to post Share on other sites
ebinmaine 63,152 #18 Posted April 2, 2019 Nice work on that axle Share this post Link to post Share on other sites
bellevillerod 834 #19 Posted April 3, 2019 6 minutes ago, ebinmaine said: Nice work on that axle What I didn't show was the first two tries that had to be ground out an re-welded. For some reason I was getting a lot of porosity in the welds. I don't know if because I was welding up against bronze or what was causing it. But the third time was a charm and the weld laid down nice. 1 Share this post Link to post Share on other sites
Pullstart 59,733 #20 Posted April 3, 2019 Oil impregnated steel? Share this post Link to post Share on other sites
bellevillerod 834 #21 Posted April 3, 2019 3 hours ago, pullstart said: Oil impregnated steel? If that is the case then yes that would cause that, I used a 7018 rod so maybe the wrong choice there. I started to use a stainless rod and at the last min changed my mind. 1 Share this post Link to post Share on other sites
Sparky-(Admin) 19,553 #22 Posted April 3, 2019 Coming along nicely. Will be like a new machine when your done! I recently got my Commando 8 running again after being out of commission since last September. 6 2 Share this post Link to post Share on other sites
bellevillerod 834 #23 Posted April 3, 2019 1 hour ago, Sparky said: Coming along nicely. Will be like a new machine when your done! I recently got my Commando 8 running again after being out of commission since last September. I like the patina on that rig. I have yet to get one that was a good candidate for that kind of restore. One day, if I get lucky I will. Seems if you paint one panel you have to do them all or it looks outta place. 3 1 Share this post Link to post Share on other sites
rjg854 10,739 #24 Posted April 3, 2019 If we're posting pictures of Commando 8s, here's mine These are powerful and fun tractors, your gonna grow to love yours. There's not much they can't do. 3 2 Share this post Link to post Share on other sites
bellevillerod 834 #25 Posted April 5, 2019 Well last night I got some progress made on the ole girl. Really gotta give her a name, have to think on that one. Well I made up a new set of tie rods for her. 4 1 Share this post Link to post Share on other sites