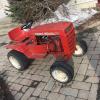
mikeeyre74 290 #1 Posted April 11, 2018 So I took the steering wheel off my 69 charger, to replace the bushing to tighten up the steering where it comes through the dashboard? I figured the bushing would have been blasted, but I actually found is that the dashboard itself is what’s pretty much beat. What’s the best way to repair this? Ream the dashboard hole out and put in a bigger outside diameter bushing? Replace the dashboard with a spare? Share this post Link to post Share on other sites
953 nut 66,614 #2 Posted April 11, 2018 Have you considered an application of JB Weld to hold the regular bushing? Share this post Link to post Share on other sites
oliver2-44 11,535 #3 Posted April 11, 2018 The bushing hole on my 312-8 looked walls red out just like that. I JjB welded in in 3 years ago and seen lots of use. Still holding strong. I cleaned it good and scratched the metal up with dreamily to give the JB weld something to grab to 1 Share this post Link to post Share on other sites
Tankman 3,528 #4 Posted April 12, 2018 (edited) I would try a sleeve bearing which could be held in place; i.e.: JB Weld, Loctite, construction adhesive. http://www.qbcbearings.com/BuyRFQ/SleeveB_StandardS_F_SB_I.php http://www.qbcbearings.com/BuyRFQ/SleeveB_SmallS_F_SB_I.php I keep some of QBC's thrust washers on hand to eliminate front wheel play. QBC Bearings Edited April 12, 2018 by Tankman Share this post Link to post Share on other sites
mikeeyre74 290 #5 Posted April 12, 2018 I like JB weld for lots of things, but for some reason I just don’t get the warm fuzzies when thinking about it in this application. Perhaps I’m being silly, but I’d like to replace the sleeve bearing and have it seated nicely in metal. No? Share this post Link to post Share on other sites
DennisThornton 4,773 #6 Posted April 12, 2018 I think a washer as large as possible OD with ID to fit the bushing could be epoxied underneath and at the same time the bushing epoxied in as well. There would be way more surface area holding the washer and plenty of metal to hold the bushing. 1 Share this post Link to post Share on other sites
JPWH 6,544 #7 Posted April 12, 2018 13 hours ago, mikeeyre74 said: So I took the steering wheel off my 69 charger, to replace the bushing to tighten up the steering where it comes through the dashboard? I figured the bushing would have been blasted, but I actually found is that the dashboard itself is what’s pretty much beat. What’s the best way to repair this? Ream the dashboard hole out and put in a bigger outside diameter bushing? Replace the dashboard with a spare? I repaired one recently with aluma weld just to see if I could. It was a pain but it worked. Share this post Link to post Share on other sites
Eric Friedrichsen 112 #8 Posted April 12, 2018 A couple of years ago I restored a much abused 414/8 that had a similar problem (among many). I used a mounted sleeve bearing from McMaster Carr that I modified to accept an angled zerk and now it is part of my routine servicing. The inst. panel on the 400 series tractor is different then yours but yours looks easier to make this modification. I then fastened the steering shaft lock under the bearing. The result is a smooth shaft with no play in that location. See the attached picture. Eric 9 3 1 Share this post Link to post Share on other sites
mikeeyre74 290 #9 Posted April 12, 2018 That’s an interesting idea with that roller bearing there, but like you said, it’s a different arrangement. I don’t believe there’s enough room to mount anything with flanged wars on it like that... and since it’s just aluminum or some type of other alloy, it’s not going to be as strong as steel. It might be possible to use through bolts through the dashboard and use spacers under those flanges tho... the only drawback being some exposed bolt heads on the top side of the dashboard. Hmm. But the trade off might be worth it? I’ll consider that. Share this post Link to post Share on other sites
Eric Friedrichsen 112 #10 Posted April 12, 2018 Hi Mikeeyre74, It is a mounted sleeve bearing. A frictionless bearing is not needed as there is very little motion there. Could you mount it underneath with a steel support plate and only the bolt heads would project through on the top. The cover tube over the shaft (on the exterior I made from an old backpack blower tube. You could make one to cover the bearing or bolt heads. Good luck, Eric Share this post Link to post Share on other sites
mikeeyre74 290 #11 Posted April 12, 2018 Is it true that the original bushing had two flat spots to keep the bushing from spinning inside the dash tower? I just read that somewhere but can’t verify it. And i I suppose some machine screws with rounded heads could be used to bolt a flanged bearing down and that wouldn’t look too terrible at all? Starting to have some promise here afterall... Share this post Link to post Share on other sites
Eric Friedrichsen 112 #12 Posted April 12, 2018 Yes,, as I remember, it did have two flat spots to keep it from spinning with the shaft. Eric Share this post Link to post Share on other sites
Anglo Traction 761 #13 Posted April 12, 2018 Adding a better bushing to strengthen the Steering was quite straight forward when I refurbished my 74 C-120 several years ago. I used the same Flanged Bushing that is used on the lower forward Steering Shaft- There was enough space below for 3/8" UNC (SAE) nuts and lock washers. Solid as a rock. 5 Share this post Link to post Share on other sites
cleat 8,986 #14 Posted April 12, 2018 A ball bearing up there will reduce steering effort as well. I have upgraded all of my 520's that way with flanged wheel bearings (same as in the front wheels of the majority of Wheel Horse tractors with 3/4" spindles) and steering effort is reduced along with all play gone from the steering shaft. Hole is drilled to the proper OD of the bearing and it is pressed into place. This is for an early 520 that has the bearing in the battery support area. And this is for a later 520 that has the bearing in the dash. This may not work on yours but it is an idea. Cleat 3 Share this post Link to post Share on other sites
peter lena 9,901 #15 Posted April 12, 2018 10 hours ago, Eric Friedrichsen said: A couple of years ago I restored a much abused 414/8 that had a similar problem (among many). I used a mounted sleeve bearing from McMaster Carr that I modified to accept an angled zerk and now it is part of my routine servicing. The inst. panel on the 400 series tractor is different then yours but yours looks easier to make this modification. I then fastened the steering shaft lock under the bearing. The result is a smooth shaft with no play in that location. See the attached picture. Eric Share this post Link to post Share on other sites
peter lena 9,901 #16 Posted April 12, 2018 good job Eric, I did a similar job on my 312, picked up the bearing on eBay for 7 $, really helped to snug up the entire dash area, and you can grease it, what a concept. while I was in there I also hit on a number of spots that needed " operational improvement ", wire issues, pto lever linkage fitting , cable lubed my choke and throttle cables till it ran out. wired my battery tender to battery, and cable wrapped the plug in to my throttle cable , for quick simple plug in. keeping after your horse , is always worth it. pete Share this post Link to post Share on other sites
mikeeyre74 290 #17 Posted April 12, 2018 Well, I decided to go with the JB Weld option, and install a new bronze oillight bushing. I figure, if it works, it works. If it doesn’t, I’m going to take it apart and try that two bolt flange operation a couple of posts north of this one. That one requires a lot more work than this one, and if this one works, that’s fine by me. This is pretty much the exact same piece as what came out, except this one is that self lubricating centered bronze stuff, and the one that came out was plastic. Surprisingly, it did not have flat spots on either side, so I’m not sure what was going on there and why it wore out the dashboard so much with just a piece of plastic rubbing on the dashboard… I could understand if it was metal, but plastic? This is how it looks right now, so when everything dries up and hardens, I’ll drop the steering shaft back out-of-the-way, and grind everything down flat and make it nice. 3 Share this post Link to post Share on other sites
stratostar250 934 #18 Posted April 13, 2018 Looks good! Like you said, if it works. It works! I like the efforts that others have put in and those look like super sturdy, long term solutions, but I bet that will be too as long as you dont yank the wheel too hard!! 1 Share this post Link to post Share on other sites
mikeeyre74 290 #19 Posted April 15, 2018 So I got the JB Weld set up and ground it down. This is what it looks like now. Gotta fill in those holes there, but not too bad! 2 Share this post Link to post Share on other sites
DennisThornton 4,773 #20 Posted April 16, 2018 I'm thinking that will work fine. Share this post Link to post Share on other sites
oliver2-44 11,535 #21 Posted April 16, 2018 That looks very similar to my repair mentioned above. On the bottom sine I made a bead of Jb weld around the flange for some extra lock in. Used masking tape to hold the JB up so it slung say off Share this post Link to post Share on other sites
mikeeyre74 290 #22 Posted April 16, 2018 After getting it all back together, the steering feels MUCH better and rock solid. I'll have to wait and see how it holds up durability wise, but it seems good to me so far. 1 Share this post Link to post Share on other sites
WHX?? 56,847 #23 Posted April 16, 2018 Little late to chime in Mike but those D or flat spot bushings are used on big box b hind snow blowers axles & augers. I woulda done just what you would have tho. A shot of spray lube ther once in awhile will help too. Share this post Link to post Share on other sites