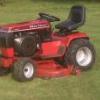
truckin88 104 #1 Posted July 20, 2013 Guys my dads 520 has never ran right...after being hot it will not restart till cool...and now it will not start at all. There is no spark. We have replaced plugs, plug wires, coil, battery. Now I believe the only thing left is the ignition pick up/trigger and rotor/stator behind the flywheel. 1. How do I remove the flywheel 2. Any tips or tricks to replace these parts. Thanks in advance. Share this post Link to post Share on other sites
Amanda 82 #2 Posted July 20, 2013 My husband has removed the fly wheel before and its a pain... Have you tested the trigger? Share this post Link to post Share on other sites
sb6511 2 #3 Posted July 20, 2013 First, download service and parts manuals from the Toro web site - they are free. Use the model number on the left rear fender, for example mine is a 1991 Wheel Horse 520H model 41-20OE02. Note distinctions between zeros and letter O. Also, most models have a dash after first two digits, though not usualky shown on label.The manuals detail all parts and servicing/rebuild of key components. What is not told, in removing the flywheel is what should be removed first. It is not difficult, as indicated earlier, just a method. When in doubt, take pictures and label each nut or bolt when removed. Most component are assembled with common sizes, but can be confusing if you drop everything into one pan. I recommend the magnetic bottomed bowl from the auto parts store so you don't lose any parts. Also, before removing the flywheel, the manual tells how to test the stator. If engine won't run, all you can do is test Ohms (resistance) in the wires. Unplug the two outside connectors from the voltage regulator (flat rectangular part with three flat plugs just in front of the battery and mounted in the engine cowl (black sheet metal cover)). I don't have my manual handy, but you are looking for very low resistance in the range of .2 to .4 Ohms use a reliable multimeter with fresh batteries; if you touch both multimeter leads together the reading should be zero (digital or analog doesn't matter). Anything else means your tester needs adjustment or batteries. You can also test the voltage regulator/rectifier also, though if engine won't start, the testing is limited. Testing the stator and regulator are generally related to a battery not charging, indicated by a dead battery after running or jump started. Jump starting this mower and running with a low charging/almost dead battery can cause failure of several electronic components. Namely the rectifier ($60) the RPM guage ($275), or other switches and relays related to the starting/running system. The coil next to the regulator can be tested also to ensure it is putting out correct spark voltage. I recommend downloading the Toro Demystification Guide which provides troubleshooting tips, procedures, and wiring diagrams for these complicated little "space ships." All you need from this several hundred page manual is the first 30 pages or so that are generic to most all models, the the 5-7 pages specific to your model (the manual covers a vast number of models.) I had the similar issue as you to some extent. I needed to replace the regulator and check the magnets in the flywheel. So if I was removing the flywheel, might as well put on a new stator (3 small screws and a two-wire plug going up to thd regulator). Depending on age and level of abuse of the mower, the magnets can come loose, or loose magnetism (usually from extreme over heating). Basically, the magnets are glued inside the flywheel and rotate around the stator (bunch of grape size nubs wound with wires) as the engine runs. Any magnet rotating around coiled wires creates alternating current electricity (the kind in your house). The regulator/rectifier converts it to DC, or battery type electricity to recharge the battery. The mower's electrical components (spark plugs, lights, sensors, etc all run off the battery which in turn is recharged by the "alternator," (the magnets and stator). So, after all this, if you want to take off the flywheel, go to you auto parts store and they will loan you for free a "puller." You want a generic harmonic balancer puller (for cars) and has a set up of one center bolt in line with two outside bolts. Take off the entire air cleaner assembly - the manual diagram shiws the basic screws in it; (put some clean paper towel or small cloth in the carburetor intake so nothing gets in there). Remove the two sweets from the fuel pump and gently pull it out about an inch or so from the engine cover. You will see a small hose and clamp coming out of the engine cover behind the pump. This is a vacuum hose attached to the engine and uses suction to make the pump work. Squeeze the clamp to loosen an wiggle it back from the pump about an inch. Then gently and firmly twist and pull the pump from the hose; leave the clamp where it is. The remove the seven small bolts from around the engine cover. The remove the two bolts holding the coil to the engine cover. Then loosen clamp in front holding the throttle cable and remove cable from clamp and and throttle lever. Disconnect the spring from the throttle lever. Now the engine cover should easily be pulled free. You do not need to remove the plastic chaff screen from the cover, but you may so it won't get broken. You will now see the exposed flywheel and metal chaff screen. Remove the metal chaff screen (four bolts in center and six hex or Torx screws around edges. Thread the center bolt in the puller (only on should fit and has a pointy tip on it that corresponds to the hole in the flywheel bolt. Tip: the flywheel bolt must be loosened two complete turns before using the puller tool. Also, when trying to loosen the center flywheel bolt, you may notice the flywheel will want to rotate also. You do not want to damage or nick the flywheel at all. Some are tempted to use a wrench, board, or other similar device to wedge into the flywheel fins to hold it while turning the flywheel bolt. I recommend against this. Without a specific flywheel holder tool, it is preferred to use a pneumatic impact socket driver since this imparts small impacts of torque to the bolt several times per second such that the mass of the flywheel keeps it from spinning. Same way your local shop removes your car tire without really having to brace the tire. Without such a tool, use a large 1/2 in drive socket wrench and socket on the bolt, and while someone assists by steadying the flywheel, hit the end of the wratchet handle with a dead blow hammer (a leas shot filled polymer hammer) or similar tool. Not a rubber mallet. A steel hammer will work, but there is a risk of damaging the internal socket teeth, the handle of the wrench, or chipping either tool, parts of which fly at high speed and can hit you eye. Can even inflict a small cut on the face. So either an air powered socket, or dead blow hammer to loosen the bolt. Then thread two bolts from the puller tool into the two bolt holes in the flywheel on either side of the flywheel bolt. The tool kit usually comes with several size bolts and thread types. Tighten the side bolts several turns. Then tighten by hand the center bolt until it contacts the flywheel bolt and is snug and centered. Using a wrench or socket, alternately tighten the two side puller tool bolts in 1/4 to 1/2 turn increments until the puller tool bolts are relatively tight ( only about 10 to 15 pounds pressure on the wrench). Note: the shaft onto which the flywheel is attached is slightly tapered. So with tension now on the flywheel, a couple light taps with a dead blow hammer on the fly wheel is sufficient for it to "pop" loose. The movement will only be a millimeter or so. Remove the puller tool, and the continue removing the flywheel bolt. Age and a little rust my provide resistance, so the flywheel may still need someone to hold it while tapping the wrench (or pneumatic socket) until the bolt will come out the rest if the way with moderate wrench torque. Once the bolt is out, remove the flywheel with two hands and set aside. This is a good time to inspect the magnets and clean out any debris between them. The manual describes how to test the magnetism, which should be very strong, by holding a flat tip screw driver between two fingers and brining it close to the magnets. The screw driver being pulled toward the magnets indicates acceptability. Refer to the manual. You can then remove the three small bolts on the stator, unplug from the rectifier and replace with a new one. Assembly is in reverse order and tightening the flywheel bolt will require the same impact technique. 2 Share this post Link to post Share on other sites
truckin88 104 #4 Posted July 27, 2013 Ok I tested the two outside wires off the voltage regulator got .2 on ohms....what now Share this post Link to post Share on other sites
sb6511 2 #5 Posted July 29, 2013 First, I assume you have a good charged battery or all tests are pointless. Second, getting behind/in the flywheel is for charging issues, generally. With a bad stator, regulator, and flywheel magnets, the engine should start and run, but will due as ignition drains the battery for lack of recharging. That said, do you hear a click when you turn the key? If so, a switch or relay is preventing voltage from going to the starter. You need to check the switches and relays for shorts or loose wires. I had a corroded connector on the PTO switch. After cutting and recrimping a new one and cleans all three switch connector blades, I found the engine wouldn't crank, but "click" came from the starter relay. I found that I put the green, yellow and purple wires back in the wrong order which sent a signal that the PTO was engaged and not allow a start. I also had a melted 30 amp fuse and burned wire, though the fuse didn't blow. Chck all wires for shorts/continuity (disconnect the 9 pin Molex connector and check each wire for beginning to end; starting and charging wires, not lights and such, unless those don't work either). If no click when turn the key, you need to check wires between the key and relays. The servicing manual and wiring diagrams show what is connected to what. As far as resistance, I think you said you checked the regulator. This is a common part failure, but should not prevent cranking. Again, make sure your battery is charged and has more than 12 volts. Frequent jump starting or running with a dead battery will fry a lots of sensitive electronics. If you have bad switches (a montuno level position switch is almost $200), you could go old school and wire around switches as though the mower had none, much the way most people take out the seat switch and put a wire nut or tape the two wires together. There are risks thigh, generally safety related and whether the mower will work or not. Old school mowers had no charger, just a pull starter and a spark plug powered by a magneto and a cutoff switch or fuel cut off. I digress... You should check voltage on the regulator wile running, and not resistance while off. You check rest instance in the outside stator wires while off (one test lead on one stator wire and other test lead in a good ground. It show zero, or no continuity, which is what you want. If you get anything other than zero, replace the stator. If it is zero, then disconnect both outside stator wires from the regulator (the AC wires, as middle regulator wire is your DC battery voltage) and test leads in each connector. You should have restistance of 0.6 to 0.1 Ohms. If not, stator should be relocated. Recall, it is uncommon for stator and magnets to be faulty when looking at the charging system, it is usually the regulator. And a poorly charged battery can prevent the circuits in the regulator from even turning on to validate other tests. So make sure battery is good and holds a load (free check at your local auto Petra store). I don't have the device manual handy on the road. You should download all the free parts and service manuals at http://www.toro.com/en-us/parts/pages/partslookup.aspx. As I recall, Pages 8-1 refers to checking the Ignition Module and Trigger Ring (behind the flywheel, but spark is tested without removing it). This test indicate a fault (if a spark is generated) in the low oil pressure cut-out switch or associated wiring. Note there are portions of wiring down between the steering gears and engine that contain relays and such for starting and engine control. This is where you hear a "click" sound when turning the key if the engine won't crank, usually the result of an open switch from the motion or PTO lever on the wrong position. Same for any other switch - engine or transmission temperature, pressure, Seat switch, etc. Page 8-2 discusses checking ignition timing (though not generally adjustable like a car). (The flywheel cover must be of for these tests since the flywheel is turned by hand to test these.) Here you are checking for voltage change from 1 volt to battery voltage as the magnets engage the ingnition control module. Share this post Link to post Share on other sites
truckin88 104 #6 Posted July 29, 2013 (edited) Ok let me start over. The tractor was running but would not restart when hot. Eventually it would not start at all. It gets gas but no spark. We replaced the fuses, plugs, plug wires, battery and coil still no spark. My research shows the hot start issues points to the ignition trigger behind the flywheel. I only tested the 2 outside wires off the regulator/rectifier and got .2 ohms. Thanks for the help. And yes battery is charged. Edited July 29, 2013 by truckin88 Share this post Link to post Share on other sites
Red-Bovine 334 #7 Posted July 30, 2013 My 520H would die while running intermittently a while back. It finally gave out and would not run at all. It was the trigger under the flywheel. A little heat applied to the flywheel in the area near the crankshaft will expand the flywheel and help remove it. It is really stuck on, but will come off. Like previously mentioned, a puller and a tap with a dead blow hammer will help, too. Keep the nut partially on to prevent damaging the threads on the crank. Red Share this post Link to post Share on other sites