mattd860 162 #26 Posted November 28, 2012 Bill - make sure you fully clean the shaft. It is best to let it run on a wire wheel of a bench grinder if you have one. Make sure after the cam is reinstalled with the cam lever that it freely pivots forwards and backwards with little to no friction. 1 Share this post Link to post Share on other sites
leeave96 496 #27 Posted December 2, 2012 Next on this project was the installation of the auto center mechanism. Share this post Link to post Share on other sites
leeave96 496 #28 Posted December 2, 2012 To install the auto center mechanism, you need to remove two existing bolts and screw the angle of the A/C bracket to it. A "U" joint adapter is your friend on this. Don't put the auto center in backwards - else later in the process you'll have to take it out and turn it around 180 degrees... :banghead: Share this post Link to post Share on other sites
leeave96 496 #29 Posted December 2, 2012 Once I got the auto center installed, I thought the corner of the angle bracket was a little to close to the hydro pump for my confort (though it would probably never tough), I pulled it again and cut off a bit of the corner. I also painted the cut area. Note for painting jobs like this - and when I have some spray paint, I will spray a blob of paint on a q-tip and wipe it on the part. Share this post Link to post Share on other sites
leeave96 496 #30 Posted December 2, 2012 The next thing I did was wrestle with what to do with the hand control hydro lever and the safety for it. The hydro lever is dash mounted on this 520H and pulling it looked like a pain - requiring pulling the steering wheel. I took the reverse lock/safety bracket off and thought about leaving the hydro lever linkage attached to the foot control kit - but in the end decided to remove the linkage from the hydro lever to the hydro cam. This puts the safety back in it's original place and for starting, the hydro lever still serves a purpose in allowing it to function without any modification. I've got the steering lever linkage on a shelf if I ever have to use it again. Share this post Link to post Share on other sites
mattd860 162 #31 Posted December 2, 2012 Bill - you should take this time to clean out the cooling fins on the eaton transmission. 1 Share this post Link to post Share on other sites
Jeremy Watson 22 #32 Posted December 2, 2012 I got one of these kits awhile ago. I recently did the bearing upgrade and added a second spring to the auto centering. This makes this thing return to neutral great. I'm looking forward to trying it out blowing snow. Thank you Matt for the making these kits. Jeremy Share this post Link to post Share on other sites
leeave96 496 #33 Posted December 2, 2012 Bill - you should take this time to clean out the cooling fins on the eaton transmission. Matt - without a doubt that hydro and the whole area under the cam cover and nearby areas will be thoroughly cleaned. In addition, I'm adding anti-seize to the cover plate screws over the cam and steering column so they will be easily and frequently taken off for cleaning. I was VERY surprised how clogged that whole area was in the first place. My tractors are working tractors vs show pieces, but I labor to keep them clean. Bill Share this post Link to post Share on other sites
leeave96 496 #34 Posted December 2, 2012 I got one of these kits awhile ago. I recently did the bearing upgrade and added a second spring to the auto centering. This makes this thing return to neutral great. I'm looking forward to trying it out blowing snow. Thank you Matt for the making these kits. Jeremy Jeremy, For all intent and purpose, my foot control is installed. I did the work over Thanksgiving weekend and am just posting the pics of it as I have a few minutes. I need to make a slight adjustment to the neutral as the tractor wants, at neutral, to creep a bit in reverse. Surprisingly even when barely creeping in reverse, there is a ton of power being applied to the wheels through the hydro. You can't stop the wheels with your hands! Creep defiantly does not equal lack of power on this tractor. But reason I am replying is that my kit pretty much snaps to a stop in forward or reverse with the spring that came with my kit. I let my brother drive it and he thought it was to harsh - but my MTD Cub Cadet LTX1042 with foot control hydro stops fairly quick too when you let the hydro go to neutral. Not sure it is as abrupt, but in either case, I feel it's good the tractor comes to a quick stop when you take your foot off the pedal quickly - for safety purposes. I think - if one doesn't want the tractor to snap to a stop, then learn to ease off the foot pedal. Having said all that, I'm wondering if you are experiencing any binding in your set-up that would show the return? Later I will post a few pics where my center return bearing was not falling exactly on the return bracket that is spring loaded and instead wanted to ride against the large OD washers that capture the bearing. I had to shim it a slight bit with smaller washers and when I did that, it was a drastic difference in function. The return mechanism truly rolled like it was on a roller bearing. Thanks! Bill Share this post Link to post Share on other sites
varosd 1,185 #35 Posted December 3, 2012 Looks like you making it happen! We will need some video of your rig in action once the pedal is all setup!!! I agree with Matt, I ended up using the pointy end of a cotter pin and dug out all the gunk and crud...and my 520 had a 48" side discharge so not sure on the RD aspect. my B-80 with the 36" RD does collect clippings but trying not to cut wet grass and always air blasting after mowing is a must!!! Share this post Link to post Share on other sites
mattd860 162 #36 Posted December 3, 2012 varosd - here is a video I made of my 520-h with foot control in action - Share this post Link to post Share on other sites
Jeremy Watson 22 #37 Posted December 3, 2012 Before I did the upgrade it wouldn't center to neutral very well. Since I was working on it I decided one the second spring. It makes it a bit abrupt if you pop your foot off the pedal. Also makes the pedal a little stiffer that I like. Guess its all about personal preferences. Jeremy Share this post Link to post Share on other sites
dbartlett1958 99 #38 Posted December 3, 2012 I got one of these kits awhile ago. I recently did the bearing upgrade and added a second spring to the auto centering. This makes this thing return to neutral great. I'm looking forward to trying it out blowing snow. Thank you Matt for the making these kits. Jeremy Jeremy, For all intent and purpose, my foot control is installed. I did the work over Thanksgiving weekend and am just posting the pics of it as I have a few minutes. I need to make a slight adjustment to the neutral as the tractor wants, at neutral, to creep a bit in reverse. Surprisingly even when barely creeping in reverse, there is a ton of power being applied to the wheels through the hydro. You can't stop the wheels with your hands! Creep defiantly does not equal lack of power on this tractor. But reason I am replying is that my kit pretty much snaps to a stop in forward or reverse with the spring that came with my kit. I let my brother drive it and he thought it was to harsh - but my MTD Cub Cadet LTX1042 with foot control hydro stops fairly quick too when you let the hydro go to neutral. Not sure it is as abrupt, but in either case, I feel it's good the tractor comes to a quick stop when you take your foot off the pedal quickly - for safety purposes. I think - if one doesn't want the tractor to snap to a stop, then learn to ease off the foot pedal. Having said all that, I'm wondering if you are experiencing any binding in your set-up that would show the return? Later I will post a few pics where my center return bearing was not falling exactly on the return bracket that is spring loaded and instead wanted to ride against the large OD washers that capture the bearing. I had to shim it a slight bit with smaller washers and when I did that, it was a drastic difference in function. The return mechanism truly rolled like it was on a roller bearing. Thanks! Bill Bill, That is a great point about shimming the auto-centering mechanism with washers. A little bit of misalignment can make a huge difference. The kit is awesome, but all our tractors can be just a little different and need some personal tweaking. David Share this post Link to post Share on other sites
leeave96 496 #39 Posted December 9, 2012 Update: I've got a few minutes this afternoon and thought I'd continue the picture journey. Next thing I did with this foot control kit was install the new control rod lever. This is the lever that extends from the hydro cam to the new foot control pedal I would install on the right side of the tractor. First though, I ran a nut on the threads with some oil to free them up from the paint on the threads and then added the turnbuckle. It's interesting and amazing that there is a elongated slot in the side of the tractor to be taken advantage of for this linkage. Don't know why that slot is there or it's purpose - perhaps something to do with an 8 speed configuration vs a hydro. Share this post Link to post Share on other sites
leeave96 496 #40 Posted December 9, 2012 After this, I assembled the foot control reverse lever to the pedal and added the bushings that will ride on the cross rod coming under the tractor. I had to sand down the paint on this rod so the foot control pedal would slide over it. After I installed the pedal, I re-painted what was left of the rod that the running board attaches so it wouldn't rust. I pumped the foot control pedal FULL of grease sooner than later so I wouldn't forget. Share this post Link to post Share on other sites
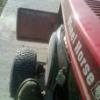
leeave96 496 #41 Posted December 9, 2012 One thing to be careful of is when attaching the rod that attaches to the cam lever to the hydro pedal is to turn the grease zerk AWAY from the pedal or it will hit the pedal and limit the travel of the pedal. This pic is how NOT to install it! Share this post Link to post Share on other sites
leeave96 496 #42 Posted December 9, 2012 Next thing I did was hook the connecting rod from the foot control to the hydro cam (which I had re-installed) and foot pedal and return spring. Then I reconnected the rear linkage/rod from the tranny back to the hydro control cam. However, there was much binding in reverse and I'm scratching my head. I shimmed the bearing center on the hydro return bracket to the hydro control cam (which I discuss in earlier posts). So I started eliminating various parts of the system to see find the exact location of the problem Hydro foot control lever worked like champ going forward, but was still binding in reverse. Checked the linkage to the tranny from the hydro cam - all good. What I found is the the bearing was riding out of the "V" cut-out on the hydro cam return bracket and down onto the vertical part as shown in the pics - when I would press the pedal in reverse. The remedy was to adjust the turn buckle from the tranny such that the maximum amount of travel on the hydro cam return lever/foot control would end with the bearing just shy of going over the edge. This resulted in VERY good operation - no binding. It also yielded great travel on the hydro for going forward and reverse - no penalty for keeping the bearing withing the confines of the V groove on the hydro cam return bracket - yippie!!!!! Share this post Link to post Share on other sites
leeave96 496 #43 Posted December 9, 2012 Next-up was to adjust the tranny at the rear to neutral. I jacked-up the rear wheels off the floor to do this. I also added wedges at the front axle pivot to keep the tractor from tipping over to one side and getting a moving wheel on the ground. After a few spins around the yard - I was a happy camper. Share this post Link to post Share on other sites
leeave96 496 #44 Posted December 9, 2012 Final post for this round of the foot control hydro (I've got another tractor to do yet). Some observations: The foot control kit is well thought out and Matt deserves GREAT credit for his work. I truly feel the foot control brings these old iron hydro tractors into the 21st century. If I look at a $6,000-ish John Deere X530 garden tractor (and I have), there is very little that - that new tractor brings which would make me (at this point in time) want to buy one and retire my Wheelhorse. The Wheelhorse is more heavy duty, simple to maintain and is a tough/true ground engaging garden tractor. Foot control just makes it easier to operate and frees up the hands for wrestling with attachment controls like on a snow blower or front plow. No need to keep one hand on a hydro lever and the other on a steering wheel at all times. The Deere tractor has one really nice feature and that is that the deck wheels turn 90 degrees so the deck rolls out from the tractor very easily. I will never take it for granted that the innards of my tractor, from the steering column back to the tranny, are clean just because everything else is clean. Anti-seize on all access panel fasteners for easy removal to keep this area clean going forward. I have some concerns that the attachment point of the control rod from the foot pedal where it attaches to the hydro control lever mechanism might be a wear point. It's just a hole with a piece of round stock going through it. There are turn buckles at the attachment points on the foot pedal and where the rear tranny linkage attaches to the hydro cam. Might need to consider some type of turn buckle/bearing arrangement at this attachment point. That linkage point will see some extreme motion/rotation as one normally drives/operates the tractor and will likely wear. The other concern I have is the aluminum foot pedal. Time will tell if it will hold-up over time and not break from a boot strike getting on/off the tractor, etc. Again I am VERY happy with the foot control kit. My concerns are by no means criticisms of the design and I would highly recommend this kit. Next, I'll be doing my 1988 520-H with center hydro lever (vs dash mounted one) over Christmas. As I get into it, I'll post more pics, including ones of the tractor I just finished. Thanks! Bill 1 Share this post Link to post Share on other sites
leeave96 496 #45 Posted December 30, 2012 Update: I installed the foot control on my 1988 year model 520H over the Christmas holiday. I've got pics - but for some reason, my PC ain't uploading them. I'll try again later. Share this post Link to post Share on other sites
ba2988 28 #46 Posted December 30, 2013 I installed my kit over the weekend and it wasn't too difficult with the good instructions provided. I do need some help in fine tuning the forward/reverse action of the pedal. Like Bill above, I had the issue of the bearing riding out of the 'V' cut. If I try to solve like Bill did - by adjusting the turn buckle from the tranny, that will keep the bearing in the 'V'...but then the tractor will creep backwards and I'm unable to adjust the cam plate back to a neutral setting so that the tractor remains still with the pedal in the neutral position. I fiddled with it for over an hour but couldn't get it right. Any advice? Share this post Link to post Share on other sites
Martin 2,134 #47 Posted December 30, 2013 (edited) when i adjusted mine i made sure that the bearing was in the v cut and everything was in neutral. ( a push on the left pedal should centralize to neutral as well). once the bearing in v and brake back to neutral is in order you need to fine tune the rest with the back wheels off the ground. jackstands under the trans, now start the engine, make sure all is in the natural 'neutral position' with the hydro shift/brake/foot control. now loosen the bolt (19) that holds the cam (18) just enough that you can rotate the cam with your fingers while watching for any movement of the wheels. rotate one way until wheels move in one direction, note position of cam, then rotate cam in opposite direction until wheel movement in the other direction. note position. then rotate back half way between the two noted positions. lock in position by tightening bolt. should be good to go..... if you can't get both directions by rotating the cam, you are not near enough to neutral because of the adjustment of the rod back to the shifter, that needs to be in the ballpark first. keep in mind that the brake centralizing and bearing in the v need to be positioning the 'shifter' in neutral the whole time you are rotating the cam to find neutral while watching wheel movement..... Edited December 30, 2013 by Martin Share this post Link to post Share on other sites
ba2988 28 #48 Posted December 30, 2013 (edited) Thanks Martin - I'm going to work on it some more today. When I tried to adjust it yesterday - I did have the back wheels jacked up and I am able to get the tractor to a still neutral by adjusting the cam as long as I have the rod/trunnion disconnected from the hydro control cam. When I connect the rod/trunnion to the control cam, at a length to keep the tractor still in the neutral setting, too much travel is permitted (when I press the pedal in reverse) and it causes the bearing to come out of the 'V' notch. If I then try to adjust the rod/trunnion by lengthening it, it solves the problem of the bearing riding out of the 'V' but then the tractor creeps backwards. I'm struggling to find a the right length of the rod/trunnion that goes between the hydro and the cam to keep the bearing in the V while at the same time maintaining a still neutral. Edited December 30, 2013 by ba2988 Share this post Link to post Share on other sites
Martin 2,134 #49 Posted December 30, 2013 (edited) if the tractor creeps back ward while still in the v with the rod attached and adjusted right you probably have a loose cam/plate relationship at the pump. try to move the large plate (11) to see if the cam (18) is loose in its slot just with your hand. if you have too much side to side in the slot you will never get it perfect. mine is loose there but i managed to get just the right amount of length on the rod so that when you take your foot off the control it stops moving the tractor. if its too loose you might just have to blip the opposite pedal from what direction you were just in to get it to neutral. you should always be able to stop movement of the tractor by pressing on the left brake pedal and centralizing the hydro cam control...... sounds like you have some worn parts making fine tuning hard. best way to get some sense from having loose parts, other than replacing them!, is to disconnect the rod, both ends, that goes from the hydro cam control back to the pump. now make sure all the parts in the hydro cam control/brake/forward reverse pedal are working as they should. move the pedal forward, reverse while watching everything move back and forth. fix all binding issues if present. operate the foot brake, bearing should be dead center in v. move the motion pedal full forward, let go, should return the bearing exactly to the middle of the v. once good there, go to the hydro pump and adjust the cam relationship there just like in post 47 above. while the rod is off, try moving any of the parts (11), (18) with very light movement to see if you have any loose issues while the tractor is running, you will see the wheels rotate if you do. there are a bunch of places that wear here and all the little movements add up to a hard to adjust neutral. my cam was worn where the slot of the plate runs against it and was binding when coming out of reverse, so i removed it and gently rounded the flat that was worn where it should be round. if you have loose parts try to fix as much as possible or replace them. because my cam was loose in the slot, i made sure i had neutral when the cam was dead center in the slot, not touching on either side of it. if you have wear you are not going to get it perfect unless you replace parts. they are available but you will blow $50 replacing 3 or 4 parts here. after you have the pump end sorted the best you can, place the rod from the hydro cam control to pump and line up the rod ends with the holes where they go, adjust rod ends to line up exactly with holes and install. hopefully you can get some sense out of my ramblings here...... Edited December 30, 2013 by Martin Share this post Link to post Share on other sites
leeave96 496 #50 Posted December 30, 2013 Thanks Martin - I'm going to work on it some more today. When I tried to adjust it yesterday - I did have the back wheels jacked up and I am able to get the tractor to a still neutral by adjusting the cam as long as I have the rod/trunnion disconnected from the hydro control cam. When I connect the rod/trunnion to the control cam, at a length to keep the tractor still in the neutral setting, too much travel is permitted (when I press the pedal in reverse) and it causes the bearing to come out of the 'V' notch. If I then try to adjust the rod/trunnion by lengthening it, it solves the problem of the bearing riding out of the 'V' but then the tractor creeps backwards. I'm struggling to find a the right length of the rod/trunnion that goes between the hydro and the cam to keep the bearing in the V while at the same time maintaining a still neutral. This sounds like the bearing is riding up out of the "V" groove as I show in my pic above. You need everything hooked-up to make your adjustments too. Once you have the linkage from the tranny to the hydro linkage such that it doesn't ride out of the "V" groove, then adjust your tranny at the rear via the cam plate. Also - I made a slight mod to mine. I doubled up the bearing that rides in the "V" groove, two bearings - side by side, to give a larger width for the "V" groove to ride-on. It seemed that sometimes the bearing was riding perfectly on the width of the "V" groove and depending on where I was at mashing the pedal, I was riding on the side of the bearing. Two bearings, side by side, eliminate this potential. I think another bearing at a parts store was maybe $5ish. A cheap and easy mod. Good luck, Bill Share this post Link to post Share on other sites