Jump to content
Sign in to follow this  
Duff

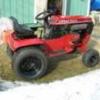
Mounting wheel weights - one man's method!

Recommended Posts

Duff

Hi, folks!

If this has been covered before somewhere in the forum, simply ignore what follows.

A while ago my best friend gave me a nice set of cast iron wheel weights. Not Wheel Horse, mind you, but 12†and in great shape. I’m guessing they are at least 50# each. What with one thing and another, I had put off cleaning them up and mounting them. Two days ago I got them prepped and painted, and today I sucked up the courage to mount them on my #2 tractor (the one with the ags all around and a mid mount grader blade).

Working alone and not exactly being a model of physical strength I did some head scratching to figure out how to get them on the tractor without breaking anything, mainly myself. I came up with a solution which, although probably neither original nor particularly clever, may be useful to someone else among our little tractor family. What follows is for wheel weights with four mounting holes. Whether you use all four to hold the weights on is up to you.

In addition to the normal complement of tools and the correct length bolts for the weights you are mounting you will need a floor jack, a length of ½â€cold rolled steel rod, not threaded, and a few wood blocks (scrap 2x4’s, 6-12†long seem to work well). I recommend at least a 3’ chunk of rod to give you maximum control and leverage. While I used a small hydraulic scissor jack, any stable jack should work OK.

1) Roll your tractor until the rear wheel you are going to do first has the weight mounting holes in the rim oriented at 3, 6, 9 and 12 o’clock (like a clock face). You may install your mounting bolts in the 3 and 9 o’clock holes if you wish. If you have carriage bolts that are not threaded all the way (like the ones I got), this method will allow you to manage them “looseâ€.

2) Position the jack about a foot away from the wheel and centered with the 6 and 12 o’clock position holes (in other words, in line with the axle). Raise the jack until it is nearly level with the 12 o’clock hole. Here is where some wood blocks may come in handy depending on what style of jack you are using.

3) Put a light coating of grease on the steel rod, leaving about 6†on one end and a foot or so on the other clean of any grease. This is to give you grip while allowing the weight to slide easily along the rod. This will make sense in a minute.

4) Stand the wheel weight on edge and pass the rod through one of the mounting holes. This will become the 12 o’clock mounting point, so if you have a notched weight to allow for access to a valve stem, plan accordingly.

5) Keeping in mind which way the weight will face, lift the rod and weight and slide one end of the steel rod through the 12 o’clock mounting hole. The end of the rod with the least greased area should be the one nearest the tractor at this point. Be careful to keep the rod level so the weight doesn’t slide and pinch your hand.

6) Once one end of the rod is passed through the wheel, set the other end on the jack.

7) Keeping one hand on the rod so it doesn’t slip or kick out, carefully slide the wheel weight up to the wheel. Use your free hand to adjust the jack if needed to bring the weight level with the wheel. If the mounting bolts at the 3 and 9 o’clock holes didn’t come through the weight as you were sliding it into place, reach around behind the wheel and work them through the weight.

8) As you begin to tighten the mounting bolts, use the jack to raise or lower the weight so it centers properly on the wheel. Once the bolts are tight, lower the jack and pull the rod out of the wheel.

Repeat this process for the second wheel. Reversing this process will allow you to easily remove the weights in the future. If you want to use all four mounting bolts, you can install the 6 and 12 o’clock bolts at any time after the first two are tight.

Now I know I’ll catch huge amounts of grief for not having taken any pictures of this process, but my camera’s battery crapped out just before I started and I had to get the work done today. Sorry!!!!!!

Duff :thumbs:

  • Like 1

Share this post


Link to post
Share on other sites
 
Hodge71

:text-datsphatyo: :tools-hammerdrill::popcorn: :text-bravo:

Share this post


Link to post
Share on other sites
 
dbartlett1958

That is what I call using your brain instead of your back. Easier on the fingers too.

Great work.

Share this post


Link to post
Share on other sites
 
varosd

great idea Duff! I mount my 85 pound JD (gasp! :hide: ) plastic weights with threaded carriage bolts. I wax the rim and finally got the correct height on the wood blocks and slide them on! I reallyjust need to get another set of beater tire/rims and just leave them (weights) on as a "snow" tire combo. :rolleyes:

Share this post


Link to post
Share on other sites
 
JimD

Very clever Duff! :)

Share this post


Link to post
Share on other sites
 
SPINJIM

Great example of "brains over brawn". Thanks for sharing. I've been putting off switching some weights and wheels, and now you've made it easier on my back.

Share this post


Link to post
Share on other sites
 

Create an account or sign in to comment

You need to be a member in order to leave a comment

Create an account

Sign up for a new account in our community. It's easy!

Register a new account

Sign in

Already have an account? Sign in here.

Sign In Now
Sign in to follow this  

×
×
  • Create New...