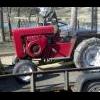
1054josh 25 #1 Posted March 19, 2012 i would like some help on how to mount the pump to the tower. The 702 has a manual lift thats wore out and i have the pump and cylinder but unsure about how to mount and where thanks Josh 1 Share this post Link to post Share on other sites
Kelly 1,028 #2 Posted March 20, 2012 You will need the plate that bolts to the pump face, the big plate that bolts to the tower that the plate on the pump bolts to, the small pulley that goes on the end of the crank to run the pump, belt guard, bracket that bolts to the rear axle, the rock shaft that replaces the lift arm, and on a 702 they had a box to relocate the push button and key switch, I have pics of one mounted on a 63 tractor pretty much the same, but the switch box is not needed, and the rock shaft is different for the 63 up tractors, I can try to get pics of the parts you will need in the next few days, these are of my 63 machine to give you a idea. And Share this post Link to post Share on other sites
1054josh 25 #3 Posted March 20, 2012 thanks all that info helps. a pic of the mount on the tower would be helpful so i know what im looking for. i have the right pulley on motor and the plate on the pump. i also have the mount for the rear axle i just dont have the mount on tower and the rock shaft parts. Share this post Link to post Share on other sites
Kelly 1,028 #4 Posted March 20, 2012 The pulley for the engine is very hard to find, it's a single sheave, and is just a little smaller in diam. than the 3 sheave engine pulley, and it is narrow for a 3/8" belt. I'll get pics of the all the parts, in a day or so. Share this post Link to post Share on other sites
1054josh 25 #5 Posted March 20, 2012 Ok thanks so much it all helps Share this post Link to post Share on other sites
stevasaurus 22,234 #6 Posted March 20, 2012 If Kelly does not have the parts, try sending a PM to IndyWH...he is selling o-rings and gaskets for these, he may just have what you need to make it whole. Kelly, that looks real nice on that 63'. Share this post Link to post Share on other sites
GT14 243 #7 Posted March 20, 2012 Nice job, I did the same years ago with an electric over hydraulic convertible top lift. Share this post Link to post Share on other sites
Kelly 1,028 #8 Posted March 21, 2012 I got a few kinda better pics of the mounts on the tractor. If you look close you can see the add on pulley is smaller than the drive pulley, and is for a 3/8" belt not a 1/2" like the drive pulley Axle bracket Rock shaft on my 63 Share this post Link to post Share on other sites
Kelly 1,028 #9 Posted March 21, 2012 Here is pics of most of the parts to install a HY kit. Bracket that bolts to the dash tower bracket that bolts to pump Belt guard for pump pulley switch box needed that bolts to the left side of the dash tower to mount the push button and key switch, if you look at my post above of my 63 you can see they put holes to mount the switches in the 63 and newer tractors Picture is sideways left side of pic is bottom. rear axle bracket to mount the lift cyl. Rock shaft for the 61 and 62 tractors Rock shaft for 63 and newer tractors add on pulley needed to run the pump, takes a 3/8" belt 1 Share this post Link to post Share on other sites
1054josh 25 #10 Posted March 21, 2012 I just pm u thanks a bunch it all helps Share this post Link to post Share on other sites
Kelly 1,028 #11 Posted March 21, 2012 There externally is two pumps, the first is for the add on HY kits, note how the valve sticks out and the handle screws in to it. This pump is from a 953 or 1054, note how the valve is flush with the pump face, the handle is made of flat stock and bolts on withe two screws, no handle on this pump. Both pumps will work, but to be correct you need the round screw in handle, also be sure the return spring is good, you should be able to pull the handle foward or back and it will self center, if not it will have to come apart and a spring put in it, there is two style springs, you have to open it to be sure what one you have. 1 Share this post Link to post Share on other sites
1054josh 25 #12 Posted March 21, 2012 I just pm u thanks a bunch it all helps Share this post Link to post Share on other sites
Martin 2,130 #13 Posted March 21, 2012 kelly, that pulley looks similar to the hyd. pump side of the two row pulley on my 1054. do you think that wh used the same dimensions and added the drive side to make the double? 1 Share this post Link to post Share on other sites
Kelly 1,028 #14 Posted March 21, 2012 I'm going to say yes Martin, it probably is I know the pump pulley is the same, so to keep the ratio correct the front pulley should be the same diam. 1 Share this post Link to post Share on other sites
AMC RULES 36,945 #15 Posted March 21, 2012 Is it difficult to rebuild these pumps, any special tools required? :scratchead: Share this post Link to post Share on other sites
1054josh 25 #16 Posted March 21, 2012 I tore mine apart last night with minimal effort and didnt have any special tools other than small long punch to get out the spring pin that was holding the return to center spring in.of coarse it was broken so now lookin for an old style spring 1 Share this post Link to post Share on other sites
AMC RULES 36,945 #17 Posted March 21, 2012 Did you take any picts to document the process Josh? Share this post Link to post Share on other sites
1054josh 25 #18 Posted March 21, 2012 I did but camera was set to high of resolution and the forum wont allow that big of file to be uploaded but i will change that and definitely change that and take more and then post them sorry bout that 1 Share this post Link to post Share on other sites
AMC RULES 36,945 #19 Posted March 21, 2012 :thanks: Share this post Link to post Share on other sites
Kelly 1,028 #20 Posted March 21, 2012 Here is the two style springs, the first is the later style, a much better set up if you ask me. This is the early style. new style ready to put back together, nothing hard to them, unless the early style spring is broken, then getting the pieces out can be a pain. lift cyl. ready to assemble Share this post Link to post Share on other sites
1054josh 25 #21 Posted March 21, 2012 Laugh out loud so that's what my spring supposed to look like Share this post Link to post Share on other sites
Martin 2,130 #22 Posted March 21, 2012 Is it difficult to rebuild these pumps, any special tools required? I tore mine apart last night with minimal effort and didnt have any special tools other than small long punch to get out the spring pin that was holding the return to center spring in.of coarse it was broken so now lookin for an old style spring Did you take any picts to document the process Josh? i have done one for my 1054, some info is in my 1054 rebuild thread and im going to say it wasnt that difficult from what i remember. theres many others on redsquare that have done them too...... i have the later style spring in mine. if you do a search for hy-2 pump or hein-werner or similar theres a bunch of info on redsquare on this subject. theres also some manuals...... HY-2_A-7140.pdf HY-3_A-7140.pdf Share this post Link to post Share on other sites
AMC RULES 36,945 #23 Posted March 21, 2012 Thanks Martin. :) Share this post Link to post Share on other sites
1054josh 25 #24 Posted March 28, 2012 This is the center bolt that i took out to get pump reservoir off this is were the spring is supposed to mount to the control lever this is were the spring mounts to pump housing to return the control lever to center once this rod is unscrewed u can remove the snap ring clip then the control is pushed out and the only seal on it is a o-ring gears under the coverand the new pump shaft seal from napa thats behind the drive pulley 2 Share this post Link to post Share on other sites
AMC RULES 36,945 #25 Posted March 28, 2012 :text-goodpost: :text-coolphotos: Share this post Link to post Share on other sites