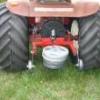
jhunsch 20 #1 Posted February 15, 2011 Fly wheel Magnet help. I don`t know were the magnets go, ????? To the top edge or do they lay down on that ledge in the fly wheel. I placed to magnets in the fly wheel. In the pictures on the Left side is top edge, right side it is on the ledge I am asking about its about ¼†difference. So what`s the right placement. What about spacing of the magnets, I can not see where they might have been originally, I cant even tell if they were glued in or not. There are no signs/indications. The magnets do not appear to be damaged in any way at all, Not one nick or ding. I read about someone putting magnets back in with JB-weld. Of course I will clean everything up real good first. Believe it or not this 20hp Kohler ran with the fly wheel like this it ran poorly but it did run, and I think I am very luck not to have caused a lot of damage. I just happened to turn the motor over buy hand and was looking in behind the fly wheel and saw one magnet move and new that wasn`t right. So here I am Red Square I need help in getting this old 20 hp Kohler back up and running. Jeff Share this post Link to post Share on other sites
Fiscalyear 0 #2 Posted February 15, 2011 Jeff, looks like you may have dodged a bullet. Luckily the magnets stuck to the flywheel drum. The theory of magnets is one end is a positive end and the other end is negative. Looking at the pictures you posted, is there one of the magnets still bonded to the drum? If so, you may want to leave it in place and proceed to clean up the area to adhere the loose magnets. Yes they will need to be bonded to the drum with what ever type of adhesive you choose (JB Weld works). Simply polish up the area with steel wool or fine sandpaper or your choice of compound. Clean also the contact surface of the loose magnets. Adhesion surface only on the magnet is fine. Now we're ready to bond the magnets back in place. Their exact location with respect to top edge or lower in the drum would make very little difference. I would place them about 1/8 of an inch below the upper/outside edge. Now for the positive and negative relationship. If one (or two) of the magnets are to stay bonded in the drum then you should hold one end of a loose magnet near the end of a fixed magnet and determine if the magnets are attracted to each other or are repelled from each other. They need to be attracted to each other. This simple check of polarity must be done on all magnets all the way around the drum (all 6 magnets). Spacing between magnets just needs to be approximately the same all the way around. In other words the magnets ends polarities would be, pos/neg - pos/neg - pos/neg, etc. all the way around. You will not have control over the air gap between the magnets and the coils of the stator. Again, no problem, as long as the magnets do not touch the coils. I hope this helps. Eddie Share this post Link to post Share on other sites
Save Old Iron 1,573 #3 Posted February 15, 2011 Eddie has given good solid advice. It is the transition from a north to south magnetic field that induces current flow into the stator coils. I would add a few comments. First, the spacing of the magnets should be considered to be important - not from a stator function standpoint, but from a DYNAMIC BALANCE standpoint. Try to re-establish original placement or at least try to keep the spacing equal around the inner diameter of the flywheel. If you wipe down the inner wall of the flywheel with mineral spirits or acetone, enough of the rust residue might be removed to allow an "image" to emerge of the original position of the magnets. Placing the magnets in their original position may assist in maintaining the balance of the flywheel. Second, when using an adhesive, be careful not to use too thick an application. This may force one or more of the magnets into the stator coils. I used spring loaded woodworking clamps to squeeze the magnets into the flywheel to help keep them positioned. I also inserted small slices of wood between the magnets to keep the spacing about equal. Share this post Link to post Share on other sites
woodchuckfarmer 333 #4 Posted February 16, 2011 Ive used J B Weld for glueing magnets on a 12 hp tucky (3 of them) , be sure to clean and degrease . You should have no problems with this repair Share this post Link to post Share on other sites
jhunsch 20 #5 Posted February 16, 2011 Ive used J B Weld for glueing magnets on a 12 hp tucky (3 of them) , be sure to clean and degrease . You should have no problems with this repair Thank you for your time and response to me. You have helped a great deal, Its good to know your out there and are willing to help. As for the Magnets, I noticed in the Pictures there is always one magnet centered on the magnet for the Ignition Module, so I think that will be my starting point and go from there and space them out as best I can. I can see the magnets now pretty good with all the shields removed so I will set 2 or 3 in place at different places ( depths) and put the fly wheel back on to see how they ride above the stator. After all this is done, & after double checking N/S orientation I will clean, test fit, and glue. It will be awhile but I will post picture as I go along and the final finished fly wheel. Thanks again to everyone. Jeff Share this post Link to post Share on other sites