ftlboy717 0 #1 Posted December 26, 2010 hey all,i have a raider 12 i recently got the pto parts i need i got the loop style pto setup so i had tyo do some changeing....i got all that done(ill have pics soon) but ne way i got the rod that bolts to my block for the pto a few days ago and theres two bolts that hold it on,well my block casting on the side doesnt allow me to bolt the rod on.the one bolt hole works but the other will need a spacer. my engine is kohler k321 and it has a line on the side of the block were the rod should bolt on this causes the rod to set on there at an angle,any one no if my engine had a different pto setup on it or maybe my engine isnt of a tractor,it had a wierd looking three piece pully on it when i got it. ill get some pics up here soon to better describe it to everyone its kinda hard to explain it,pics will show all Share this post Link to post Share on other sites
TT-(Moderator) 1,170 #2 Posted December 26, 2010 Yeah....... you're gonna need to post pictures. The "loop" style PTO doesn't have a rod bolted to the block. If the face on the PTO side of the block has a step machined for use in certain applications (like many Gravely, Power King, or Case engines) it will interfere with the top bracket for the PTO engagement assembly. Part #25 in this image: One of the easiest ways around it is to weld a piece of flat stock (the same thickness as the height of the step) to the back of the top bracket so it won't pull back when tightened. Share this post Link to post Share on other sites
ftlboy717 0 #3 Posted December 27, 2010 im going to take some pics right now to show you what i mean Share this post Link to post Share on other sites
TT-(Moderator) 1,170 #4 Posted December 27, 2010 Is this what the block face looks like?: Share this post Link to post Share on other sites
ftlboy717 0 #5 Posted December 27, 2010 yes that the same as my block,then you understand what i am talking about with the pto rod,am i missing a spacer or something or is my block for the other loopstyle pto? i bought a loop style pto clutch and i had to grind it out for the other style i have all that donbe but now i have to get that rod on,which wont be a problem i can put a spacer with a longer bolt or make somekind of plate i was just curios what my engin was off of.also i just got the right engine pully for my tractor and i had the puller on it to get it off and i cracked it ,i think its cast i was told u can weld cast but from my experiance with my welder it never holds like it should. i have a mig and i was told you need a stick welder with a special stick called a cold stick? then some one told me to heat it up prior to welding it and someone else told me i can only weld it little bits at a time so i dont get it to hot. any advice on this? :ychain: Share this post Link to post Share on other sites
ftlboy717 0 #6 Posted December 27, 2010 here is my block the pic is not the best but you can see the casting,i also had a mount that went on the side above the crankshaft Share this post Link to post Share on other sites
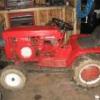
ftlboy717 0 #7 Posted December 27, 2010 the pic turned out better on here than on my camera.so just ignore the bad pic part... you can also see were i removed the bracket on the block,its not painted in that area. i redid my whole tractor this summer but it wasnt perfect so i am redoing it again,i want it to be 110% flawless,which we all no nothings ever perfect,theres always something to do. hopefully by the summer it will be ready to show Share this post Link to post Share on other sites
TT-(Moderator) 1,170 #8 Posted December 27, 2010 Is this the PTO set-up you have?: How bad is the engine pulley? Can you get a picture? Before you put it on again, polish the entire PTO end of the crankshaft with emery cloth and put the anti-seize to it. Share this post Link to post Share on other sites
Anglo Traction 761 #9 Posted December 27, 2010 We have been here before with this problem . Here is the link to your other post on this. Check it out before you go any further. http://www.wheelhorseforum.com/index.php?showtopic=23318 As mentioned before, The Original Pto Rod/Clutch setup is as Terry (TT) just posted. It may be possible to use the later Setup, but as you have found it won't be straight forward, especially fitting the Levers etc in the Hood Stand. I have PTO parts for the later C series, so I'll have a look to see exactly what you need to do IF you want to use this later Style. Share this post Link to post Share on other sites
ftlboy717 0 #10 Posted December 28, 2010 yes that is the pto setup i have .ive got all the parts i need since my last post.all i need help with now is my block.the rod doesnt fit like it should Share this post Link to post Share on other sites
TT-(Moderator) 1,170 #11 Posted December 28, 2010 You need to find a piece of flat steel that's the same thickness as the height of the step on the block face. Radius one side so it will fit against the edge of the step and drill the hole for the rod assembly mounting bolt. Something like this: Make a template out of heavy paper or the cover of a notebook first. It will stay in place once the bolt is tight - or you can tack-weld it to the rod assembly once it's bolted to the engine. Share this post Link to post Share on other sites
WheelHorse_of_course 101 #12 Posted December 28, 2010 You need to find a piece of flat steel that's the same thickness as the height of the step on the block face. Radius one side so it will fit against the edge of the step and drill the hole for the rod assembly mounting bolt. Something like this: Make a template out of heavy paper or the cover of a notebook first. It will stay in place once the bolt is tight - or you can tack-weld it to the rod assembly once it's bolted to the engine. If you can find a fender washer the right thickness you might be able to use that. Share this post Link to post Share on other sites
ftlboy717 0 #13 Posted December 28, 2010 thanks,i have some steel left over from my dual wheel kit i made im going to try cutting that down Share this post Link to post Share on other sites