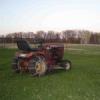
kajamo240 3 #1 Posted October 12, 2009 As it sounds that snow is about to fly up here in the midwest, I figured I would try to get the new snowblower hooked up and ready for whatever mother nature throw's at it. The picture below is not of my actual snowblower but I'm only using it for illustration purposes. My blower is pre attach-a-matic and when I try to line up the bolt to go thru the frame via the pre-drilled holes, the attach-a-matic on my tractor is hitting the sloppy welds on this bracket, therefore, preventing the blower to slide all the way onto the frame and not allowing it to be attached. Now here is my question... Do I take the time and energy to file down the crappy weld or just go all out and cut off the whole brace? Share this post Link to post Share on other sites
Doubletrouble 10 #2 Posted October 12, 2009 Couldn't you take the front tach-o-matic off the tractor? Would that work? Can you get a pic of the tractor and your snowblower to get a better idea of what's goin on? Share this post Link to post Share on other sites
kajamo240 3 #3 Posted October 12, 2009 I had thought of that too but the hood is attached to the front attach-a-matic. So I guess that I could do that but I wouldnt have a hood... I am going to take another look at it tomorrow and will get some actual pictures of what is happening. (Hands were too dirty to be handling the camera earlier) Share this post Link to post Share on other sites
kajamo240 3 #4 Posted October 15, 2009 Ok here we go. This is my dilemma. Actual pictures this time... Here you can see the front attach-o-matic and the brace holes for the snowblower. All is good at this point... Now I slide the snoblower onto the frame and the front attach-o-matic hits the large weld on the snowblower which is not allowing it to slide all the way back. Now I am left with this small little gap of space that needs to be made up for the bolt to go thru the frame and attach to the other side. Now back to my original question, do I cut off that bracket on the snowblower to allow it to slide all the way back on the frame? Would this then ruin the structural integrity of the snowblower? Would it matter if its not there? At first I didnt think it would be a big deal until I thought how that maybe that bar is necessary to assist push the snowblower forward as opposed to just that small bolt. Any suggestions? Share this post Link to post Share on other sites
nylyon-(Admin) 8,835 #5 Posted October 15, 2009 I'm just guessing (and I suppose we can validate with some measurements) but why not put a steel rod through the hole on the blower bracket and hook up to the attach-a-matic? I haven't taken my blower out yet (soon) but it looks the same as that one except it has the rod through the hole. Share this post Link to post Share on other sites
canam1991 2 #6 Posted October 15, 2009 You are missing the rod that goes though the holes on the blower. look at the pic about that in how it should be there is no bolts that go though the frame... Share this post Link to post Share on other sites
TT-(Moderator) 1,169 #7 Posted October 15, 2009 You are missing the rod that goes though the holes on the blower. look at the pic about that in how it should be there is no bolts that go though the frame... As Matt has already stated, his thrower is pre Attach-A-Matic and that is how it is supposed to mount - with a long bolt through the holes in the side of the frame. ~~~~~~~~~~~~~~~~~~~~~~~~~~~~~~~~~~~~~~~~~~~~~~~~~~~~~~~~ Let me see if I can get close enough to my thrower to get a measurement and a picture or two for you , Matt. Stay tuned......... Share this post Link to post Share on other sites
TT-(Moderator) 1,169 #8 Posted October 15, 2009 OK, Matt....... see if these will help: Share this post Link to post Share on other sites
kajamo240 3 #9 Posted October 15, 2009 Thanks TT. Now thing brings up another question or two. So would it be ok if i just removed the bar that is keeping it from bolting through the frame? Would that thin bolt be able to handle the pressure that is being put on it? ~~~ OR ~~~ Do i just chop it down and make it a attach-o-matic with a little fabrication and welding? I think option 2 may be best with TT's measurements... but :scratchead: Share this post Link to post Share on other sites
TT-(Moderator) 1,169 #10 Posted October 16, 2009 I would either alter your existing mounting frame to match the dimensions/design of the newer ones like mine OR you can try to find a used mounting frame for a newer one and bolt it on your thrower. (they are still available new from Toro but cost around $75. ) Share this post Link to post Share on other sites
kajamo240 3 #11 Posted October 16, 2009 Yeah, that is a little ridiculous. I think that I will fabricate this to become an attach-o-matic. I will make it easier for me in the long run. TT, another favor... Its a little difficult to see the measurements that you have pictured above. Would it be possible if you could post the actual measurements for me? Thanks. Share this post Link to post Share on other sites
TT-(Moderator) 1,169 #12 Posted October 16, 2009 The length to the center of the attaching rod is 9 3/4" and the width is 6 7/8" inside to inside. :scratchead: Share this post Link to post Share on other sites
kajamo240 3 #13 Posted October 16, 2009 Thanks. I plan on getting the whole chopping and welding done this weekend and will post some pics of it when its done and attached. Again, thanks for your help on this. :ychain: Share this post Link to post Share on other sites
TT-(Moderator) 1,169 #14 Posted October 16, 2009 Thought I'd mention that you can just add spacer sleeves to the mounting rod to center it in the front hitch instead of altering the width of the mounting bracket. A piece of 3/4" black pipe cut to length should work fine. Share this post Link to post Share on other sites
kajamo240 3 #15 Posted November 3, 2009 So there were a few bumps in the road when trying to get this done but I finally got this done. Did it a little differently than planned but I think it will work out. I dont have pictures yet but I hope to be posting them soon! A pre attach-o-matic has been turned into an attach-o-matic! Its not the prettiest thing in the world but it will do! None of the structural integrity was sacrificed when doing it either. I will get some pictures posted tomorrow evening for all to see! Thanks for all the help guys :scratchead: Share this post Link to post Share on other sites