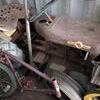
Dave D. 69 #1 Posted September 5 I thought that I would start a thread of this little tractor. Got a trailer hitch so I can pull it out of the container. Got some C-clips to secure the front wheels. Searching for a shift lever and now I'm working on the steering wheel. As it gets cooler, I'll get more done on this project. Gonna be a long term project. Thinking I'll flush the trans with diesel fuel and put Penetrol on the tractor for the patina. Looking at engine options. Liking the idea of a diesel or Predator just to get it going. More progress to come. Thanks for all the information and advice. The PC-7 will need more coats. Dave Dave 5 Share this post Link to post Share on other sites
702854boy 1,106 #2 Posted September 5 What happened to the steering wheel that it looks all melty? Share this post Link to post Share on other sites
Dave D. 69 #3 Posted September 6 That's the PC-7 I put on where the bakelite was missing. Hoping to sand it back smooth. Dave 1 Share this post Link to post Share on other sites
Dave D. 69 #4 Posted September 7 Worked on the steering wheel today. Steering wheel is just about done. Dave 5 2 Share this post Link to post Share on other sites
Dave D. 69 #5 Posted September 7 The hard part is getting the missing part round. Take a lot of hand sanding. Just a little more PC7 in 2 places. Dave 1 Share this post Link to post Share on other sites
sqrlgtr 3,731 #6 Posted September 7 2 hours ago, Dave D. said: The hard part is getting the missing part round. Take a lot of hand sanding. Just a little more PC7 in 2 places. Dave @Dave D. Just wondering how much time do you have to give the PC-7 epoxy before you can start shaping it? I would like to have a few of the wheels Ive thrown away over the years, could've probably saved them but had no idea about trying anything like this, heck there may not have been anything like PC-7 back then though . BTW looking good and will be following along with interest. A 551 burb is what got me started in this endeavor some 35/40 yrs ago and I still have it. 2 Share this post Link to post Share on other sites
Dave D. 69 #7 Posted September 7 22 minutes ago, sqrlgtr said: @Dave D. Just wondering how much time do you have to give the PC-7 epoxy before you can start shaping it? I would like to have a few of the wheels Ive thrown away over the years, could've probably saved them but had no idea about trying anything like this, heck there may not have been anything like PC-7 back then though . BTW looking good and will be following along with interest. A 551 burb is wha grt got me started in this endeavor some 35/40 yrs ago and I still have it. That's a good question. I left the PC-7 to dry overnight. I feel like doing bodywork with Bondo, if you caught it earlier, it would sand faster. I used 80 grit on a DA sander to somewhat shape it first. Then I used 180 grit not staying in one place too long. The hard part was the area where there was no bakelite at all. It was built up so thick that it took a lot of hand sanding. Now, about 2 small places on the bottom and one low spot I still need to put some more PC-7 on. This will be hand sanded since it won't be so thick. Then, adhesion promoter and flexible primer and I'll spray on the Rust Oleum truck bed liner. Dave 3 1 Share this post Link to post Share on other sites
Dave D. 69 #8 Posted Thursday at 06:21 PM Progress. Steering Wheel is taking shape. Sanding it round. Now, I just have to sand in the finger grips. Dave 1 1 Share this post Link to post Share on other sites
Dave D. 69 #9 Posted Friday at 11:37 PM Soon, maybe it will be cool enough to flush the trans on the 551. Waiting to re-install the steering box on the Ariens and then back on the 551. Steering bevel gear and shifter collar on order. Gonna look at coating the rusty patina with Flood Penetrol. Dave 1 Share this post Link to post Share on other sites
ineedanother 2,817 #10 Posted Friday at 11:49 PM 3 minutes ago, Dave D. said: Soon, maybe it will be cool enough to flush the trans on the 551. Waiting to re-install the steering box on the Ariens and then back on the 551. Steering bevel gear and shifter collar on order. Gonna look at coating the rusty patina with Flood Penetrol. Dave Looks great. A couple things...be careful with the penetrol on the decals. Usually fine but I've found that some will lift around the edges. That's very few that I've had and I use it quite a bit. It's a really good treatment for patina so just test it before you give it a full bath. As far as the flush is concerned, you might want to go ahead and see where you can source oil seals. It's not uncommon for old, dry seals to leak after a flush. They're available. 2 Share this post Link to post Share on other sites
Dave D. 69 #11 Posted yesterday at 12:40 AM Thanks, I'll go easy near the decals. I think the trans turns. Seals are a good idea. Dave 2 Share this post Link to post Share on other sites
Dave D. 69 #12 Posted yesterday at 03:09 PM Today I started the tranny flush. Added some 80W-90 open bottle I had in the shop. Drained out the fluid and I think that's all that came out in the drain pan. Filled tranny with 2 qts. of diesel and spun the wheels on jack stands. It must be in neutral because the pullley is not spinning. Installed the shifter and I can't move it. If the shifter is in it hits the gears and makes noise when I spin the wheels. The shift forks must be out of alignment. The diesel is pouring out of the axle seals, so good call on that. They will need to be replaced. Gonna let the diesel sit for a week or so. Got to get a new shifter boot, clutch spring and seals. Doesn't look too bad so far. What I can see doesn't look rusty or mirky. Looks like there might be some rear wheel weight bolted on the inside of theose rear wheels. Gonna start studying the transmission manuals and threads. If I can figure out how to make it shift, I can hook up a pulley on a drill or something to make the wheels spin to get the diesel all run through the rear end. Dave 1 Share this post Link to post Share on other sites
gwest_ca-(File Mod) 12,458 #13 Posted yesterday at 04:42 PM There is a hump in the base of the transmission that prevents all the fluid from draining. Raise the front of the tractor as high as you can to get it all out. 2 Share this post Link to post Share on other sites
Dave D. 69 #14 Posted yesterday at 07:26 PM Got the front end up a little. I'll get it higher when I go back out there. Really hot out there in the container. Thanks, Dave Share this post Link to post Share on other sites
Dave D. 69 #15 Posted 13 hours ago What is it telling me that I can't shift the trans and if I put the shifter in and spin the tires the shifter is rubbing gears. Seems the shifter forks are not in the right spot. Looking at tranny videos now. Dave Share this post Link to post Share on other sites
953 nut 68,534 #16 Posted 12 hours ago The pivot point for the shift lever is a ball that seems to be missing. Take a look at this thread. Share this post Link to post Share on other sites
Dave D. 69 #17 Posted 8 hours ago Thanks again, now I know what to look for in the shift forks. I just stuck in the new shifter, but didn't align the hole with the set screw that's still there. I'll try it again next time. Dave Share this post Link to post Share on other sites
Dave D. 69 #18 Posted 8 hours ago Sure am learning a lot! Here is the tranny from the top: Thinking some shifter fork alignment might be in order. Dave Share this post Link to post Share on other sites
oliver2-44 11,699 #19 Posted 7 hours ago That is the 1st suburban I've seen with inside weights. I'm curious what original brand they are. Of course it doesn't matter since the fit your suburban perfectly. Before you replace the seals move the axle shaft & hub up/down and side to side. if it moves more that a tiny tiny bit, your bearings are worn. worn bearings that allow the shaft to move will wipe out the new seals fairly fast. That 3 piece transmission has bronze sleeve bearings, not needle or ball bearings. Here a new sleeve bearing being driven in. 1 Share this post Link to post Share on other sites
wallfish 20,511 #20 Posted 2 hours ago 4 hours ago, oliver2-44 said: That 3 piece transmission has bronze sleeve bearings, not needle or ball bearings. 551 has a 2 pc trans They appear to be Wheel Horse weights. Here's mine. Kinda rare as we don't see very many of them 1 Share this post Link to post Share on other sites
Dave D. 69 #21 Posted 1 hour ago I like the weights. Pretty Cool! A front tombstone weight and rear wheel weights also. This keeps surprising me. Just researching the transmission. Pretty sure I'll have to dig into it. Not looking like fun, but the more I research, the more doable it seems. Thanks, Dave 2 Share this post Link to post Share on other sites
ML3 2,485 #22 Posted 1 hour ago 1 hour ago, wallfish said: 551 has a 2 pc trans They appear to be Wheel Horse weights. Here's mine. Kinda rare as we don't see very many of them I believe the RJ/Suburban rear wheel weights could be used on the inside or outside of wheels??? Definitely don't see them often. The wheel weights & front tombstone weight are definitely uncommon. 1 Share this post Link to post Share on other sites