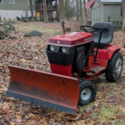
Alrashid2 476 #1 Posted February 21 Hey guys. If you've followed some of my other posts here recently, I just replaced the tires on my Wheel Horse 312-8. Originally, I had 22x7.50-12 turf savers on her, and upgraded to 23x8.00-12 Carlisle All Trails. They're awesome! Despite the size only being 1" more in diameter (22 to 23 in), it is actually nearly 4" more in diameter than the old tires! Even still, had clearance and they fit perfectly on the horse. Here is where the dilemma came in. When I first got my plow installed, I found that I didn't have enough clearance to make it up my shed ramp into my shed - the plow would hit the door opening, even with the plow adjusted to be as high as possible before the frame hit the axle! At the time, I actually drilled a fifth higher hole in my plow adjustment, to put it into what I call "Transport Mode". When the plow is tipped up like this, obviously you can't use it but it helped me gain a ton of ground clearance, and make it into my shed with a few inches to spare. Anyway... when I got the new tires, I hadn't even thought about how larger rear tires would raise the rear end, which would tip the front end lower... lo and behold, even in Transport Mode, I couldn't make it back into my shed now... Nooo!! So today, I used some spacers on the rear Attach o Matic bracket. Using a bit of trigonometry, I calculated that lowering the rear of the frame by 3/8" with a spacer would raise the front of the plow by 1", which ended up being true. Sweet! My plan was to put 2 spacers (3/8" x 2 = 3/4" = raising the plow 2") but unfortunately my carriage bolts weren't long enough for a second spacer. I actually got to talking to some people on one of the Facebook Wheel Horse groups, and a guy recommended something I had never thought of or seen discussed here: he recommended flipping the part of the plow called the Sector and Channel. This is the piece in the front of the frame that locks the plow into the 3 angled positions. If you look at it, it's nearly a mirror image if you flip it upside down, except for 2 things: 1. The plow attaches at the bottom of this component, so flipping it would now attach it to the top, raising it about 1"! 2. The hole on the bottom left side, where the bar attaches that attaches to the lever that allows you to switch between the 3 angles, does not exist on the opposite side on top. So, had to measure and drill it out myself... It ended up working! Now I've got my high plow clearance again, and it actually wasn't very hard to take this component out and drill out a new hole. Here is the only con to be aware of: flipping this component totally changed my plow angles. The fifth hole I drilled for Transport Mode was now an extreme version, with the plow being nearly horizontal. The top most hole (1 of 4) that I used to use for most of my snow plowing was now at the same angle as Transport Mode. The top hole (1 of 4) used to put my plow at about 55 degrees - now I have to be in the third hole (3 of 4) to replicate that. Likewise, the angle that used to be achieved with Hole 2 now needs done with Hole 4. What this means is, the more aggressive angles originally achieved with Holes 3 and 4 no longer exist. I never used those, so this tradeoff is OK with me, but something to be aware of. Just wanted to share. Lots of pics attached. I hope this helps someone out! 4 Share this post Link to post Share on other sites
JoeM 10,070 #2 Posted February 21 Yep, can be an issue. I have had to remove the blade to get machines with plows on one my trailers. Share this post Link to post Share on other sites
peter lena 9,930 #3 Posted February 21 @Alrashid2 plow functional detailing is too often missed , your schematic drawing , # 7 SWING QUADRANT ,ALSO SWING LEVER ARM AND RELATED MOUNTING , combine that with graphite lubricated blade face / for blade slide off , do a set up built on milk crates , one at rear of frame , the other up front just before swing area ? that way its suspended , just like on tractor , KEY TO USE A ROLLER STOOL , now you can zip around it and ENHANCE EVERY SLOPPY MOVEMENT START , also used shoulder bolts , on swing lever to frame ? lets you retain perfect lubricated / washered , SWING POINT , my swing quadrant works like a rifle bolt , the inner spring runs the entire function ! eliminate all / every bit of squeeze lever , play that gives instant response to the quadrant slide spring , red aerosol grease , every step , this entire set up , easily , hooks up to tractor frame , hitch pin clips or rear frame levers , push in to last hole ? that way they will not fall out , lube and verify as you set up , years in use , pete Share this post Link to post Share on other sites
Wishin4a416 2,597 #4 Posted February 21 I have to back my machine into my shed because of no clearance. Tx.!!! 1 Share this post Link to post Share on other sites
oldlineman 1,748 #5 Posted February 21 I always back in so I can plow my way out. 3 Share this post Link to post Share on other sites
wallfish 20,157 #6 Posted February 21 10 hours ago, Alrashid2 said: I actually got to talking to some people on one of the Facebook Wheel Horse groups, and a guy recommended something I had never thought of or seen discussed here: he recommended flipping the part of the plow called the Sector and Channel. This is the piece in the front of the frame that locks the plow into the 3 angled positions. Glad those facebook guys got you figured out! 1 Share this post Link to post Share on other sites
Lee1977 7,681 #7 Posted March 1 Wheel Horse made some steel block spacers to lower the rear tact-a-matic. Some one poster a set back some years ago. Go and buty some 1/2" treaded rod with nuts and washers. I've always used treaded rod to mount my wheel weights. Share this post Link to post Share on other sites