
Leaderboard


Popular Content
Showing content with the highest reputation on 10/14/2017 in Posts
-
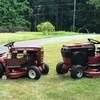
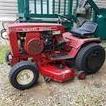
9 pointsHad all three out today, hopefully the c160 is going to a new home tomorrow.
-
7 pointsI am in the process of restoring a 72 Raider 8 and decided I would beef it up a bit with a custom stack. Currently the motor is out of the tractor and am waiting for a rod, piston, cam shaft and bearing set. Motor was in total self destruct mode when the previous owner didn't check the oil 🙄🤦🏼♂️ So I made this stainless stack out of sch 5, 2 inch pipe and reduced to 1". Decided I didn't like to looks of threaded pipe so I found a couple valve parts to act as the flanges, and am going to weld the other flange to a threaded nipple and screw into the engine block. Let me know what you think! Trying to decide if I should leave it flat, mitre it or weld a turnout on it! Jake Also, I'm going to hold out for now until I can hear it run straight piped, but considering rolling a stainless screen down to 1" and packing gap between the stack and the screen with muffler packing. Has anyone else ever done this? Looking for ideas and comments are welcome! Jake
-
6 pointsTook off the center "tower" piece today and found the bottom had broken off but still held on by the bolt. Cleaned up both pieces, put a magnet behind it and stuck the other piece to it. Welded them up along with two more cracks and then cleaned it all up. Also welded some small threaded flat "nuts" I made to hold the lever panel to it so I can remove it without taking the tower out. Post office brought me some goodies today..... two 90* mandrel bends in 304 stainless. Now I can build my muffler. 👍
-
5 pointsI myself have always been a Kohler guy...nothing beats an old K-Series for reliability, ease of repair, or power. Had a couple Tecumseh powered tractors for a while...wasnt impressed and got rid of them. My opinion (along with most people here I'm sure lol) is that the best combination is a Wheel Horse with a Kohler
-
5 pointsMake sure your PTO is completely disengaged... Might be just the PTO safety switch... Don't ask me why I suggest (know) this...
-
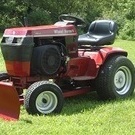
4 pointsHi guys, picked up new wheel horse 1055 yesterday as you can see it’s a pulling machine! All origanal except for starter wiring and some fuel hoses. Bought new plug, and new fuel filter cause the gas tank was full of crap. Little 10 Horse will have you in a wheelie in no time with that straight pipe adding lots of power. Had three of my wheel Horses at waters farm days in Sutton Mass (anyone in the area should come) left them for the night took this one home cause it wasn’t running right but got it to run like a top in no time. Very excited to pull with it tomorrow, will update you guys. And one more thing, the throttle only goes out about one cm. and I can’t figure out why I will look into it more though. Will get some better pics too
-
4 pointsVarious ideas were tried out for the seat using bits and pieces lying around and then discarded. A visit to a local upholstery shop with measurements resulted in a lottery win quote. Back to head scratching mode. I had already spent hours looking for something suitable on the internet without luck, trying various search word combinations. Then I spotted some cheap-ish scooter ( Lambretta / Vespa ) back rests. Not exactly what I wanted but worth a try. A pair were bought and after initial, not sure thoughts, the end result was better than expected. The fill in piece behind the seat cushion, made from plastic, still needs finishing off with padding. The first mock up from ply. The alloy frame, ex green house, just cleared the top of the gearbox. Fixing brackets were bolted on. Sheet steel was bent up for the base and back rest. There were two short threaded studs already fitted which made mounting easy. A length of U shaped trim finished off the steel plate and a similar section was fitted to the fuel tank. I finally managed to get my Great grandson Henry to try the tractor for size. Even though he is only 7 : 1/2 months he loved it. Mummy said she had never seen him so excited, squealing and swinging the steering wheel. We had to hold him though as mummy refused to let me cable tie him on.
-
4 pointsBasic rule of trouble shooting; when a new problem crops up take a look at the last thing you did. In this case the last thing you did was mow which means the PTO lever was moved. We have all done it, some just won't admit it.
-
4 pointsWho wants to be intelligent? No fun in that. Also nobody is perfect. I'm nobody. Therefore I'm perfect.
-
3 pointsTook my little 400 out for a ride today.
-
3 pointsFirst of all lots of people here know how I feel about Tecky's. This is a Tecky tool That being said, I'm sure there's some that have given good service.
-
3 pointsLast picture says it all! Phenomenal work.
-
3 pointsMore than once .
-
3 pointsThere were some odd incidents of welders dying a few years ago from using chlorinated brake cleaner to prep metals for tig welding - it left enough wet traces of chlorine in the joints of the metal to be welded that when burned in the argon envelope it created a concentrated puff of phosgene gas . With the welder standing over the weld and a hood the effects hit pretty quickly , starting with a very tired feeling . A few went and laid down for a short bit - that was the end of those guys . Took a lot of investigation to figure out how an otherwise healthy person was suddenly dead - since tig cannot tolerate any real air ventilation/flow that can interrupt gas shielding it put them in a badly concentrated situation and there were a lot of bulletins on the net about it . I've always used either acetone or non-chlorinated cleaners and allow the extra time and even using compressed air to finish removing any traces of chemical . The perfect weld isn't worth your life for sure.... Getting a highly wet sheen appearance isn't easy . It's all about how fast the paint flashes off it's solvents . If it flashes too fast it can actually have a very rough surface to the point of almost a dusty powder . Too slow - it not only doesn't want to dry but can run a lot easier . Different temperatures/humidity/sunlight all have a serious effect on flash time - adding hardeners will change it even further . Most times I have to run high temperature reducers on single stage enamels that have added hardeners - this allows the paint to "set" but not flash off completely , which allows it to flow out better and produce a much better initial shine . I do not buff most tractor jobs but if you plan on it make sure you can build enough layers properly to support buffing - you will remove some of it with the compound in a hurry . If you don't have a lot of experience you'll have to find either an auto parts store that has someone heavily trained/experienced in selling paint/chemicals or find an auto body supply that will sell to the public as many will not allow that - too much liability . Local and State laws where you live will dictate what you can buy as well - forget shipping any of this stuff with the exception of some of the paint itself . I've had some luck with Rustoleum Implement/Industrial paint in gallons and quarts - just painted my utility trailer a few weeks ago in their IH red - it is a fairly high solids paint for what you pay , sale price at TSC was $29.99/gal . The Majic hardener was around $16/can with one can being enough for that gallon . Mix hardener at it's mix ration prior to adding the reducer - for air spraying you'll have to go well past their recommended 10% limit on reducer/thinners . Many places that sell auto body supplies will carry either the regular ($$$$) PPG or the Shop Line paints and some of the best stuff I've used for the buck is the Western Auto single stage enamel - results were excellent . Off the shelf common enamels are getting very low on solids so it's tough to get a true color without quite a few coats and you have to adhere to re-coat time windows with it very closely - or risk having it boil the underlying layers . Allowing each coat to cure overnight and going over each coat with either 600+ wet sanding or a Scotch Brite pad to promote adhesion and shine quality goes a long way too . Took a gallon and 3/4 of IH Rustoleum Red Implement paint to get this trailer done - A buddy brought his mid size Kubota over yesterday and I rigged straps/chain to pick it off the jack stands to set it back on terra firma - no damage to the paint due to the added hardener . In another month or so , it will be fully cured and tough as nails . Sarge
-
3 pointsI did fire the K482 just once with straight pipes - sounded like a cannon on rapid fire at idle...lol . Here it is finished prior to painting... Sarge
-
3 pointsReally nice work..
-
3 pointsYou're gonna need one of these...
-
3 pointsLooks good! I can't really help with the packing and that. But I will say that I would definitely make sure you brace that stack. You don't want to do all that work to eventually have a cracked block or so on.
-
2 pointsWell, I've been so excited about this project that I need to share it. Can't tell my son though-this is going to be his Christmas present this year. He absolutely loves driving the C125 that I got from @oldredrider. I picked this ugly beast up for $50 at the auction in Charlottesville. I only wanted the deck from it. Got the idea to fix it up for Emory for Christmas. Best part is he thinks I'm doing it for me. Can't wait till Christmas morning for him to find out it's his. This is going to get the Vanguard I picked up last week. Got several ideas to make it just his. I'll share more later as I go. I do need to get in touch with @Vinylguy to get him to do a set of his custom decals for it. I'm going to need a little help hooking up the Vanguard. It's got one wire coming from under the tinwork and I'm not sure what I'll need. I'm thinking it will need a regulator, solenoid, and switch, but which do I use? Look at him in the last picture-no idea it is his! Oh well, that's enough for now!
-
2 pointsHello all, Figured I would share some info. I had to disassemble my d160 hydro pump motor and don't have a press. I also had no idea how far to press the shaft or how much force to use. I ended up using my small drill press to compress the spring and hold pressure downward on the shaft while i tapped down on the pump body with a rubber mallet. It popped with very little force. I think tapping it helped the most. Make sure to put a socket or something for the other side of the shaft to move into. Thanks, Pete
-
2 pointsPerhaps it's time to degrease the rest of it and go with a new shade? Don't think you will get back the original patina since it looks like the degreaser took off more than grease...
-
2 pointsBasically building a 418 muffler size wise but with just the one inlet. Also going to use a chrome heat shield setup off of a 418 Kohler magnum mounted to the rail that runs under the hood above the exhaust. Like in the pic.
-
2 pointsLet him grow a little more and you two will be fighting over who gets to drive the D. A great picture.
-
2 pointsLove the Black Hoods!
-
2 pointsYou can check fire by rolling the motor over and using your tongue! I remember working on a ladies car once. Opened the hood and dog food came flying out from the hole on the inside of the hood. Air cleaner box was full of Gravy Train. one of the guys in the shop had a truck with an electric carb heater base. Wouldn't start one day. Heating element cooked a bunch of cat food and melted enough to form a solid mass.
-
2 pointsI can see lots of scratches and scarring on the brass-surface parts. you MUST get the surfaces as smooth as possilble, using 220 400 600 progressive grit sandpaper on a FLAT surface. All 9 pistons and the valve plate....as well as the BASE of the cylinder block need refinished. Parts should look like this:
-
2 pointsOuch! Must have been a whamp, whamp ride!!!! LOL! Let me look at my spindle bucket o'parts for you to see what I have!
-
2 pointsAny 300 or 400 series with the same size front tires would work.
-
2 pointsHow about powder coated silver/ polished aluminum like the wheel covers I did this past spring?
-
2 pointsBIG mouse problem here in upstate NY too.Seems every thing that sits outside for any length of time turns into a rodent home.Doesn't matter what season it is either.Cooked a nice fan cooled Artic Cat Cheetah years ago due to mice clogging cooling fins.Cute little critters,but destructive as hell.
-
2 pointsClick on the picture. Then click on the small wiring diagram picture and it will enlarge. For a better look download the file. Garry
-
2 pointsHere is a coffee cup from the dealer I get parts from all the time. It's in South Leeds near Arlington Wisconsin. Jeff is the owner and he is quite knowledgeable about the older Wheelhorses. Its been in business a long time. South Leeds Garage. N905, US-51, Arlington, WI 53911 608-846-5748.
-
2 pointsI don't know what type engine is what. But if you could post a picture maybe that would help. If you have the same engine I have the bolts that mount the engine come up from the bottom. I have a small block and could have used a shallow pan and shorten the oil slinger and less modifications would have been required. But my property is sloped so I opted for the deep sump.
-
2 pointsGet the Kohler manual , either the pdf version here for older K series twin opposed engines or the paper versions but look for an original manual , not a copy as the photographs aren't very good at all . Sounds like you need to set the valves - it's pretty simple but it's a good idea to order the valve cover gaskets first as they tear easily during disassembly . Over time , as the seat and valve wear they can hold the valve open slightly which will severely drop it's power output and can burn an exhaust valve . Mine were down to nearly zero clearance , starts and runs perfectly now . Also , on the K482 - check the breather vent located on top of the governor - it has two long bolts holding it on . I ran a bit of brake cleaner through mine (non-chlorinated type) and got quite a bit of carbon out of it . I cannot find a replacement but would like to put a new one as mine is starting to develop several small leaks at the seals . If the breather can't function as it should - you lose the vacuum on the crankcase which helps keep the rings seated properly and can start causing seal leakage . It basically works just like a pcv valve from what I can see of it , just a spring loaded valve although it doesn't fully seal as there is a bleeder hole . That K482 is one of the best engines ever built - monster torque levels , decent oiling system and built like a tank , not to mention the weight of it's rotating mass . There are also settings for the timing - easy to check and set once you find/highlight the marks on the flywheel - settings are done through the governor housing slots . Sarge
-
2 pointsThis chart should get you cutting. Belts_Mower_spindle_and_drive_belt_charts.pdf
-
2 pointsIf your like most of us you,d better stick with the "Intellegent Post". angle🏉⚽️🏉
-
2 pointsI think the word has gone out through the Fastenal network... generally speaking, prices seem much higher in my area than they used to be. I'm getting the feeling...they're on to us Wheel-Horse guys.
-
2 points29 an counting... no good
-
1 pointI had a thread going in the tractors section called 701 black horse. Well I got it in early september. All was original except the fenders and the stop bracket for the lift arm. Well thanks to a fellow member I got the fenders and had the rest of the parts needed. I still have to install the fender brace and the dash plate. But after going through the engine and replacing what was needed. That followed with a days worth of straighten sheet metal and several days of paint stripping. The look it obtained grew on me. So everything got wet sanded and clear coated. It got all new fluids and everything that was needed mechanicaly. So overall this tractor had been previously painted 6 times and 7 time in some spots. This tractor has become one of my favorites and i will be snowblowing with it this winter. But most importantly here's the pics! There's some before and after. I'll post some more when the snowblower is put on.
-
1 pointIt's hard to stop half way through the process, and go back. Keep going forward, continue using the same process you used on the hood. Then cut and buff the original paint I see lurking there under that patina/greasey hood. That tractors original paint will easily glow again, if you just keep on going.
-
1 pointI would have to say I think you would be best degreasing the hood and then oil bath all of it to darken it up a bit.
-
1 pointWhy not put in new seals?
-
1 pointOh No, I have been demoted to 952!
-
1 pointIt was windy on the roof today. Good thing I have bigly feet like Herman!
-
1 pointFastenal https://www.fastenal.com/en/22/3pl-third-party-logistics
-
1 pointMake my own. Drill a hole and drop the magnet in. Can't get it back out if I wanted to. http://www.leevalley.com/en/wood/page.aspx?p=32065&cat=1,42363,42348 Garry
-
1 pointI hope to be started paint before cold weather. Just need to seal the hydraulic tank, rebuild the battery tray, rework the wiring, and fill the hydraulic system to give it a test run.
-
1 pointBoth your horses made the trip North John, and are waiting for me to move the boat to winter storage to make indoor space for them. Thank you again, and I really enjoyed the time we had this morning.
-
1 pointThank you Sarge! Much appreciated. Thats kinda where I am going with this tractor. Love the looks of the GT14 so I decided nice tastefully done modifications that hopefully look like they were made that way without taking away too much from the original design.Its not going to be a factory restoration by any means but I want someone to question "was that factory?" Only the purests would really know.
-
1 pointThe 1/2" plate idea didn't pan out so well due to the mounting bolt pattern. So after a little digging in the metal rack and came up with this. Let me know if you see something you think won't hold up. All welded up. Final resting place. Just needs bolted down.


.JPG.9f2ecb26065c66527b0730084ab7fc7a.thumb.jpg.7dc8a04d9a53d44ee2b23f26ee94496f.jpg)

This leaderboard is set to New York/GMT-04:00