
Leaderboard


Popular Content
Showing content with the highest reputation on 10/19/2024 in Posts
-
15 pointsI'm not one to give my tractors a name but this one just seems appropriate to call Dino. Some of you will recall the post on my road trip to Elgin a few weeks ago and came home with this. After a period of pondering what I wanted to do as well as fighting a 314H problem child I decided to tear it down for a mechanical restoration. I've got high hopes on this one. Most likely replacing that 314. I'm doing something different with the paint (no, it will be Regal red) so we'll have to see how it works but that's a ways down the road. I'll either elaborate on that or hide my head in shame. All indicates are that this is a solid machine. I guess just for some quick gratification I decided to get the engine spiffed up. Really just a good cleaning, rebuild the carb and a bit of paint. And of course, Terry's decals. The frame is dirty but solid. No repairs needed. The transmission seals were shot. The hitch pin came out by hand and I had hopes that the hubs wouldn't fight me too much considering the leaks. No such luck. I pushed the limits of a 3-jaw pulled. Something I should have done decades ago is make a good puller. I'm finally doing just that. I have maybe a half hour to finish it when I get a chance. I think this will straighten out without much trouble. No metal is cracked. That's it for now. This is going to be an all winter project. The inferno wobble mounts will be replaced with solid and a complete rewire will be done. Now if I can just get the paint right.................
-
6 pointsGot the fellas out for a breath of fresh air today. Been a couple weeks for some of them, and it’s always better to run them than not. The 523-H is in desperate need of a bath!
-
5 pointsI have voted early and have selected my 2025 Medicare supplemental and pharmacy coverages. Now I need to have someone invent a chip that can be used to block all of these political ads and Medicare ad on TV. Looking forward to seeing heemraad cream and ambulance chaser attorney ads again.
-
5 pointsFinally have a place to hang this now….thanks Ed! @Ed Kennell
-
3 pointsHappy birthday!!!!! @TonyToro
-
3 pointsDon't need a chip... turn off the tv.
-
3 pointsWorked on the 308 for a bit today. I peeled off the old hood stickers and got it ready for paint. I’m also waiting on some Amazon landscaping headlights.
-
3 pointsThis was a problem with my 310-8. I replaced the fuse holder with a new waterproof in line fuse holder.
-
3 points
-
3 pointsB-100 looks like a K-Series with a coil, not a Magnum @Moonshine*Connoisseur
-
3 pointsI have liquid filled tires on 3 wheel horses and on my big tractor and there are no negatives that I can see. Better traction, more stable.
-
2 pointsBefore and after. more pics below.
-
2 pointsSwapped out the solenoid on the C-160 and put away the hammer.
-
2 pointsWould you prefer that chip be embedded in your brain, or somewhere else?
-
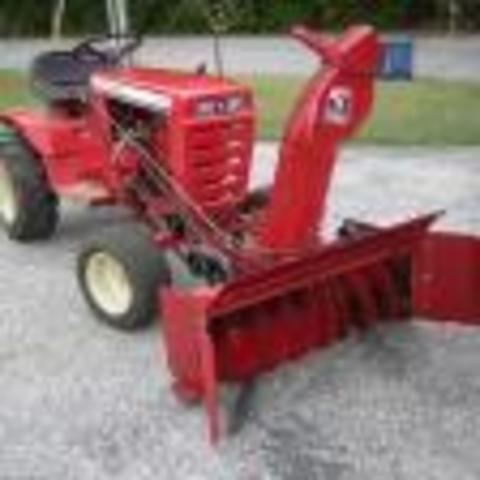
2 pointsGot the snowblower mounted and working now. Welded the tab on the flag for the eyebolt. Just need to get a spring for it now.
-
2 points
-
2 pointsThat is a ground wire you are holding. Perhaps it was under the head of one of the solenoid mounting bolts.
-
2 pointsThere’s pictures it runs on choke still and leaks a bit of engine oil, like other people say it’s never “done”
-
2 points@ebinmaine Has upgraded front spindles.
-
1 pointSeems like I'm always taking this thing apart as I learn more about how it's been put together vs how it should be put together. While I don't have plans to do a restoration, I figured I could freshen up the paint along the way. It appears to have been painted with a brush at one point (and actually not all that bad). After reading several threads, it seems color choice is somewhat discretionary, depending on the owner. With that said, I found what looks like a good candidate for my needs. I've used Rust-Oleum's "Custom Spray" on some other projects and really like the adjustable spray patterns it offers. The fan pattern lets you lay down nice even coats. When I saw this color at the farm supply store, I thought it was worth checking out. Turns out it is almost a dead-on match to the red of the hood decals. Of course, when I put on new decals, they'll probably be a completely different shade. I've done body and paint work since I was 14 (49 years ) so yeah, I could go full resto on it but that's not what I'm after. "Satin Heritage Red". Not glossy, not flat. I did a quick sanding on the belt guard, a little primer, and laid on a few coats. I think this will do nicely!
-
1 pointHappy Happy Tony
-
1 point@oliver2-44 i brought it home and cleaned it up. The serial number is really hard to read but after some research it looks like AA7 continental engine .
-
1 pointThe tins and starter rope cone, along with the angled cylinder, reminds me of the engines on some Reo lawnmowers. I grabbed a couple of images from https://reolawnmower.com/pictures.html. A Reo afficianado. v.
-
1 pointWhen you find one that you like, consider adding a tee with another valve so you can drain the tank for storage.
-
1 pointSediment bowls are French for "Gas Leak" I have had good luck with this style valve.
-
1 pointThe belt guard MUST be in place to catch the slack from the belt when the clutch is depressed.
-
1 pointHave a great day!
-
1 pointHappy birthday!!
-
1 point@TonyToro happy birthday ! pete
-
1 point
-
1 pointIs the PTO in the operate position? That could be the problem. Since the solenoid has ben working and the ignition switch has been working fine I wouldn't worry about the disconnected wire for now. Clean and tighten ALL electrical connections including grounds. Why won’t my starter turn over from the key switch? Lets take a logical step by step inspection of your starter problem. Is your PTO in the ON position, a wheel horse will not start with the PTO on. Have you had the battery load tested at an auto parts store? Have you cleaned and tightened all electrical connections including grounds? Are all fuses good and fuse holders cleaned? If these have all been done, we can check components of the starting system as follows; don’t skip a step or you may miss the problem. Be sure the transmission is in neutral and the parking brake is set. Take a pair of automotive jumper cables and connect the black cable to your battery "-" and a good clean spot on the engine. Now connect the other cable to the large post on the starter and touch the other end to the battery "+" terminal, does the starter turn over? If the starter turns over the battery and starter are good. If it didn't turn over try the same steps with the battery in your car/truck, if that cures the problem then the "good" battery wasn't so good. Presuming the starter turned over move the jumper wire from the starter post to the other end of the wire going to the starter which is one of the large posts on the solenoid. If the starter turns over when the battery is touched by the jumper as before then that cable is good, if not you have found your problem. Presuming the starter turned over move that jumper to the other terminal of the solenoid, connect the other end to the battery and use a small piece of wire to temporarily connect the battery "+" terminal to the small terminal on the solenoid, this should cause the solenoid to close and the starter to turn over. If not, the solenoid is probably the problem. If this was successful remove the large jumper cable and use the small jumper wire to the small terminal of the solenoid, the solenoid should close and the starter turn over. If not the cable to the battery is the problem. Presuming all of these have been successful remove the black jumper wire and repeat the small jumper to small terminal, if the starter turns over the ground is good. If all of these components test good then remove your ignition switch, be sure the transmission is in neutral, parking brake on, clutch depressed and PTO off. Use a small jumper to connect the terminals that were connected to the “B” and “S” terminals of the ignition switch. If the starter turns over then the PTO switch and other safety switches are operating properly and your ignition switch may be bad.
-
1 point
-
1 pointto the Gabe. Those tires should clean up and look great with some tire shine. Nice shop BTW.
-
1 pointThe video on page two of this post may help.
-
1 pointWe met our son for breakfast this morning. Since he had today off, he came out to our 20 acre wood and helped building an 8x8 storage shed. We got the area cleared, set foundation blocks that accounted for about 8" of rise in the 'reasonably flat' spot we chose for the shed. Got the floor deck built and all 4 walls framed and erected. Hopefully, we will get it finished off this weekend. This will get us some dry and reasonably secure storage for stuff we often use when we are working on the property. It will also reduce the amount of stuff that needs to be hauled to and from the property. Yes, we took pictures, but I didn't bring the proper cables to move the pictures to the proper device.
-
1 pointSlowly moving along. Got my frame in primer. Hopefully will get color on it and a few other parts during the warm temps over this weekend. Fingers crossed !! man is it a lot of effort to get these parts ground down and cleaned up. Credit to all of you who have done this multiple times.
-
1 point23x8.50-12’s will work just fine. With the correct rim you could go as wide as a 23x10.50-12.
-
1 pointAlthough I have a drill bit sharpener that I inherited, I have always and still do sharpen them by hand on a grinder. I can do it quicker and more reliably accurate than using a machine. It’s a matter of habit and practice. Also when drilling , wood, steel , brass, bronze or aluminum, ideal bit edge angle is a little different from each other. One can do that quickly by hand. Just need to know what to look for and have a steady hand. I know that some of you will not agree with me but I use the side of grinding wheel to sharpen them. It’s easier and more accurate than using the edge and in 40 plus years of doing it I never had a problem with it. Before all of these gadgets became available, everyone I know did it by hand. Their availability took away one’s ability or desire to learn how to do it by hand .
-
1 pointWell, if you are going to wait that long, you might as well wait until next June and find a good one at the "BIG" show. Wheel Horse Collector's Club Show in Penn. BTW, the detent spring measures 3/16" OD x 1 3/16" Long. It is a little heavier gage the a ball point pen spring.
-
1 pointKohler specifies a grease to use on the Bendix shaft.
-
1 point
-
1 pointA-Z hub is 2 piece. Center of the new inner hub is tapered and has a slot lengthwise. You slide the outer hub piece onto the axle then slide the inner piece with the key slot into position. Slide the outer piece onto the inner piece. Line up the non threaded holes of the outer piece with the the threaded holes of the inner piece. Install bolts and torque to spec evenly. This draws both pieces together and they wedge themselves tight and the slotted inner piece "clamps down" on the axle. To remove: Remove bolts and install them into the threaded holes of the outer piece and as you tighten them they will push the outer piece in and off the inner piece. Use a screwdriver in the slot of the inner piece to open the bore to remove.
-
1 pointI can share pics and info Sunday afternoon sometime. Absolutely agreed.
-
1 pointNothing wrong putting a K90 or K91 on a 551 instead of a temper mental Tecky! You have to move the Rt. side frame member forward about an inch to clear the gov. shaft. Other than that no mods needed.
-
1 pointChanged gear oil in both my 315 and 416 8's last week - today the 315 got new front wheel bearings all around - checked they were starting to get sloppy . For the trans changes put Lucas oil in both - this weekend gonna jack up the 416 check those bearings - many years ago plowing with the C 101 front wheel came off - bearing went out made a total mess of the spindle - made the best of it with new bearings until the big show picked up a new used one - now I check bearings periodically - if I find slop in 1 or 2 change all 4 . Not going through the spindle mess again - have a blade on the 315 all year and a tall chute on the 416 4 months a year so both are carrying weight in the front . Can anyone point out a thread for upgrading the front wheels/axles for weight ? I'm curious about the process
-
1 pointAs long as you can tell one end of a wrench from a flat screwdriver you'll do fine.
-
1 point@Jrodgers04 Xi series is what I’m talking about! They are amazing! Keep any eye on that front axle pivot. https://www.wheelhorseforum.com/topic/92609-xi-series-front-axle-pivot-repair/
-
1 pointWe have only a small percentage of ash on our acreage. Roughly 70% beech. A mix of maple oak and some evergreens after that. Ash trees here won't be around long either unfortunately. Elm and chestnut has been gone for decades...
-
1 pointNo ash trees left around here either. Most of the elms are dead as well (the next generation after the original dutch elm disease wiped most of them out years ago). It is sad to drive around and see all the dead trees everywhere. Fortunately most of the trees on my property are maples and are healthy.
-
1 pointDay 15: (Well really Friday Saturday Monday and today (Tuesday) Got the fenders for one last time primed (Friday) and now Tuesday we gave it a quick light sanding and painted them red! Fenders are now complete just have to put stickers on it and the rear lights. Got the front rims sanded and cleaned on Friday and first coat of paint on. Today (Tuesday) got the front rims painted antique white let them sit for probaly 3 minutes went back to look at they were all cracked! My dad said the spots we didn’t get rid of all the power coating the paint got underneath it and lifted it all up. So going to let the rims sit out in the sun for a few days then sand where they cracked and hopefully paint them once again for all. Also since it’s now started to get cold and getting dark really early moved some stuff around in the garage and bought Mr.Kellys tractor inside of the garage. IMG_9430.mov IMG_9429.mov














This leaderboard is set to New York/GMT-04:00