
Leaderboard


Popular Content
Showing content with the highest reputation on 08/19/2024 in Posts
-
17 pointsOur two oldest grandchildren were out on their great grandfather’s 1067 this weekend. Great practice for getting behind the wheel of the real thing.
-
11 pointsWhat to do when your 1/2 done mowing and the PTO/deck belt decides to retire? Poke around up in the rafters till you find one that fits.
-
9 pointsThank you to Red Square for saving my sanity. I'm new to RS so am looking forward to this journey. I was presented a 1984 Wheel horse C145 as payment for a small chinese scooter repair. this was bought new in 1984, along with all attachments, for 5200.00. The attachments are snowblower, coomplete weather enclosure including fibreglass top,wheelhorse wagon, dethatcher, and leaf rake with canvas catcher.. I also got the owner's manual, and all expenses paid for this unit. I was told that his uncle kept exceptional care of this mower, and I believe it. It has been in his barn since his uncle died, 2009. Obviously, it doesnt run, but I am slowly working on it. I will be posting pics when I get it cleaned up and all the mouse nests out ot of it. I collect old cast iron, Pots, Pans, wqaffle irons, pot belly stoves, and now, vintage lawn tractors. Till the next add. Thanks. Bruce Wyant
-
8 pointsUhm... @Pullstart But - Won't need to "build" it... just need to film him cruising... he'll end up upside down sooner or later...
-
7 pointsElectric Pump! The old 516H will not longer go up hills and I've got a 35° incline in my backyard that used to not be at issue. Last time this happened, the float was too low so - fixed. This time, had to be the pulse pump so decided to go the electric route with one of Eric's recommended Facet-like pumps. Larger than I thought it would be, managed to install it below the tank and atop the trans. Took plenty of time to figure it all out - where to place it, etc. Opportunity to pressure wash the grime from the trans pump. Wired it to the coil and it's glorious. Starts quickly and climbs with the deck on and full throttle/full speed. Back to normal for the beast.
-
7 pointsWho wants to build it? https://www.facebook.com/reel/3925077044396937
-
7 pointsScored a 1985 312-8 today for only $450. It’s 1 owner & only has 600 hours !! This will be my backup machine to my 315-8 . What a nice machine!!
-
6 points@Ed Kennell A rough draft just for starters. I'm a long ways off but here is a start.
-
6 pointsTrina's friend has a birthday coming up. That friend likes sandpipers. Yesterday Trina got a piece of hemlock from our firewood and split it into several pieces. She chose the flattest one and sanded it on her power band sander. This morning Trina found a pic of a sandpiper and hand copied that in pencil on to the wood. Then she used her wood burner to cut in the lines. All the background work is hand drawn then burned. Some coats of poly and it'll be done.
-
6 pointsI'd say I would but it wouldn't be half done til 2124 or later.
-
6 pointsSooo, here is an update on the brake band and adjustment rod project. Went to the local tractor scrap yard in Kalamazoo and they only had one Wheel Horse in the place. It was a 1996 314-8. I grabbed the rod that goes from the clutch pedal to the clutch linkage because it has a preformed 90 degree bend in it already. Also grabbed the brake band. Using the measurements from @TractorEd I cut the rod to length but left it a little long just to be on the safe side. Measured for a flat washer and pressure fit it on the rod. Had a friend weld it up for me and was again ready for a test fit and check for proper operation of the motion control lever and the brake band. With everything looking good, it was time for final length cut and paint. I didn’t get this pic before I cut the end off but this shows the total length of the clutch rod. Her it is cut with the flat washer welded on. Back to Red like it should be. And now it looks like it came from the factory that way. Or close anyway! I’m not sure how Toro justifies $205 for that rod but I’ve got less than $10 in the rod and the brake band. Thanks again to @TractorEd and all the other members who chimed in with helpful comments and feedback. Jim
-
5 pointsOK Ed but you have to drive it and wear a Great Gazoo helmet
-
4 pointsLooks like @RustyGold bought the weights and deck and got a free tractor! Well done!
-
4 pointsI like to have extra ground cables. Redundancy is not a concern on a 12V DC system. The original Wheelhorse ground connects the battery to the underside of the fuel tank shelf. That's fine IF the tractor has no rust between the steering tower and frame and engine adapter and engine. Too many possibilities for interruption. The original cable had a repair on the battery end. I'm not a fan of bolted on terminal ends and the cable was stiff so that went in the round file. I had a cable in stock that had two 3/8 hole ends. I cut that in half and added a 5/16 copper terminal to each end. Heat shrink on all four ends. This afternoon I decided to clean up the side steps. One was on this tractor when I got it. The other is from my 1971 Bronco. Each tractor had the wrong step in the opposite side. ... so I swapped them to the correct tractor. Well that worked out well. First Trina used the heat gun to remove the old grip tape from the surface of the left step. I ground the surface of both, cleaned them with acetone, and added new black sand grip tape. I like to run the tape up the vertical part because that protects the paint from my boots.
-
3 pointsReo Speedwagon.
-
3 pointsYou hiding a power wagon?
-
3 pointsThree time loser. I have an AC/DC stick welder a mig welder and a spot welder. Never been very good at stick or MIG not doing all that great on Spot . Tried it today to patch some cracks in a fender pan. Have to get a better feel for time of weld couple sort of burned through..but with my MIG skills I would have burned through worse...
-
3 pointsHello All outdoor power people!! Been hectic with spraying, planting, mowing and gravel work but have a bit of good news. 38 years ago I was taught how to drive my first truck, a 1972 Loadstar 1600. My uncle's owned Brauer Oil and Asphalt. This being said, I always played around the shop on loaders, graders, rollers, trucks, EVERYTHING that would get me dirty and sometimes a whipping... So, one Saturday morning, my dad dropped me off at Aunt Mary and Uncle Chuck's house since I was only 7 years old and couldn't go to the Lariat Club for steak and chicken that night. No problem!! Plenty of things to do involving picking apples, raking leaves, chasing the dog with a rake and a visit to the equipment yard. I was called in for lunch when my two uncles came over and usually it's a riot listening to them arguing with each other but that afternoon I never heard so much cursing and learned a lot of new phrases that are still used today! There was three roads needing finished and only two people. One spraying oil, on spreading pea gravel and the other on a Galion roller. Sitting at the table with two men cursing and arguing about work made me laugh at those bad, filthy words I knew would get my hyde tanned. Aunt Mary said that I should go with them and help. Cursing stopped and two leathery, sun baked men was staring at me. I excused myself from the table and tried to sneak off but Uncle Harold blocked the stairwell outside. They both knew I plowed and disked with Dad's D21. Both knew I mowed hay with a 1468 and ran the 715 combine for wheat that year. Guess who is going to work?...😮. Sitting between them two on the way over to the asphalt plant was not the pleasant ride it used to be. I've been told by many other kids including their own about the shouting and getting the belt while working and didn't want any part of it 😕. Uncle Harold had me get in and he said to watch what he did. Easy!! We headed down the road and turned around, returned to the shop. He said "Your turn". I climbed behind the wheel, hit the key. So far so good. Couldn't see over the steering wheel but a phone book was slid under me. Better. "Go"! Dumped clutch and died. Forgot to push parking brake ahead. Restarted, put in gear, finally rolling. "Shift"! I did, into neutral. This happened too many times to count but got it down. Uncle Chuck loaded me with pea gravel and I followed Uncle Harold since he did the oiling and Uncle Chuck was following on the roller. Driving was easy. Nobody told me I was going to drive backwards and spread gravel.... That's not part of the deal! However, there was a coal shovel that was my new best friend until I figured out how to spread. After basically shoveling a 6 ton load by hand, I was sent by myself back to load up with another 6 ton load and hurry back. From that day on, if I wasn't farming, I was gating gravel. 1986 - 92 I was the gravel grunt and in charge of greasing equipment, oil changes, welding and whatever else those cantankerous men said. Uncle Chuck sold out in 1993 and everything was either scrapped or sold as is with a tail light guarantee. No more Loadstar, no more gravel, nothing. Which brings me to July 29, 2024. I found the Loadstar, in the same shape it was years ago. It since has been transformed into a spotter tractor at a local shop. Hasn't been ran in 5 years and I now own it after agreeing to maintain the property I found it on. This truck Will be at the Chillicothe car show in September on the 9th along with a few garden tractors. Its something how you feel like a kid again and all the memories flood the mind. Never thought I would be 7 in a 45 year old body.... Forgive the long post but I do miss those days and the grouchy old men that taught me
-
3 pointsCalendar shot??? Me thinks so ...... Looks like a couple of new RS Members in the making...
-
3 pointsWith steel weights and a deck .. nice score
-
3 pointsFirst off let me say that I love the story! I can relate as I too grew up in the same kind of environment with cranes, dozers and trucks. I learned how to operate a Cat 941B track loader at a very young age. Also have spread thousands of tons of gravel in reverse using either a Temple stone spreading tailgate or just a tailgate chained open slightly. This made you a good truck driver as you could not go off the spread stone onto the hot oil. Whenever I see an International like that it reminds me of the school bus I rode as a kid. There’s a good chance I was riding along with the operator in the first pictures and then here’s the International that was my bus that was turned into a potato truck. It’s still sitting there where I took the picture, now out of service.
-
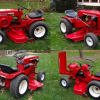
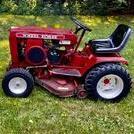
3 pointsBoth sides of the nearly complete '74 C160-8 Tecumseh Horse. Our newly aquired tractor Trina has named after my recently passed father. The "UGLY BRUCE".
-
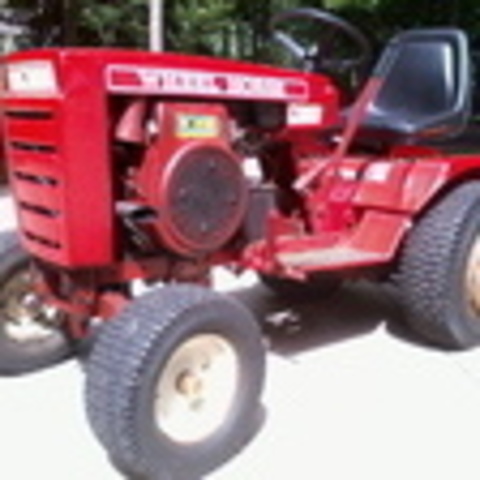
3 pointsVery common to find a Kohler swapped into a Work Horse body. Mine:
-
3 pointsThe headlight buckets were pretty gunked up with old leaves and such. Got em cleaned out and now have power to both wires. Also will be swapping a better headlight lense on. This battery is now 5 years old. At some point in the past a previous owner split the positive terminal. It won't likely last through the cold seasons but it still works so I used a longer bolt and 2 washers to pinch the split terminal.
-
2 pointsGreat introduction! My wife has been collecting copper cookware and antique sewing machines for several years, Every time she suggests that I should downsize my shop I just say "ONE for ONE" and the subject gets changed promptly. Like Randy @rjg854, please feel free to ask for any help we may be able to provide.
-
2 pointsRam board kept blowing away!
-
2 pointsHow did it test out in the wind tunnel? looks very aerodynamic.
-
2 pointsIt's actually red anodized aluminum or as the Brits say aluminium ... I bought it to fit either a Group 35 or 51/51R battery. As you can see I've trimmed one end to clear the Tecumseh starter. Works excellent.
-
2 points@fourwheelhorseman worse comes to worse, I have the valves that came out of a 341 that blew a rod. If they help you, you can have them.
-
2 pointsAnyone can buy a gift or worse a gift card. However something from one’s hands is a real indication that someone cares.
-
2 pointsThe crank case seals leaking will cause erratic operation like that. No carb or carb adjustment can solve it if that's what's happening. The vacuum pulses from the case is what makes the diaphragm pump fuel, so leaks from the seals will cause the diaphragm to pump at different pressures and rates because of those leaks. You might be able to quickly verify this if you disassemble enough just to get access to the seals. A few drops of old school brake fluid, DOT3 stuff not synthetic, causes the rubber of the seals to expand. Carb cleaner spray does work too but doesn't seem to last as long. Best to let it sit with the fluid on overnight but you could also check it immediately because the fluid will temporarily seal them for a short time to run it and notice the difference in how it runs. If it runs better without adjustments, maybe new seals are available A crappy diaphragm in the carb can also do this but you have a new one.
-
2 pointsIt sure does. Even has the rod-bender grip marks on it like the original does. Nice!
-
2 pointsWhen I was in a Fireman's band we had an old INT. bus We painted it blue and silver and called it Ol' Blue. I remember one late night coming home from a parade the rad developed a leak and it started to overheat and we had to pull over. I sealed the rad with a wad of Freshen Up gum. filled it back up with a combo of cooler water, Genny Creme Ale and water from a near by ditch. Got us the last 20 miles home.
-
2 pointsAl that is great.Start them young so they will know not to buy big box junk when they grow up. That 1067 is looking real good.
-
2 pointsI print all my manuals and have them in old school binders. I've yet to have the battery die in one yet...
-
2 pointsGood to know. ...I thought it was just me that does that!
-
2 pointsWhilst I messed around with my C160-8 Tecumseh Horse a fair amount, Trina created an overhead wood rack for us to store the pine siding of the barn. She also made a present for her friend and started a repaint on this yard ornament deer for my mom.
-
2 pointsThat will develop considerable force and likely enough to break the weaker hubs. Be sure to grease the threads and tip. For those hubs that have space behind them, the idea that @Kelsey used is a good option, especially with the frail hubs he pictured. The hub puller that I made and posted early in this thread is much like yours and works great but it would be expensive to build and it also would take good judgment in how much force can a hub can take.
-
2 pointsHood sanded and spot putty applied to final level where holes were welded in and where there were dents. It is raining on and off for the next couple of days so I can't paint right now.
-
2 pointsNext task on the C175 is to replace the hoses and rebuild the lift valve. Valve is leaking like a faucet. Parts from WheelHorsePartsandMore. I’m sure this is going to be a fun task.
-
2 pointsEngine screen is on. Rear wheels have been drilled and mounted. The lug holes need to be expanded about 2 hair's width. The OE 7/16 holes are usually worn some. I refresh them to 1/2 for the wheel spacers. Some of the holes aren't even enlarged. This is definitely a Fat Bottom Girl. Just shy of 42" across the outside of the tires. Same as my other two running C160s.
-
2 pointsI added a front hitch to the 310-8. I have one on the 312 that is centered on the mule drive, but it is not visible from the seat. I wanted one that was visible from the drivers seat for exact positioning when hooking up. This worked out really well and doesn't interfere with the deck, mule drive, steering, or hood opening.
-
2 pointsBusty got horny today... and led lights. Note the necessary ground wire to the light bucket. You know @Achto for those twilight booze cruises we never seem to get in lately. Sorry abount the seat @Pullstart... this one keeps a guy from getting thrown...
-
1 point
-
1 pointHehehehe. I mean the tractor generation. I like the '70 to '77 the most.
-
1 pointToday things finally dried out enough to run the mower around for a couple hours Well I have to say to my surprise the performance on Rev 1 of the mulching deck is great! Chambering all of the blades did the trick for sure. The clippings are even finer than before and I believe this is due to the sustained lift in each chamber. If I run a row of grass at a good clip and run out over the driveway the fine clippings fall out over about 3 to 6 feet onto the pavement. The lift is definitely acting like vacuum cleaner. I can’t speak for leaf mulching yet, but I think the results and testing are right around the corner. Stay tuned, Steve
-
1 pointPicked up 2X NAPA #11050 , brought a caliper with me. They are exact to the seal that was removed. $6.80 each. Only one is leaking on the C81, its ready for a new seal. The other side , well, I'll put the seal in the parts box ! Removing the HUB was a breeze as I replaced both sides lockdown screws not all that long ago. THX all for the replies best tp
-
1 pointthe rear deck wheels were wore down to 5 1/2. I grabbed used but not worn wheels measuring 6in. from a parts deck that somewhat helped. I never thought to measure all 3 blades in search of a bent one, never thought mount hitch could be wrong or pto belt as well. I will check all above mentioned things as well as snap a few pics to post. Maybe u guys will pick up on something im overlooking. To clarify the lawn cut doesn't look absolutely terrible but want this deck perfect. Im building a C-120 and want this deck for that. Want to put snowthrower back on the 312-8 and not do this deck swap every spring. I also have 308-8 & B80 with RD 36 decks, both run and cut out but afterwards i gotta break out the leaf blower dealing with pesky clumps. I never have that issue with the 42 SD.
-
1 pointThere was a time I had 16…playing musical batteries got old. Plus some would sit so long that it was a pain to get em fired up. I won’t store them outside so storage was an issue as well. Started selling off the ones I had no love or attachment to and got down to 5 machines. It felt great! Somehow I have crept back up to 8 or 9. I ended up buying 2 machines at this years WH Show but managed to sell one 3 days after I got back home. I guess if you have a machine that just doesn’t get used it might be time to let it go.
-
1 point201.6 today. Started at 230. My goal is to get to 195ish. My wife has been doing Weight Watchers for 22 years with incredible consistency and discipline. She has been my coach. All I need to do is eat what she feeds me


This leaderboard is set to New York/GMT-04:00