
Leaderboard


Popular Content
Showing content with the highest reputation on 03/16/2024 in Posts
-
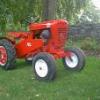
15 pointsThe Thrifty Farmer Tractor Conversion Kit The Thrifty Farmer kits sold by Sears, Roebuck & Co. in the 1930s promised to make your old Ford Model T or Model A into a tractor for less than $100. Later, kits became available for the 1929-31 Chevrolets. The kits were listed in Sears spring and fall catalogs from 1932 to 1941. By 1935, Sears had added kits for newer Ford V-8 powered cars along with Plymouth, Dodge, and Chevrolet autos with 6-cylinder engines. The kits were produced by Peru (Illinois) Wheel Co., A 1932 Sears Thrifty Farmer booklet notes that, “With the Ford body removed, and without drilling a single hole, you can in a few hours convert the old Ford into a tractor that has the pulling power of two to four horses, depending on the condition of the motor.” The working speed of the engine after the tractor conversion was 1,200rpm. The motor in a new 1928 Model A was rated at 40 brake horsepower at 2,200rpm. The final drive system on the early kits was somewhat complex, employing a jackshaft and a series of four gears on each rear wheel. The gears are mounted “high off the ground away from loose soil and trash” and are “covered on top and sides by a strong steel hood to keep out mud and protect the operator.” Within two years, Sears released a less complicated version of the kit. Transferring power to the rear wheels now employed nine-tooth pinion gears, attached to each rear axle, which engaged large diameter ring (bull) gears mounted on each wheel. The rear end (differential) of the car had to be flipped, end for end, as part of the assembly process. If it weren’t flipped, there would be three reverse speeds and one very slow forward. Peru Wheel Co. also supplied kits to Montgomery Ward & Co., called a Utility Tractor Unit, a few years before they began supplying a very similar kit to Sears. The main differences in the two kits were the diameters of the bull gears and rear wheels. The Sears gear measured 37 inches in diameter with 108 teeth, while the Wards gear was 40 inches and 120 teeth, mounted on 45-inch and 50-1/2-inch wheels respectively. Since Montgomery Ward part numbers were cast into the bull gears and the axle clamps used by both large retailers, people were often misled as to which kit was used to build a particular tractor. Early conversion kits were sold before 1920. Ultimately, more than 100 kit manufacturers operated coast to coast. Some of the brands available in the U.S. and Canada included Staude, Knickerbocker, Shaw, and OTACO. The front wheels, supplied in the kit, had non-skid attachments. The two attachments were formed of arc-shaped sections of 1-3/4-inch angle iron, each covering half the wheel. When bolted on, they formed a narrow steel rib in the center of the wheel. That made steering easier, especially in loose soil.
-
10 points
-
6 pointsThe annual Airville Fire Company mud sale was held today. 12-15 Amish auctioneers selling everything imaginable.
-
6 pointsWasnt able to use the new rod, it didn't have enough thust clearance nor oil clearance, old rod went back in, new piston, pin, rings went in fine. Getting it buttoned back up but it fired right up and no smoke I could detect. Know more once its warmed up for break-in Edit: 30 minutes in at varying speeds, no visible smoke, plug was clean...going to rip it wide open for about 30 minutes, just let it eat.
-
5 pointsI’ve worked my tire machine pretty hard this week, cleaning up what seems never ends! I think to myself every year, this’ll be the end of finding tires on the property! I think I’m close! So far, I’ve got 7 stacks of race car tires eye level with me… *well dang, my support membership lapsed. Please hold while I find some PayPal credentials
-
5 pointsTires, steering wheels, hitch pins, and hubs. I usually tell them you may as well surrender and come off. I will not give up and go for help. Then apply plenty of pain killer.
-
4 pointsYes! I know certain parts of cars and aircrafts are held together with strong adhesives. Beats welding and or riveting in certain applications, or so I've been told. You're also quite right on the perfection part, sometimes I drive myself crazy chasing perfection. The older I get the less fussy I (can) get Sometimes it's worth it to me to want to achieve perfection, or get close to it anyway.. and sometimes it doesn't really matter and you can save yourself a whole lot of time, money and sanity to make something 'just fine'. On that topic, made a small trailer handling 'jig'? Don't really know the right name for it. This will serve to quickly and safely attach car trailers and my gf's little manure trailer. Comes in handy for when the farmers land where we haul the manure to gets too wet for my car to drive on.
-
3 pointsNot a dozer blade but I used a removable attachment as a tip bucket mounting to a plow frame. I threw this out there and got a lot of good feedback but zero interest in purchasing. Now on the back burner.
-
3 pointsHad a wheel from my brother's JD317. Sidewall blew out but wheel looked good. 3+ hours later finally won. (Except my shoulder has been complaining ever since.) Wore my self out with slide hammer broke one side with crank down unit but no luck oin the other. Went though all the tire tools but couldn't budge it. Finally cut off most the tire, The used tins nips and dremel to cut through the bead steel wires...
-
3 pointsPaint chimes... Decided to go full Black Hood Wannabee on the wagon... Ordering decals from Terry today... Edit: All but decals... Edit 2: Done: Thx vinylguy!!!
-
3 pointsOld news, I've built 4 already
-
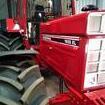
3 pointsOK - I'll start with the last picture first. Looks like there are two of those clamp and tube gizmos and they are related to the two plugged top holes. Someone in the past added accessory lights that were mounted in the plugged holes, and routed the wire(s) thru the rubber guides. At first, I thought the first picture showed someones creative "fix" for the rather commom broken hood-to-grill weld.
-
3 pointsI take my tires to the Mennonite shop down the street. If they can't get the tire off, they call in the women to do it!
-
3 pointsUnbelievable that crank down rig wouldn't do it. Looks to be hi-test. Even the HF changer. After an hour in it gets to be personal...
-
2 points
-
2 pointsNope.... Original Owner added, not original from WH........Original lights would have been the now-pricey HL 5 kit.....
-
2 pointsyeah, the dust from sitting all winter without use, was getting to me
-
2 pointsDragged a stump into the woods a few days ago… (GT-1600/8 speed with a Mag 10 swap)
-
2 pointsLooks great!
-
2 pointsAfter an hour or so it is a matter of pride/will....
-
2 pointsI'll give ya that Jim. Don't even take that much time for me.
-
2 pointsYup, Paul, when the tire has been on the rim for 50 or so years, they can be tough to deal with. A trip to the local Tire Shop would have been money well spent....... Bill
-
2 pointsTook a while but the roof is fixed! Lots of sanding, resin and fibreglass later the corners are fixed and looking allright again. After applying a off-white topcoat this is how it turned out. Certainly not perfect but for something to keep the rain and sun off my face it'll do just fine.
-
2 pointsBonus points for adding a tractor to drive it!
-
2 pointsThe wheels are rustoleum antique white with 3 coats of clear on top. I know there's been a lot of debate over the correct color but to me this looks close and I like the contrast with the tractor being red
-
2 pointsThis afternoon I got the new Carlisle's mounted on the 854, I'm really happy with this tire choice, now to give the fronts a sandblast and paint.
-
1 pointAbsolutely nothing wrong with that. Make it work. Make it yours. Make it more functional for the intended purpose. Looks excellent.
-
1 pointIm all day on that ole B-80 with the ??? hitch It would be enjoyable to wander around holding my bride ogling equipment Thanks for sharing
-
1 pointHas anyone converted the dozer blade into a bucket similar to a Johnny Bucket? I just need something to move mulch around. If so, any photos? thanks
-
1 pointUn-passable! Muddy and wet
-
1 pointI add a coupling nut piece of treaded rod and a couple of jam nuts and used the thick filter on all my Kohlers. The short cover don't cover all the filter, but I use it.
-
1 pointThis may help you. Wheel horse 520H service manual.pdf
-
1 pointIn the fall I clean out anything my after mowing wash didn't get and coat the whole underneath of my decks with a mix of140w gear oil and grease. This has worked well to prevent rust of the bare metal over the winter months! C-85
-
1 pointDefinitely got dusted at some point, im amazed the new rings fit so snugly. Oil control ring is about as gone as gone gets, thats as close as i can get the ends on the bottom ring and its quite a bit wider in the hole. Last 2 are old oil ring and new oil ring.
-
1 point@squonk and @rjg854 Randy found a few dozen squonk eggs hidden in different places so he had to remove them and made you an egg pie for the next time you visit his barn.
-
1 pointYour barn got dirty?
-
1 pointIf the 3 inch filter fits (and it should on a Magnum), just go with that. I ran that filter on my 310-8 for decades. It's better to have more unrestricted airflow than not on a worker.
-
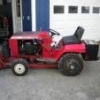
1 pointLooks like an 88 or 89 WH. Obviously the seat is not a WH seat. The slide mechanism looks to be upside down ? and not OEM. The slide lever I think is usually on the left side.The yellow rubber cover is for another brand I assume.
-
1 pointA battle that is all too fresh in my mind.
-
1 pointSpent yesterday afternoon and evening laying some red paint, always an exciting day! This is the 702 project I've been helping a friend with. There's been a lot of sheetmetal work In this, but seeing the outcome makes it all worth it
-
1 pointWorked on several Wheel Horses today. I took my snowplow off the 854. Touched up some bare spots on the plow frame with new paint. Took off my steering wheel on the 854 ( easy I have a pin in it) and painted a bare spot on the gas tank top. Took the snowplow off the RJ and stored. Put some Fix a Flat in my 314 toro front tire. Seal around the rim leaking air. Cleaned out my spreader and did two applications today. Grubbed for the lawn and Scott’s Weed and Feed. Pretty quick work with the spreader I have. Checked out the HY belt guard that Mark Godzig made me (traded a three race pulley). I have one but also have another hydraulic system to install on a round hood tractor that it will be used for. Also primed and painted the belt guard. Fits great and Mark did a great job making this from measurements I sent him. Also primed a heavy duty RJ snowplow frame I got from Rodney Burger in Florida last month. Whoever made this didn’t want it bending!
-
1 point@Thor27
-
1 pointI’m going to build another one like the one that I made for the 416-8.
-
1 pointI finished putting the rear end back together on the 518-h. Took it for the first drive and it runs and drives amazing! Next up is a beefy rear hitch.
-
1 pointBig Thanks To, @Vinylguy for helping me out with this custom decal. Thank You, Sir! My part doesn’t do this justice…lol. I need to do this more often.
-
1 pointMade it myself few years ago with a cheapo „Harbor freight“ Engine to see what can be achieved. One word before - cheap - depends on your own definition. 🤪 all together i wasted for that „idiot Bet“ about 1800$ for few Day‘s Fun and abou 2 months of Work to win this Bet. We used a cheap chinese Quadbike as „Testvehicle“ what had a cracked Engine. That was the reason this dang idiotic Bet was made by few Beers - if you think about such an item - no friends should be aside and the Beer must be faaaaar faaaar away... believe me, ask why i knew it.😎 I used a Smart Turbo therefore that must be reworked before you can use it. Reason is, the Smart Turbo has an fixed cast iron Exhaust manifold for a 3 cyl. engine on it. That is part of the Turbo. Grinded it down and welded a Pipe onto it, to be able to be adapted. or be aware to have access to a cnc Machine and build your own exhaust. If you can weld cast iron you got the half bet with the Cheap version. Additionally you need a little Temp stable Hydraulicpump. I raped a Haldex pump for that, what becomes an own Filter and distributor case cnc milled. Here first the pump intake pass a filter, out of the pump to the Cooling section of the Turbo, than rerouted thru a external Oil Cooler I used a Computer Watercoolung system heatchanger and back in the Pressure oil section. all this lines must be temp stable hydraulic up to 130 deg C and 8 bar pressure. The turbo oil drain section out of the Turbo goes into the separate Oiltank where the Haldex pump sucks it‘s oil via Filter. if you drive a turbo without an pressured Oil system it runns for about 5 min that you be done. it‘s bearings be shot and the Turbo is killed. It may spin but want be able to build pressure. that „System“ worked for about a Month if i remember right before the Engine blows at about 7500 rpm. i suggesting also wrap a rabbitfence arround the Engine to protect yourself against hot spit parts out from the Engine when it explodes. Carb passes thru the Turbo with a Silicone inlet pipe to decouple the Heat. Use at least 100 oktan fuel- if you can get Air Fuel - the better solution. Ignition at Start a little retarded or best movable or programmable between retard and advanced. exhaust depends on your „Soundambiente“ your neighbours are willing to accept. 😎 The Boos was Freaking Funny. The Values up to 22 HP be results of several Dyno Runs after lots of modifications. at this time i had a friend with a tunning shop, who had a own Dyno. But he is retired since about 20 years sadly. This Engines can be simpler „modified“ increase Static Middlepressure by reducing the Head Gasket thickness, improve all bearings if possibillity and if available enlarge the Intake and outlet valves +2 sizes up ( bore and grind) open up the Intake and exhaust paths on the Cylindre head and optimise the Airflow - perfectly is, if an airflow bench is available. remove the Piston and enlighten it, or better use high performance parts. Extremely important be much stiffer valve springs and maybe a reworked or aftermarket „hot Camshaft“ and a six horses Engine can bring up easy Up to 12HP but only if carb and exhaust are perfectly matched and set up. Depending on your time and Wallet..🤪😁👍😎 you also need better quality bearings on the crankshaft and stronger springs or the engine don‘t survive the first „throttle up“. turbo wasn‘t cheap if the system should last just a little bit. as allready mentioned , just to blew it up, use NOS. small pipe with 0,3- max 0,65 bar pressure for a dry system brings also dang lot of Fun but also not for long. Each tunning reduces the lifespan - the more power you squezzed out of that little aengines, the shorter the Enginelife, that simple. But yap, get this experiences give me a dang cool idiotic Times with my best Friend Peter since...👍😎
-
1 pointToo bad the odds of all these news ones lasting that long is nil...
-
1 pointI put a new battery in my 14-8 last spring. The one removed was 9 years old!
-
1 pointI had one the other day at work I swapped out that was a 2013 battery. Can’t believe it lasted that long. Was the factory battery with the assembly technician’s markings still on it.
-
1 point6Years is a good lifetime.


This leaderboard is set to New York/GMT-04:00