
Leaderboard


Popular Content
Showing content with the highest reputation on 03/13/2024 in Posts
-
12 pointsA salute to the Silo Dairy farmers work with nutritionists who create healthy, balanced diets that are specific to the cows’ needs – based on their age, whether they’re milking, whether they’ll soon have a calf, and many other factors. Some dairy cows eat as much as 100 pounds of food per day. The ingredients often include human food byproducts, grain, a mixture of grass hay, alfalfa hay, as well as corn and grass silage that is grown on the farm, harvested green and stored in an anaerobic chamber. Fifty percent or more of a dairy cow’s food intake is silage. Woolford (1984) defined silage as “the product formed when grass or other material of sufficiently high moisture content, liable to spoilage by aerobic microorganisms, is stored anaerobically”. Silage is produced by ensilage, that is, the placing of crop material inside a vessel or a structure called a silo. Excavations at the Egyptian town of Guft show trench silos used around 1500 BC. A silo is a structure for storing bulk materials. Silos are used in agriculture to store fermented feed known as silage. Three types of silos are in widespread use today: tower silos, bunker silos, and bag silos. Tower silos are the tall cylindrical items we are accustom to seeing attached to dairy barns thought the countryside. They contain corn and/or grass silage which will make up the majority of a cow’s dilate and are usually unloaded from the top of the pile, originally by hand using a silage fork—which has many more tines than the common pitchfork; 12 vs 4—and in modern times using mechanical unloaders. An advantage of tower silos is that the silage tends to pack well due to its own weight, except in the top few feet. I can recall many winter days when a pickax was needed to break up the frozen silage in the winter and the fermented silage by springtime was probably ready to be distilled, cows seemed to love it. The bunker silo is an improvement on the Egyptian trench silos use in 1500 BC. Bunker silos are trenches, usually with concrete walls, that are filled and packed using tractors and loaders. The filled trench is covered with a plastic tarp to make it airtight. These silos are usually unloaded with a tractor and loader. They are inexpensive and especially well-suited to very large operations. Bag silos are heavy plastic tubes, usually around 8 to 12 ft in diameter, and of variable length as required for material to be stored. They are packed using a machine made for the purpose, and sealed on both ends. They are unloaded using a tractor and loader or skid-steer loader. The bag is discarded in sections as it is torn off. Bag silos require little capital investment and considerably less labor the conventional tower silo. The silage is harvested using a Round Baler and the bales are placed end to end where a device holds each bale off the ground as the bag is slipped over it. The farm I grew up on is now using the bag silo system.
-
8 pointsA few years back I built a chariot mounted on a small Harbor Freight trailer. My wife felt like the Wheel Horse Queene riding around on it. We were even able to give a couple of friends a lift while cruising the grounds of the Florida Flywheeler show. It had storage under the seat and a cup holder on each side.
-
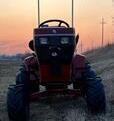
7 pointsI had this powder coated orange. I haul my uncle around mostly since he doesn't get around good anymore and he's an allis chalmers nut. I would have loved to have done it WH red but sometimes we have to make sacrifices haha
-
6 points80 90wt oil. Filling through the shift hole works the best. Right below the axle on the right hand side is a pipe plug. Remove this plug and fill the oil until it starts to run out of the hole. Put the plug back & carry on. You can see the hole in this pic.
-
6 pointsThank for all the great info Richard. Just a reminder for members attending the Big Show. One of the few remaining round barns is located a few miles from the show. It is now a yuppy farm market, but back in the day it was a dairy farm and the circular barn was built around a central silo with some very interesting construction. It is worth a visit if you are in the neighborhood .The Historic Round Barn & Farm Market
-
6 pointsYou definitely get what you pay for. Did you by chance check how much grease was in the bearings to begin with?
-
5 pointsFinishing up building this show buggy for this season. Just finishing up painting the railing and adding beverage holders. Anyone else have show buggies? It's orange so I probably can't get away with taking it to the big show lol
-
5 points@Pfmet - Welcome!! What you have there are "normal" raised lines found on an aluminum casting.... I se NO evidence of oil intrusion from a full-thru crack. Carry on...!!
-
5 pointsSpring Cleanup Seat time!
-
5 pointsWorked on several Wheel Horses today. I took my snowplow off the 854. Touched up some bare spots on the plow frame with new paint. Took off my steering wheel on the 854 ( easy I have a pin in it) and painted a bare spot on the gas tank top. Took the snowplow off the RJ and stored. Put some Fix a Flat in my 314 toro front tire. Seal around the rim leaking air. Cleaned out my spreader and did two applications today. Grubbed for the lawn and Scott’s Weed and Feed. Pretty quick work with the spreader I have. Checked out the HY belt guard that Mark Godzig made me (traded a three race pulley). I have one but also have another hydraulic system to install on a round hood tractor that it will be used for. Also primed and painted the belt guard. Fits great and Mark did a great job making this from measurements I sent him. Also primed a heavy duty RJ snowplow frame I got from Rodney Burger in Florida last month. Whoever made this didn’t want it bending!
-
5 pointsI clicked on the laughing emoji but obviously I'm not laughing at the part about people dying in silos - that's not funny at all. I have heard the joke about taking a dump (or peeing) in a round barn before. I think it was from my Dad, could have been my grandpa but he was a bit too proper to tell a joke like that, I think. I'm a big fan of silos and have a collection of pictures I've taken over the years... If I see an old one I try to get a picture of it, even if it's during a drive-by. Here's one:
-
5 pointsI can’t believe we are knocking on months from driver’s training for my youngest! August (July 29 actually) will mark eligibility for taking classes and getting behind the wheel. My kids have grown up driving, getting dirty, failing and excelling. No surprise there, with their father learning to wrench on Christmas toys long before they were played with, and their mother following in the footsteps of their grandfather, Adam Petty’s ASA teammate and 1994 ASA Rookie of the Year recipient. This 1992 Chevy Short Box C1500 toted Mrs. P’s Hobby Stock circle track dirt car to every race she could afford to get to, when she wasn’t penciled in for a swim meet in high school. It was a 4.3L Automatic bare bones 2wd work truck, no A/C, no power windows, just a good ole’ first set of wheels. It was passed back to her dad, and long before I was involved with this side of my family, it’s been sitting victim of high miles, hard work, and a ventilated V6 block. When we were dating, I pulled a donor engine from a junk yard and wheelbarrow toted that hefty thing about 300 yards to the register. @Lil’ Pullstart’s Great, Great Uncle Steve is a well known hot rodder in the area. He took the engine down to his shop, had it bored .030” over, rebuilt it with all new pistons, cam, timing set, bearings, valve, the whole ball of wax. It’s been on a stand waiting for this project for over 15 years, maybe 17 or so if I can count and recall dates correctly. About a year or two ago, we were camping at Grandpa’s house and Rylee started having a conversation with him about buying the truck back. It has been pushed from the yard, to the barn, filled with stuff, pushed out, pushed around, leaned on a time or two, etc. They settled on $300 as is, with the engine. I picked the engine up about a year ago. Her truck has been loaded on Grandpa’s ramp truck with a dead battery and flat on the bottom tires for even longer. Last weekend, we went over, popped some 5 on 5” wheels and tires from a race car on the back, pushed it off the ramp truck and tugged it home. I have a 5 speed manual swap to go into it, thanks to a local CL ad for the transmission and Tony Angelo from Motor Trend’s Hot Rod Garage and now his own show Stay Tuned. Since anything in the engine bay that is plastic or rubber has been cooking in the sun for a few years with no hood, I am thinking a lot of electronics will go away in favor of a nice carburetor, and an HEI ignition. I have a 2000 K3500 (5.7L 4x4) parts truck for the things like grille and headlights, washer and coolant tanks, any interior parts needed, I found a clean front bumper in my stash, and some things will be needed like good tires, brakes, etc, and we will search for those. There are more parts still at Grandpa’s like the hood, motor mounts, radiator, etc, but it’s nice the truck is home.
-
5 pointsJust offer a free ride to the official??? How could anyone turn that down?
-
4 points
-
4 pointsGrowing up on a dairy farm I have lots of memories of climbing that ladder (covered on the inside) and using the silage fork to unload the needed corn silage for the days feeding. There were "doors / hatches" located at each stage that would be removed as the silage level was reduced. Been there done that.... There was always the occasional tragedy in the neighborhood when someone, often a youngster, would go up into the silo unannounced before it was safe. The result was a death from the gasses. The canary in the coal mine.... Also, there was the standing joke about the farmer who died in his round barn.... he couldn't find a corner...to take a dump in....
-
4 pointsBest to pop the shifter out and fill through there
-
4 pointsMaybe you could add a red removable skirt like a parade float has?😂😂
-
4 pointsBig Betty Baloo is my show buggy. This pic is shortly after I adopted her and got her running.
-
4 pointsI’m going to build another one like the one that I made for the 416-8.
-
3 pointsJust make sure the cupholders are already occupied by a couple of cold recreational beverages!
-
3 pointsThe BBT is quite fond of the idea of silos as homes.
-
3 pointsWhatcha think, show up with it and plead my case?
-
3 points1.5 qts. 80w90 gear oil or a weight thereabouts. 3 and 4 speeds all use 1.5 qts while 6 and 8 speeds call for 2 qts.
-
3 pointsI don't see a problem. They can be a bit fussy over there and I understand for good reason. If your hitched up to a wheel horse I figure your good to go. Just an accessory then.
-
3 pointsNice!!! 10 minutes with a brush and voila... it's red (or black)... Sort of a show buggy...
-
2 pointsLast year I replaced both #21 and #32 as part of my work to add dual front remotes to a 520 chassis. #21 (which runs from the pump to the control valve) is the only line that will see any significant pressure; #32 runs to the filter and transaxle “tank”. @JoeM is on the money with doing replacements. Metal is better and there isn’t a lot of room anywhere! I used the new alloy brake line which is very easy to form, uses a regular tubing flare tool and won’t rust. Per its specs, working max pressure is 900psi, well under the 700. JIC connectors worked fine. I was a bit leery of tightening the connections, so I ran it and tightened until it stopped leaking and then gave it another 1/8th of a turn. Some advice I followed from an “old hand” at hydraulics was to make sure there are no rubbing edges against the tubing and to support it every 10-12 inches to prevent vibration that can weaken/break a connection. You have flaring experience so a quick practice will get you dialed in on how much you need to extend beyond the tool to get the right length of flare. Good luck!
-
2 pointsSlowly but surely. I built up the front axle and tried it in place on the chassis. All lines up OK and I'm happy so far. Obviously the detail is not as fine as it could be but the kit is made to a good standard and is operational, not just a static model. The shock absorbers are held on by a 2.5mm bolt and there was some play which I wasn't happy with. Quick bit of lathe work and brass spacers were made to take up the gap between mounting and shocker eye. I just forget about everything else when I'm in the build space, so relaxing.
-
2 pointsBefore worrying about a "blown engine" do a step by step check of spark and fuel. I would start with making sure you have a good spark at the spark plug. You can lay the plug on the head and turn the engine over to see if there is spark. If not replace the plug and if still no spark check the points. May need to replace points and condenser. Once you determine you have spark start working through the fuel supply. Is the gas cap venting air ok? you can pull the gas line off the carb coming from the fuel pump. Is it pumping fuel from the pump when you turn the engine over? If not you may have a plugged gas cap, plugged fuel filter or a bad fuel pump (would need a rebuild or replace). If you have spark and fuel to the carb then I would assume its something plugging the carb and would need a good cleaning. That is just my but I am sure others here will chime in on suggestions. Best of luck!
-
2 pointsplus the cherries are ripe too. I like to stop at the place below there and pick up some to take home. As good as you can get
-
2 points@clueless personally like a ATF FLUID , refill and some road driving / shifting , for a trans clean up / out . use every gear , range , also lubricate related CLUTCH LINKAGE , for easier movement . use a razor blade to cut off old boot , like to lightly grease the INSIDE of new shift boot , at trans contact area , improves slide , and add a TYE WRAP , ABOVE THE BOOT , on the metal rod . so it can / will move with ease , reduce cracking / tearing . after some miles on that atf flush , drop that , and refill 89-90, like lucas CLIMBING GEAR OIL , it works better , pete
-
2 pointsInteresting... Understand the Club's dilemma - unless it's truly NOS there are only a handful of 100% 's out there... Wouldn't want to be the "Judge" at the entrance gate...
-
2 pointsI knew, I just didn’t say anything 😜
-
2 pointsJust slap some WH decals on it. Good to go. I drove around the show one year with an Allis Chalmers mid grader blade painted red on a 704. The only guy who knew was Wild Bill!
-
2 pointsLike the others have said replacing the line with hydraulic hose is and option but on some machines there is just not enough room. The tubing is much cleaner. That line doesn't have super high pressure. It runs at 700 lbs and can be spliced with a compression fitting for steel tubing. if need be or just replacing one end. A new line can be made. Just like the brake lines but just a tad different. If you want to change the entire line you can get new steel tubing and form it. I have found changing the fitting over to JIC and using steel tubing is good way to go. I have these style tubes on my front end loader works good there too. I have used JIC 37 degree fittings and flared the tube ends To convert the line to JIC tube or for that matter hose. You will have to change the fittings 33, and 19 to JIC to O-ring the fittings are in the block and hydro are O-ring boss so you will need one 90 and on straight I believe (going from memory here) the oring in the main lines is a #6 but please double check. The 90 Degree Elbow 6801-06-06 The straight part number is 6400-6-6 McMaster Carr sells the tubing and the ends. The ends will need a single flare sliding on the nut on the tube and then the sleeve and single flare the end. this will allow it to connect to the JIC fitting. 50695K218 is the MMC number for the sleeve. and 50695K226 is the MMC nuber for the nut this is the tubing I used.
-
2 pointsCheck out the vendors on this site... i've had very good experiences... https://www.wheelhorseforum.com/forum/92-vendors/
-
2 pointsI finished putting the rear end back together on the 518-h. Took it for the first drive and it runs and drives amazing! Next up is a beefy rear hitch.
-
2 points@ebinmaine
-
2 pointsMe n BBT spent some time cleaning clearing up and organizing oit behind the backyard today.
-
1 pointthey were from the racecar junk yard to roll it home
-
1 pointCut the line where accessible. Make a new piece from the proper size brake line. Flare the end. You can use a compression connector or if you want to get fancy, flare the cut ends and use a flare connector.
-
1 pointSo why is the duct tape on the oil filter? Insulation for the spark plug wire? nice looking tractor
-
1 pointA belated happy b-day to you from here in my corner of middle PA, too. Keep racking them up!
-
1 pointAerodynamics has sort of forced them to cut off all the identifying shapes. About the only thing they can play with anymore is the grille. And then there's Elon ...
-
1 pointRoths Garden Tractor Immediately after World War Two there was a strong demand for motorized lawn and garden equipment and Herbert Roths was eager to meet the need. Roths Industries began manufacturing two wheeled walk-behind garden tractors in 1945 known as the Garden King. Roths Industries first patent was for the design of an ornamental tractor. (An ornamental design patent only protects the design of a manufactured object, unlike a utility patent which protects the function and operation of an item.) This patent was awarded on June 17, 1947. Their second patent awarded on February 21, 1950 for a garden tractor design which would later become the Roths Garden King walking tractor which went into production in 1945. The drivetrain known as Steeromatic Control transferred power from a gear reduction gasoline engine to a worm gear drive with Forward/Reverse, Ratchet type differential to a chain drive to each drive wheel. Roths Model-G and BesRo utilized transmissions and other parts from the Garden King. The BesRo W riding tractor was basically a Garden King Model G walk-behind tractor with the handlebars replaced by a steerable sulky added to the rear. A four wheel BesRo R riding model with the operator forward of the engine was also offered. Roths went into the four-wheel riding garden tractor business in 1958 with two models, the “Country Boy” and the “Little Jef.” No production records are available but it is believed that production ended in 1960 According to the sales flyer below the Roth Country Boy and its baby brother the Little Jeff, both have “STEEROMATIC CONTROL” which means attachments move exactly as you want them to – with no wide arcs – no removal of plants in cultivating. Complete control over rear working tools at all times! Roth had an optional lift system referred to as “PARALLELING REAR TOOL LIFT” that was similar to a three-point lift. They also boasted that the Country Boy and Little Jeff were engineered as close to the ground as it’s feasible for a tractor to get which gives you the greatest possible security. Won’t tip under load since exclusive construction places pulling load ahead of rear axle instead of behind. Keeps front end firmly on ground.
-
1 pointlike it... an the idea behind. can be driven with just a single V8 engine to save fuel and with a second added to have pure Fun. That‘s definitely cool 😎
-
1 pointI will usually clean the cover really well, and apply the right stuff to the block, and put the gasket down, then put the cover on..this should allow future removals without ripping the gasket, the block side is more apt to have porosity or imperfections.
-
1 pointNot quite ready to mow lawn here yet but almost ready to get the garden opened up and put some taters in the ground. I figured since it was a warm rainy day I would pull the snow blower off and put the new to me tiller on and check everything over before it really is time. Now I just have to wash all the barn dust off the 520 lol
-
1 pointSounds like you are doing it right. Two turns on the crank would get you right back to where you started, one turn like you did is perfect. I hope you downloaded the Onan Service Manual the torque specs are in there. Don't be afraid to pop the top off the carburetor, often the gasket can be reused. With the top off you can flush out any debris collected in there. It is possible to dislodge some debris from doing your work and there is nothing like pulling it all back apart after you had it running. The flat intake was likely designed to keep engine height to a minimum. If you test the intake for leaks and it has none, I wouldn't split it. I finish all flat surfaces with a 8" good quality mill file kept flat on the part, of course one needs to be very careful to not do damage with it. A rotary tool is something that I would not use. I use Rustoleum High Heat spray paint on the exhaust, I find it better that some expensive header paint. Of course the ceramic coating you propose should be better, but I find that the Rustoleum is good enough, YMMV. I use Dupli-Color Engine Paint with Ceramic Semi-Gloss DE1635 for all of the engine tins. That little air filter sensor often fails because of the nipple breaking off from the heavy factory vacuum hose, find a thin, lightweight and flexible hose to protect it.
-
1 pointIf I haven’t already, It looks like you’re on the right track to getting a good runner! Do you have a large enough flat surface to give that head a good hone? Many people use thick glass and a sheet of sandpaper, I have a machined aluminum plate that works well.
-
1 pointLooks good from my house. I don't have bore gauges so we "measure" by the @Pullstart "eyecrometer" Being an old kohler iron engine it'll be very forgiving. As long as the piston looks fairly tight in the bore we'll run em.


.thumb.jpeg.8bdd6995142db7fbcf4df2d7b452df33.jpeg)


This leaderboard is set to New York/GMT-04:00