
Leaderboard


Popular Content
Showing content with the highest reputation on 02/16/2024 in Posts
-
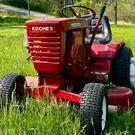
13 pointsSometimes I swear the smallest things make such a huge difference. My PTO lever was loose as hell, flopped around, and make a metal on metal squeal rubbing on the side panel. I hate that squeal noise because it just tells you something is NOT mechanically correct. Looking on the Toro parts site I saw there was supposed to be a spring attached from the lever to a bracket which mine didn’t have, so went ahead and bought that and the stupid nyliners (why the hell they’re not something better like brass bushings I don’t know). Spent an hour putting them in tonight and…wow. Man, the PTO is so solid now it makes it feel like a firm, serious tractor again! Not even a peep. Plus I did the nyliners for the hood hinge while I was at it and absolutely no more squeals there either. I know, this is small potatoes and doesn’t come anywhere close to the restorations and improvements some of you guys make but this just made my night.
-
13 pointsSoil erosion control is nothing new. In response to the extreme soil drifting in Western Canada, Charles Noble develops a system to shear stubble and weeds below the ground and leave the residue on top of the soil to reduce evaporation and prevent erosion. Patented in 1937, more than 10,000 will be used around the globe by 1979 Amid the Great Depression and the Dust Bowl, soil health and regenerative agriculture practices were not commonplace. Soil drifted in "black blizzards," massive clouds of airborne soil that could travel hundreds of miles. Strip farming and planting crops in alternating strips were how farmers combated erosion at the time. But strips could eventually become useless, depending on the direction of the wind. Farmers also used tillage to control weeds at the time, contributing to soil disturbance. Since the dry year of 1919, Noble had been interested in soil erosion. In an effort to get Noble away from some of the troubles of the Great Depression, his friends and family convinced him to take a trip to California. It was there that he saw a beet farmer using a straight-blade tool to cut into the soil and loosen the beets. The blade got to the weeds without interrupting the crops and soil. Noble ended up returning from California early with the idea for the first Noble blade. The Noble Blade was an underground 8-foot-wide straight blade with two vertical standards designed to leave trash above ground while cutting weeds at the roots to terminate them. A decent blacksmith, Noble used an old grader blade with a borrowed forger and anvil. He reshaped the blade and fixed it with two stout arms and a frame. He gave it 2 wheels and a means of depth control. The initial design wasn't perfect, but it was functional.
-
7 pointsI like potatoes. Big or small. It's the little things that often make the most difference. Nice work.
-
6 pointsGentlemen, Today I replaced the motion control linkage seal and changed the transmission fluid on the ‘68 Charger 12. No more leak!
-
5 pointsLooks like I have another quick project. My wife was offered this today for $100. The shifter cable popped off the linkage on the transmission. I sip tied the cable towards the front driveshaft, holding it onto the shifter linkage today and drove it home in about 6 minutes from point of sale. 2002 Olds Bravada, Vortec 4200 in-line 6, all wheel drive.
-
4 pointsI drilled out the holes to 5/8" sawed one bushing half in two.. It's been 11 or 12 years still working great. Also did the clutch shaft the sane way that is the reason I was doing that as the clutch was worn bad.
-
4 pointsGood luck don -- sounds like awesome C175 project idea -- if anything like your results of your beautiful restored Workhorse I am sure the 175 project will be special -- I'm wondering if you plan to start a GOFUND ME page to buy the brochure guys jacket and shoes? I was able to acquire a couple C175s a few years ago -- an 83 Series 1, and a 84 Series 2, -- both apparently their original black hoods, plus the raised plastic seat pan fenders -- I have done some rehab on the 84 Series 2, but not much on the 83 Series 1 - both are in use -- that twins certainly have a great sound. Hoping to keep both running and in good condition - Bill
-
4 pointsI am planning a full blown resto. She's not in good enough shape to keep original and I haven't painted one in a long time. It'll feel good to get the spray gun out again! If ya got what I need you know I'll be out shoot me a pm with some pics! You know I can pick up in April lol That should give me enough time to get everything prepped, painted and back together by the big show.
-
3 pointsRear bolt pattern is 5 x 4.5. Lots of trailer wheels are made that size. To find a used set you could place an ad in our classified section. Or Contact one of our vendors like @76c12091520h Brian Or A to Z in PA.
-
3 pointsWent fine on 3 so far, i really need to get a plug and crimper, the ratcheting crimper i have is good enough but not ideal. I put dielectric grease in the boots and so far all 3 are starting easier,the 416 will usually kick back once but it didn't.
-
3 pointsYou can try to file the flats on the shaft until they are flat once again. The gear is hardened so it likely is OK but you would have trouble filing that anyways. If you have a really good straight edge, you can check the shaft flats to be sure they are totally flat with no high spot in the middle. If the straight edge rocks on the flat then you can file carefully until the straight edge sits nice and even. Now the shim stock should fit better when you reassemble. Shim until the gear has as little rotational play as possible but it still needs to be able to slide on the shaft. Be sure to shim the same amount on both flats to keep the gear centered on the shaft. You will likely not get it perfect and it may not have been perfect when it left the factory but you can make it better.
-
3 points
-
2 pointsPTO clutch disk. Needs lining. Good for a spare if you plan on doing yours in the future. 2 blower chute retainers. Used but functional.
-
2 pointsSo I have fought this confounded hood for about 3 days now. Still got some dimples in the "brow" up front to fix, but at least it's primed now. All the big dents are banged out. The PO had put something like polyurethane on it with a brush. Problem was he left it in the rain for a while, and it had thousands of little rust filled blisters all over it. I've used paint stripper 4 times and scraped it off each time. Burned out my grinder and wire brush on it, because the stuff just balled up when sanded or brushed. After today's "strip and scrub" session, I got down to factory paint. Easy from there... So I gave her a test fit. Paint tomorrow....
-
2 pointsI'm in process of sealing the tank, already got coat, second coat tomorrow. Then I'll get it together good enough to run it and see how it runs and how the transmission works. I got several 8hp kohlers around so I'm not real worried about the engine. I have a set of 3 bolt hubs sitting around somewhere, just gotta locate them. After I get that tested, I'm gonna strip the whole thing down. Blow the trans apart, the whole 9 yards.
-
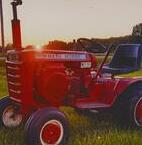
2 pointsUpdate: I dragged my C-175 out of the backyard and into my shop today. This tractor hasn’t ran in years. Purchased a new battery, filed the points, cut the fuel line so it wouldn’t suck up crappy fuel and sprayed some gas down the carburetor. Vroom! It started right up! Then I drained and cleaned the tank, replaced the fuel line and added a filter. Next I topped off the transmission, then drove it around. I have to say that I was one happy camper. The transmission is nice and tight and the hydraulic lift works fine too. I’m not sure but this may be on its way to a full blown restoration? Also more good news, @Sparky I found the jacket for the picture!
-
2 pointsNever saw a "white hood" before. I like it, really makes the stickers pop!
-
2 pointsThe 854 came with 6.00x12 tires on the rear and 4.00x8 on the front. 854 front and rear are both narrower than what you have, though with similar overall diameter. I believe what you have is stock sizes. The rear hub bolt pattern @ebinmaine cites will be the same for the narrower wheel. The front spindle diameter will be the same (¾”) for the narrower wheel though the hub width might be different so you may need a spacer on the tractor side if you mount the 854-style wheel.
-
2 pointsAllis Chalmers Cream.
-
2 points- Negative terminal on coil (to points) will (should ) flash while cranking. If positive terminal flashes at all there is a problem with the power feed from ignition switch.
-
2 pointsMost drugs have many side effects that vary individually. Always check on them even if a Doctor recommends. I was giving med once with side effect of possible Stroke! I passed and dealt with it without.
-
2 pointsHere is the difference between plain Rust-Oleum white (left) and Rust-Oleum Navajo white (right)
-
2 pointsLooking great!! Excellent progress.
-
2 pointsPiston rings will rotate some unless they are pinned as in the case with many 2 stroke engines. Break in or where in needs to occur in order for the rings to seat properly. Once you remove the rings from the cylinder they will never seat properly again and you will have an oil burner that has a compression loss. Then of course there is the recommendations from page 11.9 in the Kohler manual.
-
2 pointsReally ... after I posted on FB i may have what you need I got no fewer than three PMs from dudes looking for a square pan! Do I look like a square pan wholesaler?!?!? I don't give it up to just anybody ya know!
-
2 pointsLooks alot better than this.... musta came off a Cub.... Just to see if I had spark ya know....
-
2 pointsA working tractor is a happy tractor. Some of the ugliest machines I've owned were some of my favorites. You just can't beat a worker!
-
2 pointsAnd less soil displacement due to wind and water erosion.
-
2 pointsWho owns who... TTI and Stanley have it pretty well locked up
-
2 pointsGiven the degree of damage and assuming that you are working your machine vary hard, I’d go straight to the clamp-on style of hub from A-to-Z. The setscrews in the hub are mainly to prevent it from moving side to side on the axle, not to prevent rotation. Axles and hubs that do not mate tightly and evenly on the shaft and the key without any play whatsover will gradually fail.
-
2 pointsNo-till is the only way to go. Better for the soil, less fuel used, less time, get seeds in the ground earlier due to organic layer decomposing above the soil.
-
2 pointsI didn't check the latch on the seat pan: Rich I did that once also. The ones who saw that got a good laugh.
-
2 pointsI first though the PTO spring on this c141 was to take play out of the linkage and it does; but I think it is more to with the PTO brake. When off, it puts outward pressure on the bell hoop and applies the brake harder. A novel idea but could have been a little better designed. Although I am pretty sure the PTO brake being so small is only there to keep the bell from turning when not in use.
-
2 pointsThat was interesting watching the plowing video. I know it was a demonstration but I wouldn't want to be the one trying to bust up the the clods that the muddy field will turn into. I remember when dad went to no till. Mom didn't like it, They had his and her tractors and mom had as many hours tilling as dad. She called not till "trash farming". She liked to see corn stocks plowed under.
-
2 points867 is really coming along!
-
1 pointIve got 3 onans, 2 Kohler Ks, and ive never liked the selection of plug wires, ive been using V-Twin kits and shortening them down but most options i find are 'supressor' cored. I found this company called Tons Performance, they sell old style copper cored, cotton wrapped, with a scuff cover, and a variety of colors, patterns, boots and connectors. I got enough to do 5 tractors (8 wires) 12ft of wire, for $53 with shipping, and a few extra boots and ends. Cant wait to get it all made and installed.
-
1 pointThe question about opinions regarding routers in another post prompted me to write this one, since not only I have used them extensively in my career but I have many times been asked why I own so many and why my choices. In my line of work aside from drills they were the most used power tool. From laminate trimming , rabbeting, molding, chamfering , lock mortising, etc, etc, they are indispensable for their speed ,versatility and general utility. They were used daily many times entire consecutive days on end. Because of such an extensive usage it became evident what models and types were not only the most reliable but also comfortable and above all safe since i did things with them that most people never have the need for. They were even used to undercut doors ,thing most unheard or snubbed on by some , but when you are dealing with a $10,000.00 custom made door with exotic veneers , a circular saw is the last thing you want to put on it for reasons that can be explained. Wearing them out, damage from dropping, and the fact that many times several individuals would use them and not be so kind to them were all also facts in deciding what was best. As far as price it quickly became evident as it always is that one gets what one pays for, so it was the least important factor since money saved on a tool is many times money lost on a job due to break down or difficulty in use or and setup. The ones I own now are vintage since they have proved themselves just in the fact that they are still here and as good as the day they were bought so there is no need to buy a new one with the latest frills which many times amount to nothing. I have used them and quite honestly with one or two exceptions I am not impressed. There seems to be a necessity to reinvent the wheel or dazzle with features that quite honestly may be impressive looking at , reading about but when it comes down to actual real use mean nothing. Almost like a Wheelhorse compared to new big box store models. The important things to me in a router are the following in the order they are stated. 1- Safety. Where is switch located and how fast can one get to it? Do I need to take my hand off handles to shut it off or start it? Does switch location change with adjustments? 2- Comfort. How comfortable is unit to use? Is it well balanced? Is it top heavy? Does it vibrate excessively? Can it be used comfortably for an entire day? 3- Adjustability. Do they hold hour after hour of usage. Can adjustments be locked in by hand alone ? Can it be adjusted safely while running without taking one’s hands entirety off handles? If so are adjustments smooth and predictable or are they jerky or stiff? 4- Durability. How well built is it? How durable is base? Will an occasional drop be catastrophic to the base and therefore to routers accuracy? Are adjustments precariously exposed prone to damage? 5- Flexibility and accessories. How available are accessories such as special guides, template guides, collets, etc. Are they proprietary or universal? Do most molding bits fit in base or base needs to be modified? I own quite a few routers since they are dedicated to specific functions or cutters, but will list only a few since they are always Makitas, Dewalts ,Porter Cable or Rockwells. I will stick to full size routers and not trimmers I’ll start with my favorite ones and their qualities. Plunge routers are my favorites. They are the most versatile and if a good one the most accurate. Makita 3612 BR. Japan made.In use since 1986 This router embodies everything I have mentioned above. Perfectly placed and oriented handles and everything in reach of right hand. Switch conveniently and safely located next to your index finger. Can be switched on and off without removing hand from handle. lock also conveniently located again adjustable while holding handle. Adjustments are easy and smooth. More so while router is running. Preset depth stops also able to be operated without releasing handle Router is perfectly balanced regardless of adjustment. Handles are placed at router’s center of gravity making for steady totally controlled use. Large guide with micro adjustments , sturdy well placed posts. Just about any cutter fits through base Unique template guide system easy to install and remove which will stay securely attached unlike most others perfectly concentric with base and shaft. Lockable shaft and high quality wrench 2-1/4” plunge capable as per manafacturer plunge capability actually able to be stretched safely to 2-7/8” allowing longest available cutters to be used Base is perfectly concentric to cutter which is not so with many. Newer models also have a flat spot to be used with a guide. Phenolic bottom perfectly aligned with base. Makita 3612 BR also made in Japan in use since 1992 This router has always been adapted to my router table. It is absolutely incredible the hard use that this machine has had. It is always used with large cutter’s sometimes entire days on end . Same bearings and brushes . A testament to its quality. Besides removing handles i adapted a height adjustment from an older model to make it convenient under table. It is easily adjustable just with finger tips as shown. Type of cutters this router has lived with all of its life. US made Dewalt type 1 of this model.Had it probably 25 years. Good solid reliable fixed base router. Sturdy construction and comfortable. A little top heavy but better than most of this type. Another favorite Good adjustment system keeps motor in same orientation and keeps switch in same place next to right hand.precise adjustments which stay put. Bottom of bases on this type of router are terrible. Cutter hole always too small and phenolic base rarely concentric to cast case and therefore cutter. Clear plexiglass bases remedy that and allow greater visibility. I have several separate bases for these models dedicated with different template guides Dewalts and Porte Cable use a standard template guide. Great availability and size choice but problematic due to low quality bases which are also inconsistent in thickness. They are difficult to install or remove quickly sometimes requiring using channel lock and getting loose while usage from vibration. Holes for them in bases are also always oversized allowing guide to favor one side or other reducing accuracy important such as when routing inlays . Bases on these routers are notoriously fragile as evidenced in the router cemetery here. The good is the different size availability Old Rockwell also probably over 30 years here. A work horse dedicated to precise edge trimming or cleaning of MDF or composite materials using it with a dedicated fence. Well built but not a good design which I will get into on next one. The best thing about it is the handle providing great control specially how it is used. I made rectangular base for stability and accuracy to be used with dedicated fence. Last but important for all the bad things present still today in many. Old Porter Cable probably here for 20plus years. Good motor but very bad design. Extremely top heavy. Very hard to control and use. if used with intended fence ,posts are too close together making fence unstable and flexible. Fence posts are also too thin for routers weight. Plastic top unforgiving to the slightest drop. Motor twists on base to adjust height. Typical of this brand . Effect is that places switch always either on wrong side or away from right hand. Not an easy router to control with one hand. Same feature makes adjustment erratic and unable to achieve any type of precision. Rotating motor also creates more lack of precision in base already not concentric with cutter. Totally unpredictable. Not good for precision work. Tightening system although rugged looking does not lock or hold well needing a tool so one is sure that motor will not come loose. Never use a router of this design in overhead operation . Outright dangerous.
-
1 point@WHX?? Let me mess with my frame and see how nice i can make it. I need to check underneath and see if its cracked at the trans or not. If i dont like it I'll take that early frame.
-
1 pointI was thinking of welding it up before I saw how bad it was! It's going in the trash.
-
1 pointYes but saveable... what did you expect for a Frankie. Good thing the tractors I score for ya are fairly complete... It just make me wonder... what on earth could a PO been thinking when he drilled that hole above the fine fine wire job?!?!
-
1 pointGood eye, that's an original MAYPOP tire from the 80's. An obscure little company that went out of business shortly thereafter...
-
1 pointI agree 100% on the manfacturer supporting their product which is why I mentioned Ridgid. In 2011 I purchased one of their 18v drills. The kit had two batteries and I purchased one more. I registered everything for the warranty. About a year ago, after 11 years of hard use, the switch was getting funky. I thought about just buying a switch but I decided to send them an email about it. I also mentioned that the batteries were starting to run down quicker than they used to. They replied back stating that they had three new batteries on their way and to take the drill back to Home Depot. The batteries arrived in a couple days and when I took the drill to HD I handed it to the customer service gal along with the email from Ridgid. I ended walking out of there with a complete kit, drill, another battery, charger and case.
-
1 pointThe 2 stage is a keeper, for sure.
-
1 pointEther can destroy your engine, use gas sprayed in or i have used wd 40 on my small engines.
-
1 pointThanks for the tip Red. They even have the old skool primary wire for that custom job. I'm kinda heavy on wiring supplies for now but next time. https://tonsperformance.com/
-
1 pointThank you sir. That is what I was shooting for. I won't use it for very heavy loads, but at least it's at a better height with these small wheels.
-
1 pointI said previously that this build had very little fabrication, but I guess I just can never leave well enough alone... I fabbed a heavier hitch for this little guy, and modded the toolbox so it would pass through the back. With the hitch on top, I didn't want it to stick out any further than needed. It's not as heavy as one that mounts on the axle, but at least it's more than 6 inches off the ground. The seat spring sits on top of the hitch. I also got the right side tunnel cover painted, and one fender. The other side is still in progress. Since these fenders came from a Suburban, they were too high for these wheels. So I lowered them so the sit closer to the tires. I had previously built added supports to use hydraulic lift on this, but abandoned that idea. It would work, but I didn't like the setup. Regardless, the supports are 1/4 plate and use pivots from a D series. They bolt in the same holes as the tunnel sides. The bellcrank is 1 inch, and has a removable tab to connect to a cylinder. I'll make a manual arm to fit it later. Or I'll figure something else out. Also started putting the engine back together...
-
1 pointIt's your machine to do with as you wish, so take this with a grain of salt... If you're going for accuracy that the WH police can't gripe about, then almond is closer to correct for anything prior to the early 70s, with a lighter "linen" color used afterwards- particularly after 73. I don't have any C-series machines, so it's pretty much all I use on the older tractors. The pic below is Rust-Oleum Almond. My Bronco is close to the same tractor as a C-series, so the last pic is for reference.
-
1 point
-
1 pointIt’s beginning to look like a runner!


This leaderboard is set to New York/GMT-04:00